Are you tired of the same old morning routine? Ready to elevate your breakfast game with something truly special? Look no further! Today, we’re diving into the delightful world of homemade Pancakes, a dish that promises to transform your weekend mornings (or any morning, really!) from mundane to magnificent. Preparing these fluffy disks of joy at home isn’t just about saving money; it’s about crafting a personalized culinary experience, ensuring freshness, and customizing every bite to your exact preferences. Imagine the aroma filling your kitchen—a scent that store-bought mixes simply can’t replicate. This comprehensive guide will walk you through creating the perfect stack, guaranteeing a delicious and wholesome start to your day.
Ingredients & Kitchen Tools
Crafting the perfect batch of Pancakes requires a few essential ingredients and tools. Quality ingredients are key to a sublime breakfast experience.
- All-purpose flour (1 ½ cups): The base of our fluffy creations. You can substitute with a 1:1 gluten-free baking flour blend for a dietary alternative.
- Granulated sugar (2 tbsp): Adds a touch of sweetness and helps with browning. Adjust to your taste.
- Baking powder (1 tbsp): The secret to light and airy pancakes. Do not confuse with baking soda!
- Baking soda (½ tsp): Reacts with the buttermilk for extra lift and tenderness.
- Salt (½ tsp): Enhances all the other flavors.
- Large egg (1): Binds the ingredients and adds richness.
- Buttermilk (1 ¼ cups): Provides tanginess and reacts with baking soda for ultimate fluffiness. If you don’t have buttermilk, you can make your own by adding 1 tablespoon of white vinegar or lemon juice to regular milk and letting it sit for 5 minutes.
- Melted unsalted butter (3 tbsp): Adds flavor and moisture. Vegetable oil can be used as a substitute, but butter offers superior taste.
- Vanilla extract (1 tsp): Elevates the aroma and flavor profile.
- Non-stick cooking spray or additional butter/oil: For greasing the griddle.
Kitchen Tools:
- Large mixing bowl: For combining dry ingredients.
- Medium mixing bowl: For whisking wet ingredients.
- Whisk: To ensure all ingredients are well combined and lump-free.
- Ladle or ¼-cup measuring cup: For portioning batter onto the griddle.
- Non-stick griddle or large frying pan: Essential for even cooking.
- Spatula: For flipping pancakes.
- Wire rack: To keep cooked pancakes warm and prevent sogginess.
Prep Time & Cooking Schedule
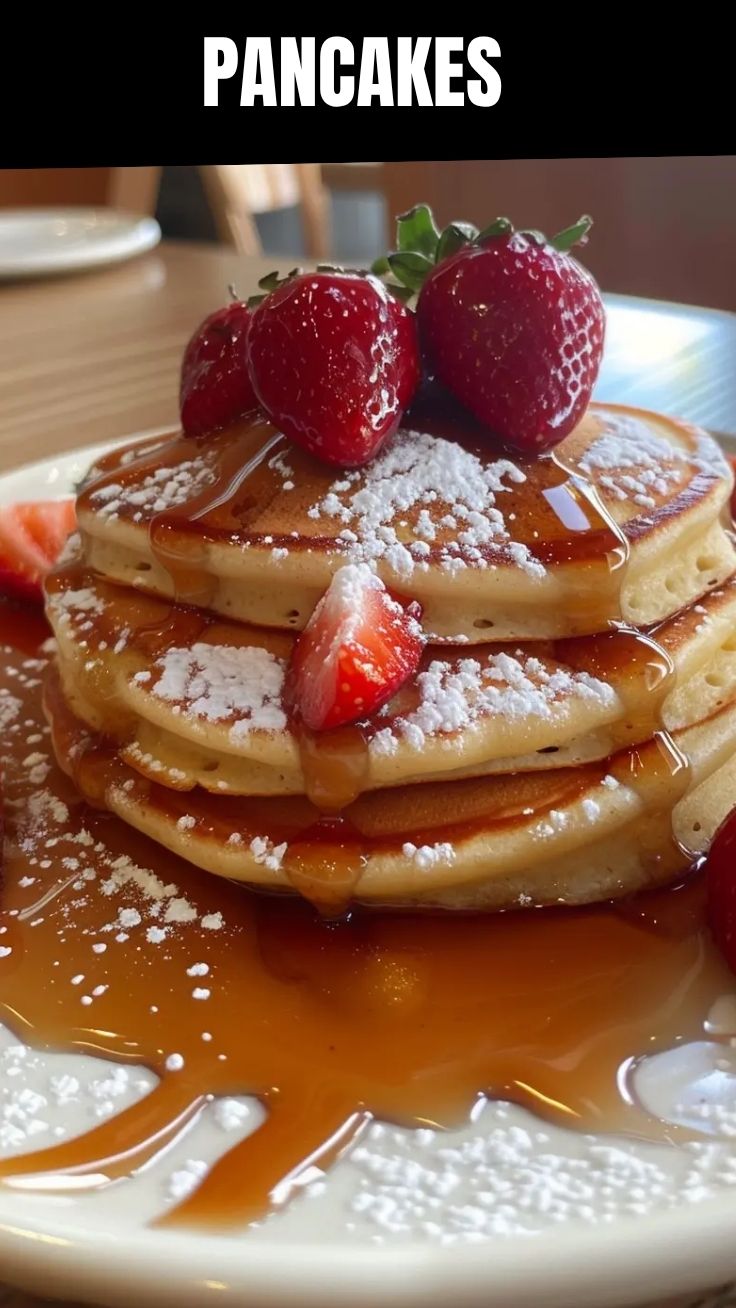
This recipe is designed for ease and efficiency, perfect for a relaxed breakfast.
- Prep Time: 10 minutes
- Cook Time: 2-3 minutes per batch (about 15-20 minutes total for 8-10 pancakes)
- Resting Time (optional): 5-10 minutes (for the batter)
Allowing the batter to rest briefly can lead to even fluffier pancakes as it gives the gluten a chance to relax and the leavening agents more time to activate. Plan to start your prep about 30 minutes before you want to serve, giving you ample time to mix and cook without feeling rushed.
Step-by-Step Instructions
Follow these steps for perfectly fluffy and flavorful Pancakes every time, making your breakfast truly exceptional.
1. Combine Dry Ingredients: In a large mixing bowl, whisk together the flour, sugar, baking powder, baking soda, and salt. Ensure there are no lumps for a smooth batter.
2. Combine Wet Ingredients: In a separate medium mixing bowl, whisk together the egg, buttermilk, melted butter, and vanilla extract until well combined.
3. Combine Wet and Dry: Pour the wet ingredients into the dry ingredients. Stir gently with a spoon or whisk until just combined. A few lumps are perfectly fine—overmixing develops gluten, leading to tough pancakes. The batter should be thick but pourable.
4. Heat the Griddle: Heat a non-stick griddle or large frying pan over medium-low heat. Grease it lightly with cooking spray or a pat of butter. The ideal temperature is crucial: if it’s too hot, the pancakes will burn before cooking through; too cool, and they won’t puff up or brown nicely. A good test is to sprinkle a few drops of water; they should sizzle and evaporate within a few seconds.
5. Cook the Pancakes: Ladle about ¼ cup of batter for each pancake onto the hot griddle. Cook for 2-3 minutes per side, or until golden brown and bubbles appear on the surface of the pancake (this is your cue to flip!). Flip gently with a spatula and cook for another 1-2 minutes until thoroughly cooked.
6. Keep Warm: Transfer cooked pancakes to a wire rack set over a baking sheet in a warm oven (around 200°F/90°C) to keep them warm while you cook the remaining batter.
Nutritional Benefits & Advantages
These homemade Pancakes offer more than just deliciousness. Using buttermilk provides calcium and probiotics, beneficial for gut health. By making them at home, you control the sugar content, avoiding excessive amounts found in pre-made mixes. Adding whole wheat flour (see variations) can significantly boost fiber content, aiding digestion and promoting satiety. Plus, serving them with fresh fruits transforms them into a vitamin-rich, antioxidant-packed breakfast, contributing to overall well-being.
Tips Variations & Cooking Advice
- Flavor Variations: Add ½ cup of fresh blueberries, chocolate chips, or finely diced banana to the batter for different flavors.
- Whole Wheat: Substitute up to half of the all-purpose flour with whole wheat flour for a nuttier flavor and increased fiber. You might need a tablespoon or two more buttermilk.
- Dairy-Free: Use a dairy-free milk alternative (like almond or soy milk, soured with vinegar) and a plant-based butter substitute.
- Gluten-Free: As mentioned, use a 1:1 gluten-free baking flour blend.
- Spice It Up: A pinch of cinnamon or nutmeg can add a wonderful warmth.
- Perfectly Round: For perfectly round pancakes, pour the batter into metal biscuit cutters placed on the griddle. Remove the cutters after the first side is cooked.
Common Mistakes to Avoid
- Overmixing the Batter: This is the cardinal sin of pancake making! Overmixing develops gluten, resulting in tough, chewy pancakes. Mix until just combined; a few lumps are okay.
- Too High Heat: High heat leads to burnt exteriors and raw interiors. Medium-low heat is your friend for even cooking and beautiful golden-brown results.
- Not Greasing Properly: Insufficiently greased griddles result in sticking and uneven browning.
- Flipping Too Soon/Late: Wait for bubbles to appear on the surface and the edges to look set before flipping. Flipping too early can cause them to tear; too late, and they may burn.
Storage & Meal Prep Tips
Leftover pancakes can be a delightful quick breakfast during the week.
- Refrigeration: Store cooled pancakes in an airtight container in the refrigerator for up to 3-4 days.
- Freezing: For longer storage, place cooled pancakes in a single layer on a baking sheet and freeze until solid. Then transfer them to a freezer-safe bag or container, separating layers with parchment paper. They will keep for up to 2 months.
- Reheating: Reheat in a toaster, microwave, or oven. A toaster oven works best for restoring a slightly crispy edge.
Conclusion
Mastering homemade Pancakes is a culinary triumph that everyone can achieve. This recipe not only promises fluffy, golden perfection but also offers a wholesome and customizable breakfast experience that far surpasses any store-bought alternative. With these detailed instructions and tips, you’re now equipped to create memorable mornings, full of delicious aromas and satisfied smiles. Go ahead, give it a try this weekend, and share your delightful results with us! What will be your favorite topping?
FAQs
Q1: Can I make the batter ahead of time?
A1: You can, but for the fluffiest results, it’s best to mix dry and wet ingredients just before cooking. If you must prepare ahead, mix dry ingredients and wet ingredients separately, then combine right before cooking.
Q2: My pancakes aren’t fluffy, what went wrong?
A2: Common culprits are overmixing the batter, using old baking powder/soda, or cooking on too high heat. Ensure your leavening agents are fresh and mix until just combined.
Q3: What are some good toppings for these pancakes?
A3: Classic maple syrup and butter, fresh berries, whipped cream, chocolate syrup, sliced bananas, nuts, or even a dollop of yogurt are all fantastic options.
Q4: How do I know if my griddle is the right temperature?
A4: Sprinkle a few drops of water onto the griddle. If they sizzle and evaporate within a few seconds, it’s ready. If they just sit there, it’s too cool; if they disappear instantly with significant smoke, it’s too hot.
Q5: Can I use regular milk instead of buttermilk?
A5: Yes, you can. Simply add 1 tablespoon of white vinegar or lemon juice to 1 ¼ cups of regular milk and let it sit for 5-10 minutes until it slightly curdles. This creates a homemade buttermilk substitute.