Master the Classic: Your Guide to a Flawless Homemade New York Cheesecake
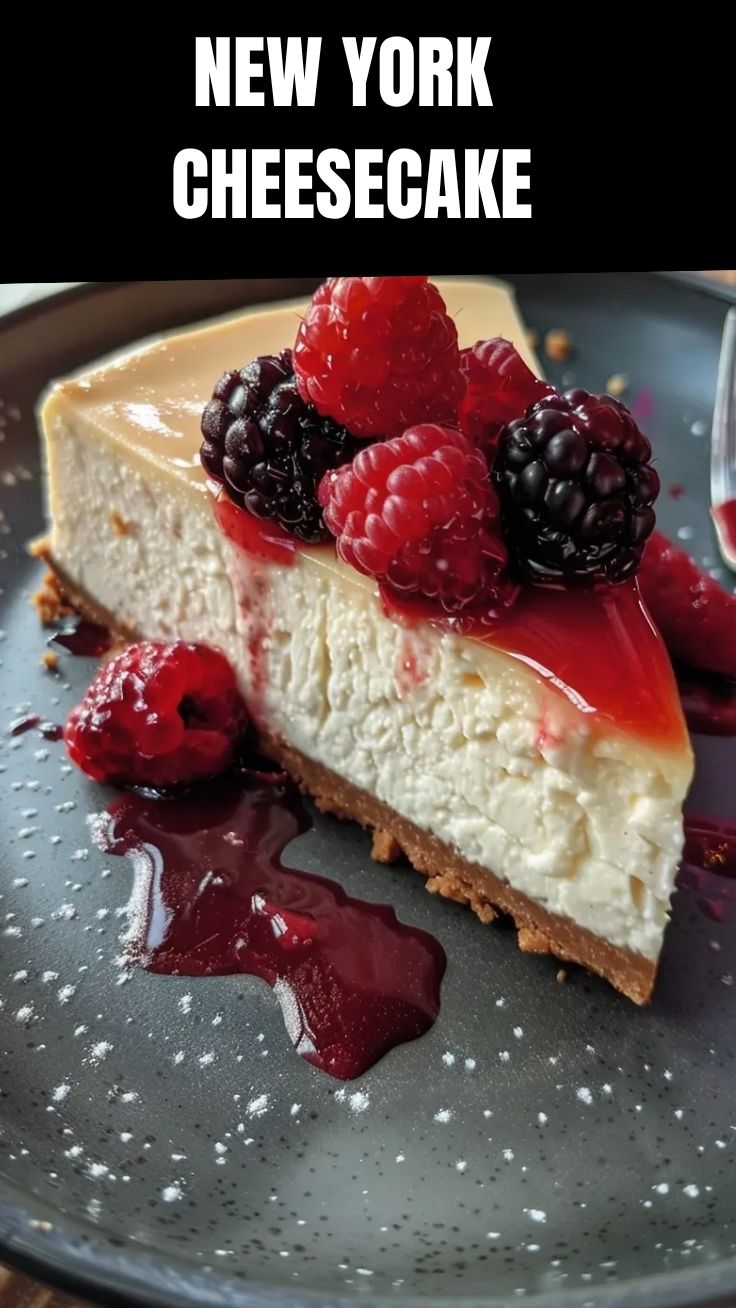
Ever wondered if you could recreate that iconic, velvety smooth slice of heaven right in your own kitchen? That rich, dense, yet ethereally creamy texture of an authentic New York Cheesecake isn’t just for fancy bakeries anymore. Preparing this classic at home is incredibly rewarding, offering unparalleled freshness and the satisfaction of customizing every detail to your liking. Forget store-bought facsimiles; we’re diving deep into the art of making a cheesecake that will impress even the most discerning palates. This comprehensive guide, packed with expert tips and detailed instructions, will empower you to bake perfect Cheesecake recipes from scratch, transforming ordinary moments into extraordinary dessert experiences.
Ingredients & Kitchen Tools
Crafting the perfect cheesecake starts with the right components. Here’s what you’ll need:
Ingredients:
- For the Crust:
* 1 ½ cups graham cracker crumbs (about 10-12 full graham crackers): Provides a sturdy, slightly sweet base.
* ¼ cup granulated sugar: Adds a touch of sweetness to the crust.
* 6 tablespoons unsalted butter, melted: Binds the crumbs together.
- For the Filling:
* 4 (8-ounce) packages cream cheese, full-fat, softened: Crucial for that signature rich, tangy flavor and creamy texture. Do not use low-fat; it affects consistency.
* 1 ½ cups granulated sugar: Sweetens the filling.
* 2 teaspoons vanilla extract: Enhances the overall flavor profile.
* ¼ cup all-purpose flour: Helps prevent cracking and provides structure.
* ¼ teaspoon salt: Balances the sweetness.
* 1 cup sour cream, full-fat: Adds moisture, tang, and contributes to the smooth texture.
* 4 large eggs: Binds the filling and adds richness.
- For the Topping (Optional):
* 1 cup sour cream
* 2 tablespoons granulated sugar
* 1 teaspoon vanilla extract
- Optional Substitutions: For a gluten-free crust, use gluten-free graham crackers or a nut-based crust (almond flour + butter). For a slightly less rich filling, you could use Neufchâtel cheese, but the texture will differ.
Kitchen Tools:
- 9-inch springform pan: Essential for easy removal of the cheesecake.
- Aluminum foil: For creating a watertight seal around the springform pan for a water bath.
- Large roasting pan: To hold the springform pan for the water bath.
- Electric mixer (stand or hand-held): For thoroughly creaming ingredients.
- Large mixing bowls: Several for different stages of preparation.
- Spatula: For scraping bowls and smoothing the top.
- Measuring cups and spoons: For accurate ingredient portions.
- Wire rack: For cooling the cheesecake.
- Parchment paper (optional): To line the bottom of the springform for easier removal.
Prep Time & Cooking Schedule
This recipe requires a bit of patience, but the waiting is well worth it!
- Prep Time: 25-30 minutes (active preparation)
- Baking Time: 60-75 minutes
- Cooling Time (Room Temp): 1-2 hours
- Chilling Time (Refrigerator): Minimum 6 hours, ideally overnight
Plan ahead! The chilling time is crucial for the cheesecake to set properly, ensuring that iconic dense and creamy texture. Starting a day before you plan to serve is highly recommended.
Step-by-Step Instructions
Follow these steps meticulously to achieve a bakery-quality New York Cheesecake. Pay close attention to ingredient temperatures and mixing techniques, which are key to avoiding cracks and achieving a smooth texture. These techniques are fundamental across many delightful Cheesecake recipes.
1. Prepare the Crust (Preheat Oven to 350°F / 175°C):
* Combine graham cracker crumbs, sugar, and melted butter in a medium bowl. Mix until evenly moistened.
* Press the mixture firmly into the bottom of a 9-inch springform pan (lined with parchment paper if desired).
* Bake for 8-10 minutes, or until lightly golden. Remove from oven and let cool slightly.
* Reduce oven temperature to 325°F (160°C).
* Wrap the outside of the springform pan tightly with several layers of heavy-duty aluminum foil to prevent water from seeping in during the water bath.
2. Make the Filling:
* In a large bowl with an electric mixer, beat the softened cream cheese on medium speed until smooth and creamy (about 2-3 minutes). It’s crucial for the cheese to be at room temperature to prevent lumps.
* Gradually add the granulated sugar, beating until well combined and fluffy, scraping down the sides of the bowl as needed.
* Beat in the vanilla extract, flour, and salt until just combined.
* Stir in the sour cream until smooth.
Add the eggs one at a time, beating on low speed just until combined* after each addition. Do not overmix once the eggs are added, as this can incorporate too much air, leading to cracks.
* Pour the filling over the cooled crust in the springform pan. Gently tap the pan on the counter a few times to release any large air bubbles.
3. Water Bath & Bake:
* Place the foil-wrapped springform pan into a larger roasting pan.
* Carefully pour hot water into the roasting pan until it comes about halfway up the sides of the springform pan.
* Carefully transfer the roasting pan to the preheated oven.
* Bake for 60-75 minutes. The cheesecake is done when the edges are set but the center (about 2-3 inches in diameter) still jiggles slightly when gently shaken. This slight jiggle is normal and indicates perfect doneness.
* Turn off the oven, crack the oven door open slightly, and leave the cheesecake in the water bath for 1 hour. This slow cooling prevents cracking.
4. Cooling & Chilling:
* Carefully remove the springform pan from the water bath and remove the foil.
* Let the cheesecake cool completely on a wire rack at room temperature for 1-2 hours.
* Once completely cooled, cover loosely with plastic wrap and refrigerate for at least 6 hours, or ideally overnight, before serving.
5. Optional Topping:
* About 30 minutes before serving, whisk together sour cream, sugar, and vanilla. Spread evenly over the chilled cheesecake.
Nutritional Benefits & Advantages
While a classic dessert, a homemade New York Cheesecake offers advantages over many processed options. You control every ingredient, avoiding artificial flavors and preservatives. Full-fat dairy, while caloric, provides essential vitamins like A and D, and healthy fats that promote satiety. Cream cheese and sour cream also offer a source of protein and calcium. Enjoying a homemade dessert in moderation allows for a mindful treat that satisfies cravings without the hidden additives often found in commercially prepared foods.
Tips, Variations & Cooking Advice
- Room Temperature Ingredients: This is the most crucial tip for a smooth, lump-free filling. Cold cream cheese will result in a lumpy texture.
- Don’t Overmix: Overmixing, especially after adding eggs, incorporates too much air, which expands during baking and then collapses, causing cracks. Mix just until combined.
- Water Bath is Your Friend: A water bath creates a moist, consistent cooking environment, ensuring even baking and preventing cracks.
- Slow Cooling: Letting the cheesecake cool gradually in the turned-off oven is another critical step to prevent thermal shock and cracks.
- Flavor Variations:
* Chocolate: Melt 6 ounces of good quality semi-sweet chocolate and fold into the cream cheese mixture before adding eggs.
* Lemon/Lime: Add 2 tablespoons of zest and ¼ cup of fresh lemon or lime juice to the filling.
* Fruit Toppings: Serve with fresh berries, a fruit compote, or a cherry pie filling for added zest and sweetness.
* Salted Caramel: Drizzle with homemade or store-bought salted caramel sauce.
- Dietary Adaptations:
* Gluten-Free: Use gluten-free graham crackers for the crust.
* Dairy-Free: While challenging for a traditional New York style, there are excellent recipes using cashew cream or vegan cream cheese alternatives; however, the texture will be different.
Common Mistakes to Avoid
- Cold Ingredients: Leads to lumpy batter and a less smooth texture.
- Overmixing: Causes cracks and a crumbly texture. Beat only until just combined.
- Skipping the Water Bath: Results in a dry, cracked, and unevenly baked cheesecake.
- Opening Oven Door Too Soon: Drastic temperature changes during baking can cause the cheesecake to fall and crack.
- Not Chilling Long Enough: The cheesecake needs ample time to set, otherwise it will be gooey and fall apart when sliced.
- Cutting While Warm: This will result in a messy, unset slice. Always chill thoroughly.
Storage & Meal Prep Tips
- Refrigeration: Store leftover cheesecake tightly covered in the refrigerator for up to 5-7 days. An airtight container or wrapping with plastic wrap and then foil works best to prevent it from absorbing refrigerator odors.
- Freezing: For longer storage, freeze individual slices (or the whole cheesecake) for up to 1-2 months.
* Slices: Place parchment paper between slices, wrap each slice tightly in plastic wrap, then foil.
* Whole Cheesecake: Ensure it’s completely chilled. Freeze uncovered for 2-3 hours until firm. Then, wrap tightly in multiple layers of plastic wrap, followed by a layer of aluminum foil.
- Thawing: Thaw frozen cheesecake overnight in the refrigerator. Do not thaw at room temperature.
- Reheating: Cheesecake is typically served chilled, so reheating is not recommended as it changes the texture.
Conclusion
Baking a homemade New York Cheesecake is a fulfilling culinary journey. With patience, attention to detail, and this comprehensive guide, you can confidently create a show-stopping dessert that embodies rich flavor and perfect texture. Embrace the process, and soon you’ll be delighting friends and family with your mastery of classic Cheesecake recipes. Don’t be afraid to experiment with the variations we’ve suggested, and most importantly, enjoy every decadent bite! Share your results in the comments below – we’d love to hear how your masterpiece turned out!
FAQs
Q1: Why did my cheesecake crack?
A1: Cracks are usually caused by overmixing (incorporating too much air), drastic temperature changes (not using a water bath, or opening the oven door too often/too soon), or underbaking/overbaking. Ensuring all ingredients are at room temperature and following the slow cooling steps are key preventative measures.
Q2: Can I make this cheesecake ahead of time?
A2: Absolutely! Cheesecake is an excellent make-ahead dessert. It needs at least 6 hours (preferably overnight) to chill, so preparing it a day or two in advance is ideal.
Q3: My crust is soggy. What went wrong?
A3: A soggy crust can happen if the water bath isn’t properly sealed, allowing water to seep into the springform pan. Ensure you wrap the springform pan tightly with multiple layers of heavy-duty aluminum foil. Also, make sure to completely cool the crust before adding the filling.
Q4: How do I know when the cheesecake is perfectly baked?
A4: The edges should be set, and the center (about 2-3 inches in diameter) should still have a slight wobble or jiggle when gently shaken. The residual heat will continue to cook the center as it cools.
Q5: Can I reduce the sugar in the recipe?
A5: While you can slightly reduce the sugar, it’s not recommended to cut it drastically, as sugar plays a role in the cheesecake’s texture and structure, not just sweetness. A small reduction (e.g., ¼ cup less) might be manageable without significant textural changes.