Unlock the Secret to the Perfect Stack: Mastering Homemade Pancakes!
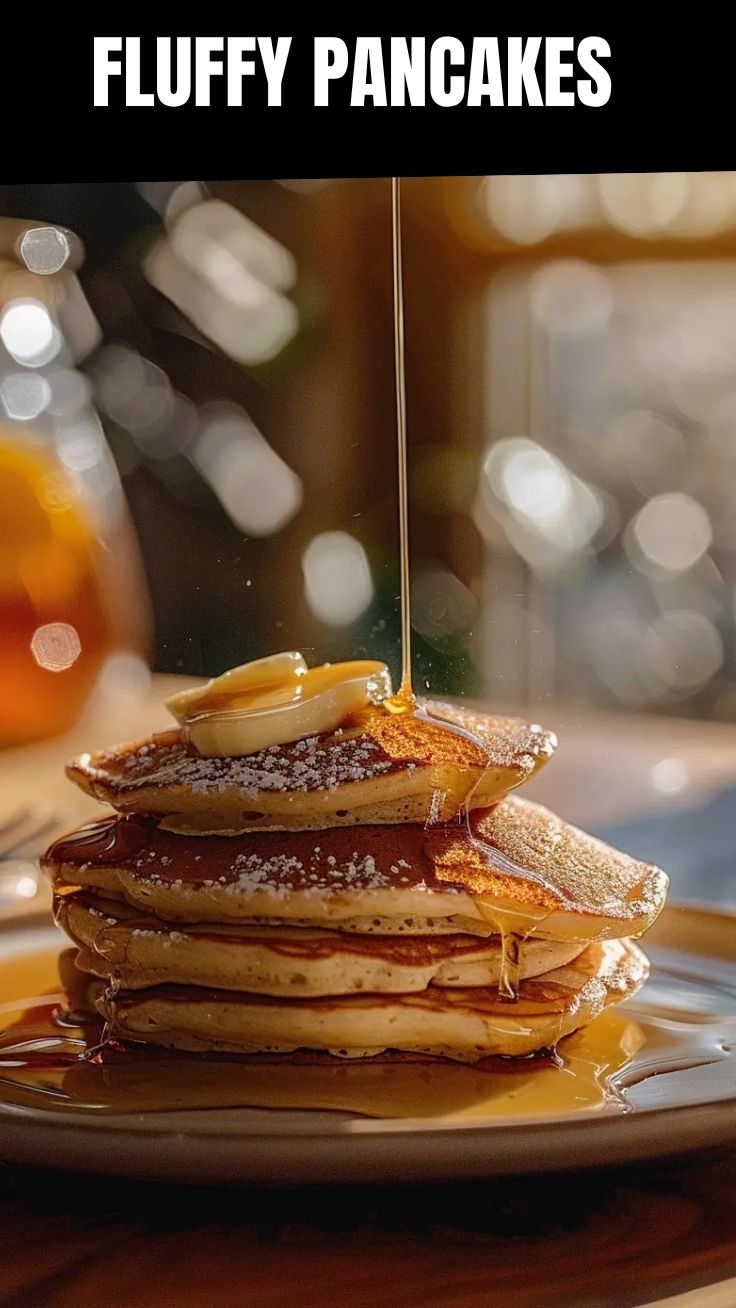
Ever dreamt of waking up to the aroma of freshly made, pillowy clouds waiting to be drenched in syrup? Forget the greasy diner versions; today, we’re diving deep into the art of crafting the ultimate breakfast treat right in your own kitchen: the perfect stack of homemade pancakes. This comprehensive guide will empower you to create a delightful breakfast experience that surpasses any store-bought mix. We’re not just making pancakes; we’re elevating your morning routine with simple, wholesome ingredients. Get ready to discover the magic behind truly Fluffy Pancakes that will become a cherished family favorite.
Ingredients & Kitchen Tools
Crafting culinary masterpieces starts with the right foundation. Here’s what you’ll need for your journey to pancake perfection:
- All-purpose flour (2 cups): The backbone of our batter, providing structure and texture. For a lighter touch, you can experiment with cake flour or even a 50/50 mix with whole wheat.
- Granulated sugar (2 tablespoons): Adds a touch of sweetness and helps with browning. Adjust to your preference.
- Baking powder (2 teaspoons): Our primary leavening agent, responsible for those glorious, airy bubbles. Ensure it’s fresh for maximum lift!
- Baking soda (1 teaspoon): Works in conjunction with the buttermilk to create an even more tender crumb.
- Salt (½ teaspoon): Enhances all the other flavors. Don’t skip it!
- Large eggs (2): Provide richness, bind the ingredients, and contribute to the fluffy texture.
- Buttermilk (1 ½ cups): The secret weapon for tender, flavorful pancakes. Its acidity reacts with the baking soda for superior lift and a subtle tangy note. If you don’t have buttermilk, you can make your own by adding 1 tablespoon of lemon juice or white vinegar to regular milk and letting it sit for 5 minutes.
- Unsalted butter (¼ cup, melted): Adds incredible richness and a beautiful golden-brown color. Melted and cooled slightly.
- Vanilla extract (1 teaspoon): A classic flavor enhancer that truly elevates the pancake experience.
- Mixing bowls (large and medium): For separating wet and dry ingredients.
- Whisk: To thoroughly combine ingredients and aerate the batter.
- Ladle or ¼ cup measuring cup: For portioning the batter onto the griddle.
- Spatula: For flipping and serving.
- Griddle or large non-stick pan: Essential for even cooking.
Prep Time & Cooking Schedule
Good things come to those who wait, even if it’s just a little bit!
- Prep Time: 10 minutes
- Cook Time: 2-3 minutes per pancake (approximately 15-20 minutes total)
- Resting Time: 5-10 minutes (for the batter) – this allows the gluten to relax and the leavening agents to activate fully, leading to an even more tender outcome.
Total time from start to plate is about 30-40 minutes, making this a perfect weekend breakfast or even a special weeknight treat.
Step-by-Step Instructions
Let’s turn those ingredients into a stack of edible sunshine!
1. Whisk Dry Ingredients: In a large mixing bowl, combine the flour, sugar, baking powder, baking soda, and salt. Whisk well to ensure all ingredients are evenly distributed and aerated. This prevents clumps and ensures a consistent rise for your Fluffy Pancakes.
2. Combine Wet Ingredients: In a separate medium bowl, whisk together the eggs, buttermilk, melted butter, and vanilla extract until thoroughly combined.
3. Marry Wet and Dry: Pour the wet ingredients into the dry ingredients. Stir gently with a spoon or whisk until just combined. A few lumps are perfectly fine and even desired – overmixing will develop the gluten too much, resulting in tough pancakes. This is crucial for achieving light and airy Buttermilk Pancakes.
4. Rest the Batter: Let the batter rest for 5-10 minutes. This short rest allows the baking powder and soda to activate and the gluten to relax, contributing to a more tender texture.
5. Heat the Griddle: While the batter rests, heat your griddle or non-stick pan over medium-low heat. A good test for temperature is to sprinkle a few drops of water on the surface; if they sizzle and evaporate immediately, it’s ready. If they just sit there, it’s too cool. If they instantly disappear, it’s too hot.
6. Cook the Pancakes: Lightly grease the griddle with a tiny bit of butter if not completely non-stick. Pour ¼ cup of batter for each pancake onto the hot griddle.
7. Flip Time: Cook for 2-3 minutes per side, or until bubbles appear on the surface of the pancake and the edges look set. Flip with a spatula and cook for another 1-2 minutes until golden brown and cooked through.
8. Serve Warm: Transfer cooked pancakes to a plate and serve immediately with your favorite toppings!
Nutritional Benefits & Advantages
Beyond their delicious taste, homemade pancakes offer surprising nutritional perks! Opting for quality ingredients like real buttermilk provides beneficial probiotics, supporting gut health. Eggs contribute high-quality protein, essential vitamins, and choline, important for brain function. Making them at home allows you to control sugar content and choose healthier fats, making them a more wholesome alternative to many processed breakfast options. You can also easily incorporate whole grains or add fruits for extra fiber and antioxidants.
Tips, Variations & Cooking Advice
- Even Cooking: Don’t overcrowd the griddle! Cook pancakes in batches to ensure even heat distribution and golden-brown results.
- Temperature Control: Often the key to perfect pancakes. If they are browning too quickly, your griddle is too hot. If they aren’t browning, it’s too cool.
- Flavor Variations:
* Blueberry Bliss: Fold in ½ cup of fresh or frozen blueberries (do not thaw) into the batter before cooking.
* Chocolate Chip Dream: Add ½ cup of mini chocolate chips for a sweet treat.
* Spiced Fall: Incorporate ½ teaspoon of cinnamon and a pinch of nutmeg into the dry ingredients.
* Lemon Ricotta: Fold in ½ cup of ricotta cheese and 1 teaspoon of lemon zest for incredibly moist and flavorful pancakes.
- Gluten-Free Option: Substitute regular flour with a 1:1 gluten-free baking blend.
- Dairy-Free Option: Use plant-based milk (almond, soy, oat) and apple cider vinegar to make “buttermilk” (1 tbsp vinegar per 1 cup milk). Use vegan butter or oil.
Common Mistakes to Avoid
- Overmixing the Batter: This is the most common sin! Overmixing develops gluten, leading to dense, chewy pancakes instead of light, fluffy ones. A few lumps are okay!
- Overcrowding the Griddle: Leads to uneven cooking and makes flipping difficult. Give your pancakes space to breathe.
- Too High Heat: Results in burned exteriors and raw interiors. Keep the heat medium-low for a golden, cooked-through finish.
- Not Letting the Batter Rest: Skipping this step means less tender and less fluffy pancakes. That short rest is crucial!
Storage & Meal Prep Tips
Leftover pancakes are a delightful treat!
- Refrigeration: Store cooled pancakes in an airtight container in the refrigerator for up to 3-4 days.
- Freezing: Arrange cooled pancakes in a single layer on a baking sheet and freeze until solid. Transfer to a freezer-safe bag or container, separating layers with parchment paper, for up to 2-3 months.
- Reheating: Reheat in a toaster, microwave, or oven (350°F/175°C for 5-10 minutes) until warm. Freezing and reheating often makes them even fluffier!
Conclusion
Congratulations, pancake master! You’ve successfully navigated the journey to creating truly exceptional Fluffy Pancakes from scratch. With this guide, you now possess the knowledge and skills to whip up a batch of delicious and comforting Buttermilk Pancakes that will impress anyone lucky enough to share your breakfast table. Don’t be afraid to experiment with variations and make this recipe your own. Share your pancake triumphs in the comments below – we’d love to hear your favorite toppings and twists!
FAQs
Q1: My pancakes aren’t light and fluffy. What went wrong?
A: Most likely, you’ve overmixed the batter! Remember, a few lumps are desirable. Also, ensure your baking powder and soda are fresh.
Q2: Can I substitute regular milk for buttermilk?
A: Yes, but you’ll need to “sour” it first. Add 1 tablespoon of lemon juice or white vinegar to a measuring cup, then fill to the 1 ½ cup mark with regular milk. Let it sit for 5 minutes before using.
Q3: How do I know when to flip the pancakes?
A: Look for bubbles forming on the surface of the pancake and the edges starting to look dry and set. This usually takes 2-3 minutes.
Q4: Can I make the batter ahead of time?
A: While it’s best to cook pancakes with freshly made batter, you can prepare the dry ingredients in advance. For the wet ingredients, mix them the night before and store them in the fridge. Combine just before cooking. Note that the leavening might be slightly less potent if the batter sits for too long.
Q5: My pancakes are sticking to the griddle. What’s the trick?
A: Ensure your griddle is thoroughly preheated and lightly greased. If using a non-stick pan, it may not need grease, but some brands benefit from a very thin layer of butter or oil.