Unlock the Secret to Creamy, Dreamy Homemade Hummus!
Ever wondered how to achieve that silken, irresistible Hummus you find in your favorite Mediterranean restaurant, right in your own kitchen? The good news is, it’s not as daunting as it seems! Crafting your own homemade Hummus elevates this classic dip from a simple appetizer to a culinary masterpiece. Beyond the unparalleled freshness and flavor, preparing it yourself offers complete control over ingredients, allowing you to tailor it perfectly to your dietary needs and taste preferences. Say goodbye to preservatives and hello to a vibrant, wholesome spread. Our journey today will demystify the process, turning humble chickpea into a velvety smooth delight.
Ingredients & Kitchen Tools
Gather your culinary arsenal! Here’s what you’ll need to transform simple ingredients into extraordinary Hummus:
- 1 (15-ounce) can chickpeas, drained and rinsed: The star of the show! Rinsing helps reduce sodium and improve texture.
- 1/2 cup tahini: Essential for that characteristic nutty flavor and creamy texture. Choose a good quality, smooth tahini.
- 1/4 cup fresh lemon juice: Brightens the flavor and adds a tangy kick. Always use fresh-squeezed!
- 2 cloves garlic, minced: Provides aromatic depth. Adjust to your garlic preference.
- 1/2 teaspoon ground cumin: A warm, earthy spice that complements the chickpeas beautifully.
- 1/2 teaspoon salt: Enhances all the other flavors. Adjust to taste.
- 2-4 tablespoons ice-cold water: The secret to ultra-creamy Hummus! Helps emulsify the ingredients.
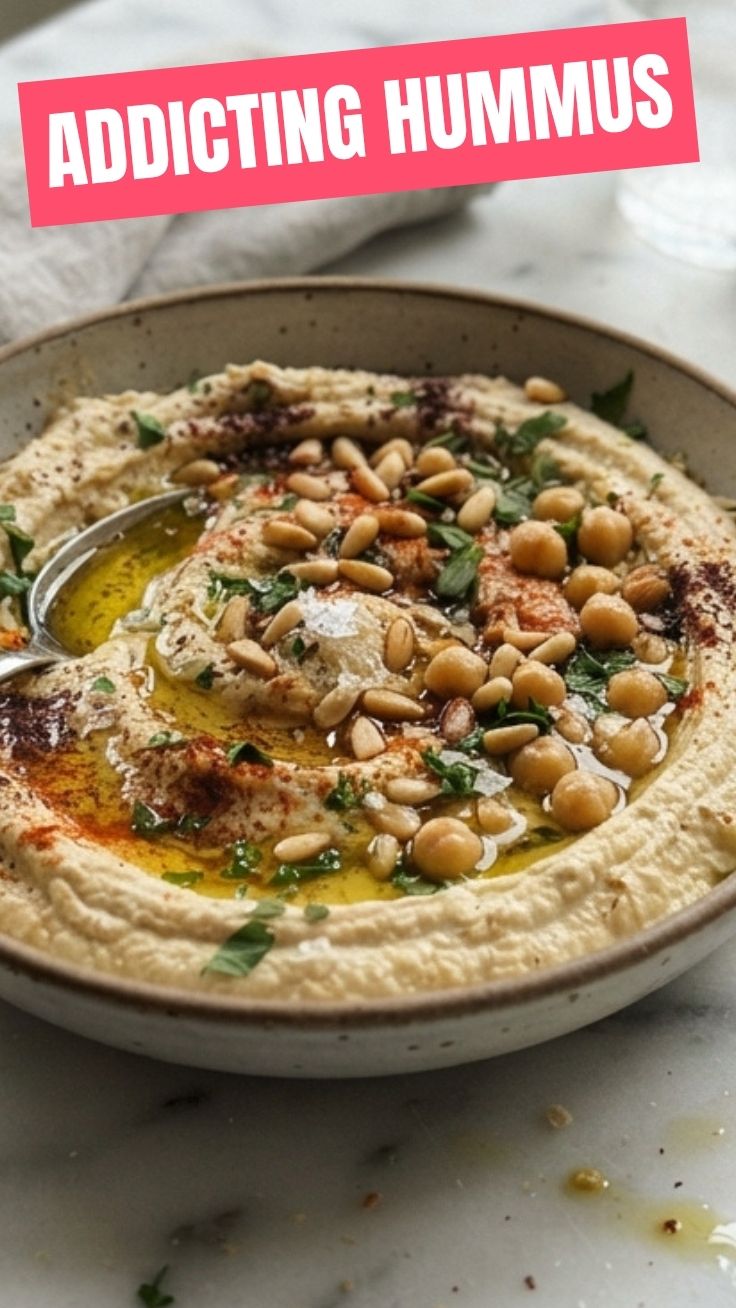
- Optional garnishes: Drizzle of olive oil, paprika, fresh parsley, pine nuts. For visual appeal and an extra layer of flavor.
Kitchen Tools:
- Food processor or high-speed blender: Crucial for achieving that smooth, consistent texture.
- Colander: For rinsing the chickpeas.
- Measuring cups and spoons: For precise ingredient measurements.
- Spatula: For scraping down the sides of the food processor.
Prep Time & Cooking Schedule
Good news for busy chefs: homemade Hummus comes together remarkably quickly!
- Prep Time: 10 minutes (mostly rinsing chickpeas and gathering ingredients).
- Cook Time: 5-7 minutes (actual blending time).
- Resting Time: 15-30 minutes (optional, allows flavors to meld and the Hummus to thicken slightly).
This recipe is perfect for a quick snack or as part of a larger meal prep. You can whip it up while other dishes are cooking or make it ahead for a party.
Step-by-Step Instructions
Follow these simple steps for a consistently perfect batch of velvety Hummus:
1. Prepare the chickpeas: Drain and rinse the canned chickpeas thoroughly under cold water. For an extra-smooth texture, you can remove the skins from the chickpeas – this is optional but highly recommended for the silkiest Hummus.
2. Combine ingredients (initial blend): In your food processor, add the tahini and fresh lemon juice. Process for about 1 minute until the mixture is pale and thick. This crucial step helps create an emulsion that prevents the Hummus from separating and ensures a creamy base.
3. Add aromatics and spice: Add the minced garlic, ground cumin, and salt to the food processor. Process for another 30 seconds to incorporate.
4. Introduce the chickpeas: Add the drained and rinsed chickpeas to the food processor. Process for 1-2 minutes, scraping down the sides as needed, until the mixture is relatively smooth.
5. Achieve ultimate creaminess: With the food processor running, slowly drizzle in 2-4 tablespoons of ice-cold water, one tablespoon at a time, until your Hummus reaches your desired creamy consistency. The ice water is key to breaking down the chickpeas into a truly luxurious spread.
6. Taste and adjust: Taste the Hummus and adjust seasonings as needed. You might want more salt, lemon juice, or even a pinch more cumin.
7. Serve and garnish: Transfer the Hummus to a serving bowl. Drizzle with a good quality extra virgin olive oil, sprinkle with paprika, and garnish with fresh parsley or pine nuts for an authentic touch.
Nutritional Benefits & Advantages
Beyond its incredible taste, homemade Hummus is a nutritional powerhouse. The star ingredient, the humble chickpea (also known as garbanzo bean), is rich in plant-based protein and dietary fiber, promoting satiety and aiding digestion. This makes it an excellent choice for weight management and gut health. Tahini, derived from sesame seeds, contributes healthy fats, calcium, and iron. Lemon juice provides vitamin C, while garlic offers immune-boosting properties. Overall, Hummus is a heart-healthy, gluten-free, and often vegan-friendly spread, perfect for those seeking nutritious and delicious options.
Tips, Variations & Cooking Advice
- Roast your garlic: For a deeper, sweeter flavor, try roasting your garlic cloves before adding them to the food processor.
- Spice it up: Add a pinch of cayenne pepper or a dash of hot sauce for a spicy kick.
- Herbaceous twists: Incorporate fresh herbs like cilantro, basil, or mint for unique flavor profiles.
- Roasted red pepper Hummus: Add 1/2 cup of roasted red peppers (jarred or homemade) for a vibrant and smoky version.
- Sun-dried tomato Hummus: Blend in a few rehydrated sun-dried tomatoes for an intense, savory note.
- Make it dairy-free/gluten-free: Good news, this recipe is naturally both!
- Dried chickpeas: If using dried chickpeas, soak them overnight and then cook until very tender before proceeding with the recipe. This yields an even more profound flavor and superior texture.
Common Mistakes to Avoid
- Not rinsing chickpeas: This can lead to a metallic taste and excess sodium. Always rinse well.
- Skipping the tahini/lemon juice emulsion: This step is crucial for creamy, non-separated Hummus. Don’t rush it!
- Not blending long enough: Patience is key. Blend until you achieve the desired smoothness, scraping down the sides often.
- Too much water at once: Add ice-cold water gradually. Too much too fast can result in a thin, watery consistency.
- Ignoring the ice-cold water: Warm water won’t achieve the same emulsification and creaminess. Use ice water for best results.
- Under-seasoning: Always taste and adjust. Hummus benefits from proper seasoning.
Storage & Meal Prep Tips
Homemade Hummus is excellent for meal prep!
- Refrigeration: Store leftover Hummus in an airtight container in the refrigerator for up to 5-7 days.
- Preventing oxidation: To keep the surface from drying out and oxidizing, drizzle a thin layer of olive oil over the top before sealing the container.
- Freezing: While possible, freezing Hummus can slightly alter its texture, making it a bit grainier. If freezing, store in an airtight, freezer-safe container for up to 3 months. Thaw in the refrigerator overnight and give it a good stir before serving, adding a splash of water or lemon juice if needed to restore consistency.
- Reheating: Hummus is best served at room temperature. Simply take it out of the fridge 15-30 minutes before serving. No need to heat!
Conclusion
There you have it – the definitive guide to creating truly sensational homemade Hummus! By understanding the nuances of each ingredient and following our step-by-step process, you can easily transform humble chickpeas into a luxurious, flavorful dip that rivals any store-bought version. The journey to culinary excellence is often paved with simple, fresh ingredients and a little technique. Don’t be afraid to experiment with variations and make this recipe your own. We encourage you to give this recipe a try and share your delicious results with us! What’s your favorite way to enjoy Hummus?
FAQs
Q1: Do I have to remove the skins from the chickpeas?
A1: While optional, removing the skins results in an incredibly smooth and creamy Hummus. If you’re short on time, you can skip this step, but expect a slightly less silken texture.
Q2: My Hummus is too thick. How can I thin it out?
A2: Slowly add more ice-cold water, one tablespoon at a time, while the food processor is running, until you reach your desired consistency. You can also add a little extra lemon juice or olive oil.
Q3: What if I don’t have a food processor?
A3: A high-speed blender can also work effectively. If you only have a regular blender, you might need to blend in smaller batches and scrape down the sides more frequently to achieve a smooth consistency. A mortar and pestle would be very laborious but possible!
Q4: Can I use different beans instead of chickpeas?
A4: While traditional Hummus is made with chickpeas, you can experiment with other white beans like cannellini beans for a different flavor and texture, though it wouldn’t technically be Hummus.
Q5: My Hummus tastes bitter. What went wrong?
A5: Bitterness can often come from old or poor-quality tahini. Ensure your tahini is fresh and from a reputable brand. Also, too much garlic can sometimes contribute to a bitter note. Reduce the garlic next time if this is a recurring issue.