Unlock the Secret to the Ultimate Homemade Queso Dip
Are you tired of settling for mediocre, store-bought dips that lack that authentic, creamy, and flavorful punch? Imagine the rich, gooey perfection of a restaurant-quality Queso Dip, bubbling hot and ready to be scooped with your favorite tortilla chips, all from the comfort of your own kitchen. This isn’t just any ordinary cheese dip; it’s a culinary experience waiting to happen, a vibrant, savory delight that’s surprisingly easy to master. Preparing this focus keyword at home not only saves you money but also allows you to control the quality of ingredients, ensuring a fresher, more personalized taste. Get ready to elevate your snack game and impress everyone with your homemade creation!
Ingredients & Kitchen Tools
Crafting the perfect queso requires a thoughtful selection of ingredients and the right tools. Here’s what you’ll need:
- 1 tbsp Olive Oil: For sautéing aromatics and building a flavor base.
- 1 small White Onion, finely diced: Provides a sweet and pungent foundation.
- 1-2 Jalapeños, finely minced (seeds removed for less heat, left in for more): Adds a kick and fresh, vibrant flavor.
- 2 cloves Garlic, minced: Essential aromatic for depth.
- 1 (10 oz) can Rotel Diced Tomatoes with Green Chilies (undrained): The classic shortcut for tomato and chili flavor.
- 1 (4 oz) can Diced Green Chilies (undrained): Extra green chili punch without the heat.
- 1 cup Milk (whole milk recommended for creaminess): The liquid base for the sauce.
- 1/2 tsp Cumin: Earthy, warm spice that defines Tex-Mex flavors.
- 1/4 tsp Chili Powder: Adds a mild, smoky heat.
- 1/4 tsp Smoked Paprika: Deepens the smoky notes.
- Pinch of Cayenne Pepper (optional): For an extra fiery kick.
16 oz Processed Cheese, cubed (e.g., Velveeta, or a blend of Colby Jack and American cheese for a more gourmet twist): The backbone of the dip, providing ultimate meltiness. Substitution: For a more natural option, use a mix of freshly grated cheddar and Monterey Jack, though the texture might be slightly less smooth.*
- 1/4 cup Fresh Cilantro, chopped (for garnish): Adds freshness and color.
- Salt and freshly ground Black Pepper to taste: Essential for balancing flavors.
Kitchen Tools:
- Large Skillet or Dutch Oven: For cooking the dip.
- Whisk: For ensuring a smooth, lump-free texture.
- Measuring Cups and Spoons: For accurate ingredient portions.
- Cutting Board and Knife: For prepping vegetables.
- Serving Bowl: For presenting your delicious dip.
Prep Time & Cooking Schedule
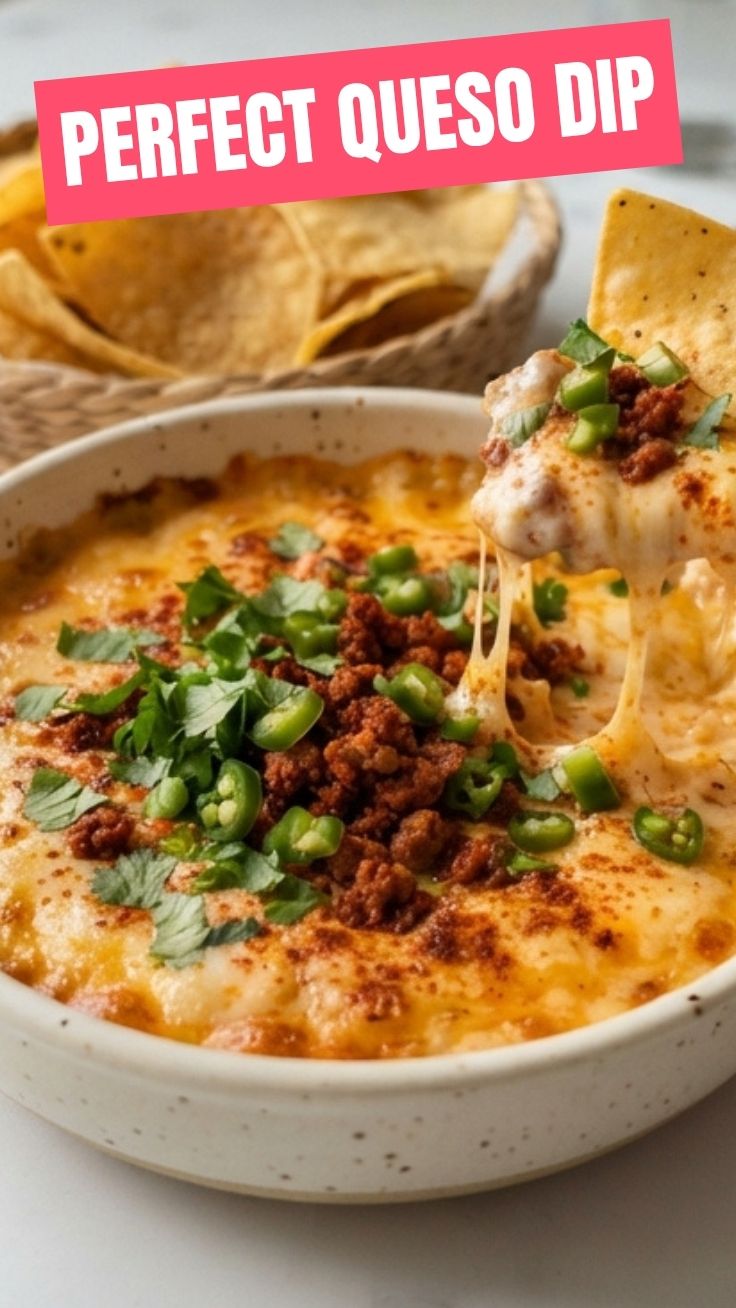
This recipe is designed for maximum flavor with minimal fuss, making it perfect for last-minute gatherings or a spontaneous snack attack.
- Prep Time: 15 minutes (mostly chopping vegetables)
- Cook Time: 20-25 minutes (until melted and bubbly)
- Resting Time: 5 minutes (allows the dip to slightly thicken and cool to an enjoyable temperature)
Plan to start your prep about 40-45 minutes before you want to serve, giving you ample time to get everything ready and enjoy the aroma as it cooks.
Step-by-Step Instructions
Follow these steps for a perfectly creamy and flavorful Queso Dip every time.
1. Sauté Aromatics: Heat olive oil in a large skillet or Dutch oven over medium heat. Add diced onion and jalapeño, cooking until softened, about 5-7 minutes. Stir in minced garlic and cook for another minute until fragrant.
2. Build the Flavor Base: Add Rotel diced tomatoes with green chilies (undrained), canned diced green chilies (undrained), cumin, chili powder, smoked paprika, and cayenne pepper (if using). Bring to a gentle simmer and cook for 5 minutes, allowing the flavors to meld.
3. Introduce Milk & Cheese: Pour in the milk and bring it to a gentle simmer. Reduce heat to low. Gradually add the cubed processed cheese, stirring continuously with a whisk until the cheese dip is completely melted and smooth. Be patient and keep the heat low to prevent scorching.
4. Season and Serve: Taste the dip and season with salt and freshly ground black pepper as needed. Garnish with fresh cilantro before serving hot with tortilla chips, crackers, or even as a topping for tacos or nachos.
Nutritional Benefits & Advantages
While often seen as an indulgence, homemade Queso Dip can offer some surprising benefits when made with quality ingredients. Cheese provides a good source of calcium and protein. Tomatoes and jalapeños contribute vitamins and antioxidants. By making it yourself, you avoid the excessive preservatives and artificial flavors often found in pre-made versions, allowing for a fresher and more controlled intake of fats and sodium.
Tips, Variations & Cooking Advice
- Spice Level: Adjust the number of jalapeños or add a pinch of serrano pepper for extra heat. For a milder dip, use only canned green chilies.
- Cheese Blends: Experiment with a blend of cheeses like sharp cheddar, Monterey Jack, and even a touch of cream cheese for added tang and silkiness.
- Add-ins: Stir in cooked ground beef, chorizo, or black beans for a heartier, more substantial dip.
- Smoky Flavor: A tiny splash of liquid smoke or a roasted poblano pepper can elevate the smoky notes.
- Thickening: If your dip is too thin, allow it to simmer gently for a few extra minutes, stirring occasionally, to reduce and thicken. If it’s too thick, add a little more milk, one tablespoon at a time.
Common Mistakes to Avoid
- High Heat: Cooking cheese on high heat will cause it to seize, become grainy, and separate. Always melt cheese on low heat, stirring constantly.
- Not Stirring Enough: Insufficient stirring can lead to scorching on the bottom of the pan and uneven melting.
- Using Only Low-Fat Cheese: While healthy, low-fat cheeses often don’t melt as smoothly or deliver the rich texture needed for a good queso. A blend can work, but processed cheese provides the best melt.
- Over-Seasoning at the Start: Taste as you go. It’s easier to add more salt or spices than to correct an over-seasoned dish.
Storage & Meal Prep Tips
Leftover Queso Dip can be stored in an airtight container in the refrigerator for up to 3-4 days. To reheat, gently warm on the stovetop over low heat, stirring frequently, or in the microwave in short bursts, stirring in between. You might need to add a splash of milk to restore its creamy consistency. Freezing is not recommended as it can alter the texture of the cheese, making it grainy upon thawing.
Conclusion
There you have it – the ultimate guide to creating a mouth-watering, restaurant-quality Queso Dip right in your own kitchen. This simple yet incredibly rewarding recipe proves that the best flavors often come from homemade efforts. By following these steps, you’ll be serving up a perfectly creamy and spicy cheese dip that will undoubtedly become a staple for your gatherings and snack times. Don’t hesitate – give this recipe a try and experience the joy of homemade deliciousness. Share your creations in the comments below, or tell us your favorite ways to enjoy this classic!
FAQs
Q1: Can I make this queso ahead of time?
A1: Yes, you can prepare it a few hours in advance. Reheat gently on the stovetop or in the microwave, adding a splash of milk if needed to restore its creamy texture.
Q2: What’s the best way to keep queso warm for a party?
A2: A slow cooker set to the “warm” setting is ideal for keeping queso hot and melty throughout a party. Stir occasionally to prevent a skin from forming.
Q3: What kind of tortilla chips pair best with this dip?
A3: Thick, sturdy tortilla chips are best for scooping up this rich dip. Restaurant-style or scoop-shaped chips work wonderfully.
Q4: Can I make this recipe spicier?
A4: Absolutely! Leave the seeds in the jalapeños, add a dash of cayenne pepper, or incorporate a finely minced serrano pepper for an extra kick.
Q5: My queso turned out grainy. What did I do wrong?
A5: Grainy queso usually results from cooking the cheese over too high heat, causing the milk solids and fats to separate. Always melt cheese on low heat, stirring constantly. Using processed cheese or a blend with sodium citrate can also help maintain a smooth texture.