The Ultimate Tuna Salad Sandwich: A Homemade Delight That Outshines All Others
Are you tired of bland, uninspired lunches? Do you crave a dish that’s both satisfying and simple to prepare, yet bursts with flavor and wholesome goodness? Look no further than the humble yet extraordinary Tuna Salad Sandwich. While it might seem like a straightforward classic, mastering the art of a truly exceptional tuna salad recipe at home can elevate your everyday meals from mundane to magnificent. Forget the pre-made versions; learning how to craft this culinary marvel yourself unlocks a world of fresh ingredients, personalized tastes, and incredible value. It’s time to transform your lunch game with a homemade creation that’s miles ahead in taste and nutrition.
Ingredients & Kitchen Tools
To embark on your journey to the perfect Tuna Salad Sandwich, gather these essentials:
Canned Tuna (in water or oil): 2 (5-ounce) cans, drained well. Water-packed offers a lighter flavor, oil-packed richer.*
Mayonnaise: 1/2 cup (or plain Greek yogurt for a lighter option). The binder that brings it all together.*
Celery: 2 stalks, finely diced. Adds crucial crunch and freshness.*
Red Onion: 1/4 cup, finely diced. Provides a sharp, welcome zing.*
Dill Pickle Relish (or finely chopped dill pickles): 2 tablespoons. A tangy, briny depth of flavor.*
Fresh Dill: 1 tablespoon, chopped (optional). For an aromatic, herbaceous lift.*
Dijon Mustard: 1-2 teaspoons. Adds a subtle piquant kick.*
Lemon Juice: 1 teaspoon, freshly squeezed. Brightens all the flavors.*
Salt & Black Pepper: To taste. Essential for seasoning.*
Bread: Your favorite kind (whole wheat, sourdough, rye). The foundation of your sandwich.*
- Lettuce Leaves (optional): For added crunch and freshness.
Kitchen Tools:
- Mixing Bowl: Large enough to combine all ingredients.
- Fork: For flaking tuna.
- Cutting Board & Knife: For dicing vegetables.
- Measuring Cups & Spoons: For accurate ingredient portions.
- Spatula or Spoon: For mixing.
Prep Time & Cooking Schedule
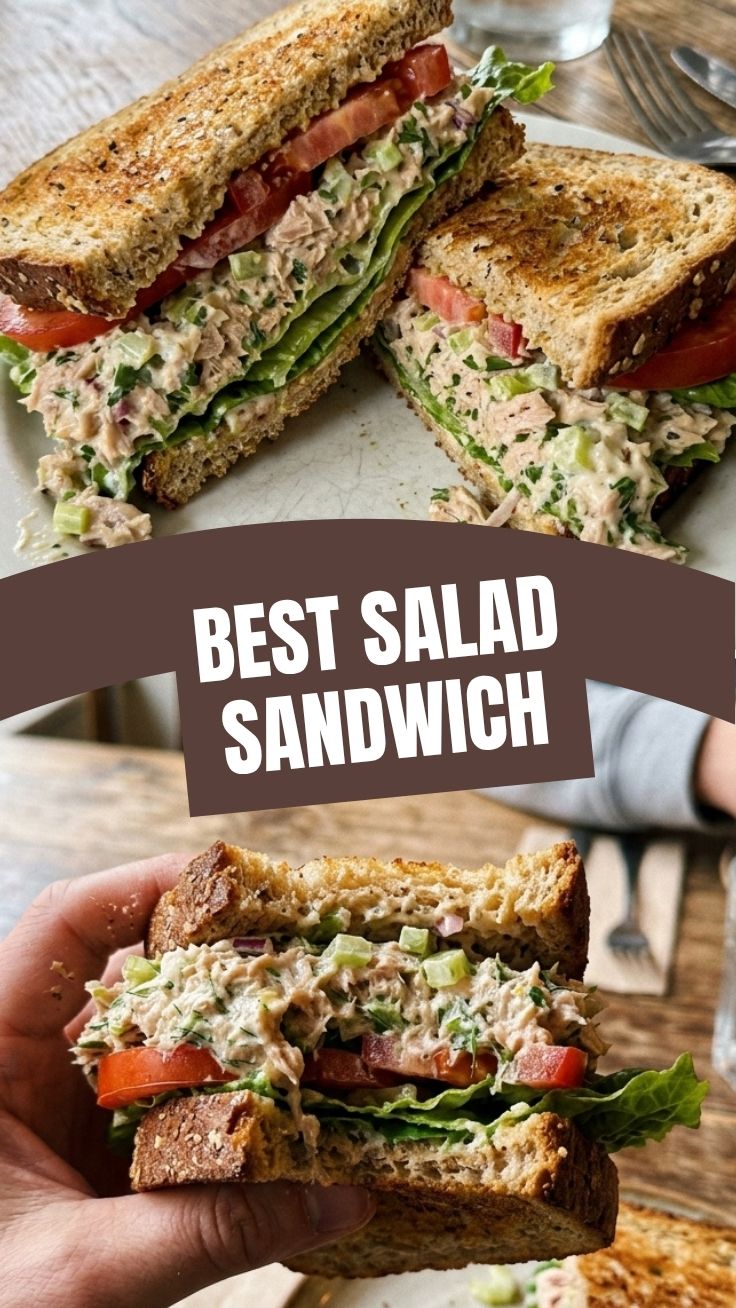
Good news – this recipe is a speed demon!
- Prep Time: 10-15 minutes
- Cook Time: 0 minutes (no cooking required!)
Resting Time: 15-30 minutes (optional, but highly recommended for flavors to meld). Allowing the tuna salad to chill briefly enhances the overall taste profile and texture.*
You can easily prepare this in the morning before work or school, let it chill in the fridge, and assemble your sandwich just before eating for peak freshness.
Step-by-Step Instructions
Crafting the perfect Tuna Salad Sandwich is incredibly simple. Follow these steps for a delightful culinary experience that starts with an amazing tuna salad recipe:
1. Drain the Tuna: Open your cans of tuna and drain them thoroughly. Press down with a fork or the lid to remove as much liquid as possible. This prevents a watery tuna salad. Transfer the drained tuna to a large mixing bowl.
2. Flake the Tuna: Use a fork to gently flake the tuna into smaller, bite-sized pieces. Don’t over-mash it; you want some texture.
3. Dice Vegetables: Finely dice the celery and red onion. The smaller the dice, the better they integrate into the salad without being overwhelmingly chunky.
4. Combine Wet Ingredients: In a separate small bowl, whisk together the mayonnaise (or Greek yogurt), dill pickle relish, Dijon mustard, and lemon juice.
5. Mix Everything Together: Add the diced celery, red onion, and fresh dill (if using) to the flaked tuna. Pour the wet mixture over the tuna and vegetables.
6. Season and Mix: Gently fold all the ingredients together until well combined. Season generously with salt and black pepper to your taste. Taste and adjust seasonings as needed – perhaps a little more lemon, mustard, or relish.
7. Chill (Optional but Recommended): Cover the bowl and refrigerate for at least 15-30 minutes. This allows the flavors to deepen and meld beautifully.
8. Assemble Your Sandwich: Toast your favorite bread if desired. Spread a generous amount of your freshly made Tuna Salad Sandwich mixture onto one slice of bread. Top with lettuce, if using, and the second slice of bread.
9. Serve and Enjoy: Cut in half and savor your homemade masterpiece!
Nutritional Benefits & Advantages
Tuna is a powerhouse of nutrition, rich in lean protein, which is essential for muscle repair and satiety. It’s also an excellent source of Omega-3 fatty acids, known for their heart-healthy properties and ability to reduce inflammation. Incorporating vegetables like celery and onion adds fiber, vitamins, and minerals, making this Tuna Salad Sandwich a well-rounded and energy-boosting meal. Using Greek yogurt instead of mayonnaise can further boost protein content while reducing fat.
Tips, Variations & Cooking Advice
- Spice It Up: Add a pinch of cayenne pepper or a dash of hot sauce for a spicy kick.
- Herbaceous Heaven: Experiment with other fresh herbs like parsley or chives.
- Crunch Factor: Include finely chopped water chestnuts or toasted chopped almonds for extra texture.
- Caprese Twist: Mix in some chopped sun-dried tomatoes and a touch of balsamic glaze for a gourmet experience.
- No Mayo? No Problem! Use mashed avocado, hummus, or plain Greek yogurt as alternatives to mayonnaise for a creamier, lighter binder.
- Gluten-Free: Serve the tuna salad in lettuce cups, gluten-free bread, or atop rice crackers.
- Dairy-Free: Ensure your mayonnaise is dairy-free (most are, but always check labels).
- Portion Control: For lighter meals, serve the tuna salad on cucumber slices or bell pepper halves.
Common Mistakes to Avoid
- Not Draining Tuna Properly: This is the #1 culprit for a watery, bland tuna salad. Drain it thoroughly!
- Over-Mashing the Tuna: Aim for flaked, not pureed. Some texture is desirable.
- Skipping the Seasoning: Don’t be shy with salt and pepper. Taste and adjust. Lemon juice is also key for brightness.
- Too Much Mayo: Start with less and add more if needed. You want a creamy, not greasy, consistency.
- Not Chilling: While edible immediately, a short chill significantly improves flavor integration.
Storage & Meal Prep Tips
Your delicious tuna salad can be a fantastic meal prep staple.
- Storage: Store leftover tuna salad in an airtight container in the refrigerator for up to 3-4 days.
- Freezing: Tuna salad generally does not freeze well due to the mayonnaise base, which can separate upon thawing. It’s best enjoyed fresh from the fridge.
- Reheating: No reheating needed! This is a fantastic grab-and-go cold meal.
- Meal Prep: Prepare a larger batch of the tuna salad at the beginning of the week. Store it separately from your bread or lettuce wraps. Assemble your Tuna Salad Sandwich or other serving options fresh each day to maintain optimal texture.
Conclusion
Creating your own Tuna Salad Sandwich from scratch is a rewarding experience that yields far superior results than any store-bought alternative. By following this easy-to-follow tuna salad recipe, you’ve unlocked the secret to a flavorful, nutritious, and incredibly satisfying meal that can be customized to your heart’s content. Give it a try, experiment with variations, and share your delicious creations! We’d love to hear how you make this classic your own.
FAQs
Q1: Can I use fresh tuna instead of canned?
A1: Absolutely! Poach or grill fresh tuna, then flake it for a premium and even more flavorful tuna salad. Just ensure it’s cooked through.
Q2: What’s the best way to prevent my sandwich from getting soggy?
A2: Toasting your bread slightly helps create a barrier. You can also spread a thin layer of cream cheese or butter on one side of the bread to protect it, or simply put a layer of lettuce between the tuna salad and the bread.
Q3: How can I make this recipe lighter?
A3: Reduce the amount of mayonnaise or substitute it entirely with plain Greek yogurt or mashed avocado. Load up on extra vegetables like shredded carrots or bell peppers.
Q4: Can I add eggs to this tuna salad?
A4: Yes, hard-boiled eggs are a popular and delicious addition. Chop them finely and fold them into the tuna salad mixture for extra protein and creaminess.
Q5: What other ways can I serve tuna salad besides a sandwich?
A5: Tuna salad is incredibly versatile! Serve it in lettuce cups, scooped into half an avocado, as a topping for crackers, stuffed into bell pepper halves, or simply as a main dish with a side of fresh greens.