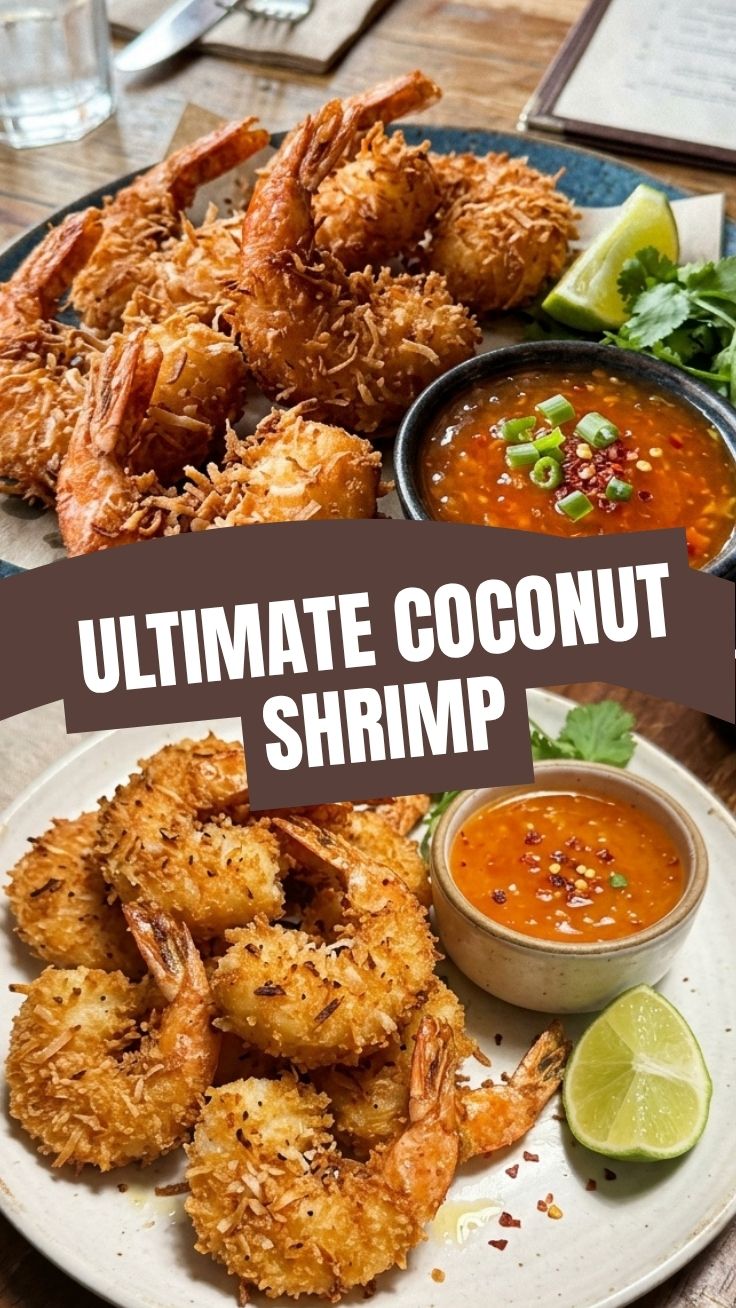
Unleash Your Inner Chef with the Ultimate Homemade Crispy Coconut Shrimp!
Ever dreamed of replicating that restaurant-quality Coconut Shrimp right in your own kitchen? That irresistible crunch, sweet coconut flavor, and juicy shrimp – it’s a culinary experience that often feels out of reach for home cooks. But what if I told you it’s not only achievable but also incredibly rewarding? Preparing this delectable dish from scratch allows for complete control over ingredients, ensuring freshness, quality, and often, a healthier alternative to store-bought or restaurant versions. Forget soggy, bland imitations; with this comprehensive guide, you’ll master a truly spectacular coconut shrimp recipe that will impress even the most discerning palates.
Ingredients & Kitchen Tools
Crafting the perfect Coconut Shrimp requires a few key ingredients and tools, each playing a crucial role in achieving that coveted texture and flavor.
- Large Raw Shrimp (Peeled, Deveined, Tail On): Approximately 1 lb (21-25 count). Tail-on adds a professional touch and a handle for dipping.
- All-Purpose Flour: ½ cup. Provides the initial coating for the shrimp, helping the egg adhere.
- Eggs: 2 large, whisked. Acts as the binder for the coconut coating.
- Sweetened Flaked Coconut: 1 ½ cups. The star ingredient, providing sweetness and that signature crunch.
- Panko Breadcrumbs: ½ cup. Enhances the crispiness without adding excessive sweetness.
- Salt: ½ tsp. Essential for seasoning and balancing flavors.
- Black Pepper: ¼ tsp. Adds a subtle hint of spice.
- Vegetable Oil or Canola Oil: 4-6 cups, for deep frying. Choose oils with a high smoke point.
- Large Frying Pan or Deep Fryer: For even cooking and temperature control.
- Shallow Bowls (3): For the dredging station (flour, egg, coconut/panko).
- Whisk: For whisking eggs.
- Tongs: For safely handling shrimp in hot oil.
- Wire Rack with Paper Towels: For draining excess oil and maintaining crispiness.
- Meat Thermometer (Optional but recommended): For precise oil temperature monitoring.
- Dipping Sauce of Choice (e.g., Sweet Chili Sauce, Pineapple Salsa): To complement the shrimp perfectly.
Prep Time & Cooking Schedule
- Prep Time: 20 minutes
- Cook Time: 8-10 minutes (in batches)
- Resting Time: 2-3 minutes (after frying)
- Marinating Time: Not applicable for this recipe.
This recipe is designed for efficiency. The prepping involves setting up your dredging station and cleaning the shrimp. The cooking itself is quick, but it’s crucial to cook in batches to maintain oil temperature and ensure even crispiness. Plan to serve immediately for the best texture.
Step-by-Step Instructions
1. Prepare the Shrimp: Pat the peeled and deveined shrimp very dry with paper towels. Excess moisture will prevent the coatings from adhering properly.
2. Set Up Dredging Station: In three separate shallow bowls, set up your dredging station.
* Bowl 1: Combine all-purpose flour, salt, and pepper.
* Bowl 2: Whisk the eggs thoroughly.
* Bowl 3: Combine sweetened flaked coconut and Panko breadcrumbs.
3. Coat the Shrimp: Working in batches, dredge each shrimp first in the flour mixture, shaking off any excess. Then dip it into the whisked egg, allowing excess to drip off. Finally, thoroughly coat it in the coconut and Panko mixture, gently pressing to ensure good adhesion. Place the coated shrimp on a clean plate or baking sheet. This careful coating is key to achieving that perfect fried Coconut Shrimp texture.
4. Heat the Oil: In a large, heavy-bottomed frying pan or deep fryer, heat 2-3 inches of vegetable or canola oil to 350°F (175°C). Use a meat thermometer to ensure accurate temperature.
5. Fry the Shrimp: Carefully add a few shrimp to the hot oil, ensuring not to overcrowd the pan. Overcrowding will lower the oil temperature and result in greasy, rather than crispy, shrimp. Fry for 2-3 minutes per side, or until golden brown and cooked through. Continue with the remaining shrimp, adjusting the heat as needed to maintain oil temperature. This precise frying is vital for the best coconut shrimp recipe.
6. Drain and Serve: Remove the cooked shrimp with tongs and place them on a wire rack lined with paper towels to drain excess oil. Serve immediately with your favorite dipping sauce.
Nutritional Benefits & Advantages
Shrimp itself is an excellent source of lean protein, low in calories, and rich in essential nutrients like selenium, vitamin B12, and phosphorus. While this fried version of coconut shrimp is certainly an indulgent treat, homemade preparation allows you to control the quality of the oil and coatings. Choosing a high-quality oil and patting dry ensures minimal grease. Furthermore, coconut provides healthy fats and fiber (though the sweetened variety adds sugar). Paired with a fresh, homemade dipping sauce, this dish can be part of a balanced meal.
Tips, Variations & Cooking Advice
- Air Fryer Option: For a lighter version, preheat your air fryer to 375°F (190°C). Lightly spray the coated shrimp with cooking spray. Air fry for 10-12 minutes, flipping halfway through, until golden brown and crispy.
- Spice it Up: Add a pinch of cayenne pepper or chili powder to the flour mixture for a subtle kick.
- Herbaceous Twist: Mix finely chopped fresh cilantro or parsley into the coconut mixture for added freshness.
- Gluten-Free: Substitute all-purpose flour with a gluten-free flour blend and ensure your Panko breadcrumbs are gluten-free.
- Unsweetened Coconut: For a less sweet profile, use unsweetened shredded coconut and add a pinch of sugar to the egg wash if desired.
- Dipping Sauce Ideas: Beyond sweet chili, consider a mango salsa, a spicy sriracha mayo, or a lime-cilantro crema.
Common Mistakes to Avoid
- Wet Shrimp: Not patting the shrimp dry enough leads to a soggy coating that won’t adhere properly.
- Overcrowding the Pan: This drastically drops the oil temperature, resulting in greasy shrimp that absorb too much oil and don’t crisp up. Fry in small batches.
- Incorrect Oil Temperature: Oil that’s too cool results in greasy shrimp; oil that’s too hot burns the coating before the shrimp cooks through. Use a thermometer.
- Not Pressing the Coconut: Ensure the coconut mixture is firmly pressed onto the shrimp for a robust, crispy coating.
- Skipping the Wire Rack: Draining on paper towels alone can trap steam, making the bottom of the shrimp soggy. A wire rack allows air circulation.
Storage & Meal Prep Tips
While Coconut Shrimp is best enjoyed fresh, leftovers can be stored in an airtight container in the refrigerator for up to 2-3 days. To reheat, avoid the microwave as it will make them rubbery. Instead, preheat your oven or air fryer to 350°F (175°C) and reheat for 5-7 minutes until crispy and warmed through. For meal prep, you can coat the shrimp ahead of time and store them in the refrigerator on a baking sheet lined with parchment paper for up to 24 hours before frying.
Conclusion
Mastering a homemade Coconut Shrimp is a truly satisfying culinary achievement. With this detailed guide, you now have all the tools and knowledge to create a restaurant-quality dish that’s crispy, flavorful, and incredibly rewarding to make. This ultimate coconut shrimp recipe isn’t just about frying shrimp; it’s about elevating your home cooking and delighting your taste buds. Give it a try, share your magnificent creations with us, and get ready to enjoy one of the most beloved seafood appetizers right from your own kitchen!
FAQs
Q1: Can I bake or air fry this recipe instead of deep-frying?
A1: Yes, you can! For baking, preheat your oven to 400°F (200°C), lightly spray the coated shrimp with oil, and bake for 12-15 minutes, flipping halfway. For air frying, follow the instructions in the “Tips, Variations & Cooking Advice” section above.
Q2: What’s the best way to get the coconut to stick to the shrimp?
A2: The key is to pat the shrimp very dry first, ensure a good adhesion of flour, then a thorough coating of egg, and finally, firmly press the coconut-Panko mixture onto the shrimp.
Q3: Can I use frozen shrimp?
A3: Absolutely. Just make sure to thaw the frozen shrimp completely in the refrigerator overnight or under cold running water, then pat them thoroughly dry before proceeding with the recipe.
Q4: My coconut shrimp turned out greasy. What went wrong?
A4: Greasy shrimp are typically a result of oil that isn’t hot enough. Make sure your oil maintains a temperature of 350°F (175°C) throughout the frying process, and avoid overcrowding the pan.
Q5: How can I make a simple homemade dipping sauce?
A5: A quick sweet chili lime dipping sauce can be made by combining 1/2 cup sweet chili sauce with 1 tablespoon fresh lime juice and a dash of sriracha for extra heat. Mix well and serve chilled.