Bake Your Best Thanksgiving Yet: The Ultimate Guide to Homemade Pumpkin Pie
Are you ready to transform your holiday table with a dessert that epitomizes comfort, tradition, and irresistible flavor? While store-bought options can be convenient, crafting a homemade Pumpkin Pie isn’t just about the decadent taste; it’s about the aroma that fills your home, the pride of presenting a dish made with love, and the ability to customize every element. This comprehensive guide will walk you through creating a flawless pie, from selecting the finest ingredients to mastering the perfect blend of notes that only a premium pumpkin pie spice can deliver. Get ready to impress your family and friends with a pie that tastes as good as it looks.
Ingredients & Kitchen Tools
Here’s everything you’ll need to conjure up this autumnal masterpiece:
Ingredients:
1 (15-ounce) can pumpkin puree: Ensure it’s 100% pure pumpkin, not pumpkin pie filling, which already contains sweeteners and spices.*
1 (12-ounce) can evaporated milk: Adds richness and creaminess without thinning the filling.*
2 large eggs: Acts as a binder, giving the pie its custard-like texture.*
¾ cup granulated sugar: Sweetens the pie to perfection.*
½ teaspoon salt: Enhances all the other flavors and balances sweetness.*
2 teaspoons pumpkin pie spice: The crucial blend of cinnamon, ginger, nutmeg, and cloves that defines the pie’s taste profile.*
1 (9-inch) unbaked pie crust: Homemade or store-bought, make sure it’s ready for filling. Flaky is key!*
Optional garnishes: Whipped cream, a sprinkle of ground cinnamon, or candied pecans. Elevates presentation and adds extra texture.*
Kitchen Tools:
9-inch pie plate: The standard size for a perfect pie.*
Large mixing bowl: For effortlessly combining all the filling ingredients.*
Whisk: Essential for thoroughly blending the ingredients and achieving a smooth consistency.*
Measuring cups and spoons: Accuracy is paramount in baking.*
Spatula: For scraping down the bowl and ensuring no delicious filling is left behind.*
Oven thermometer (optional but recommended): Ensures your oven is at the correct temperature for even baking.*
Pie crust shield (optional): Prevents the crust edges from over-browning.*
Prep Time & Cooking Schedule
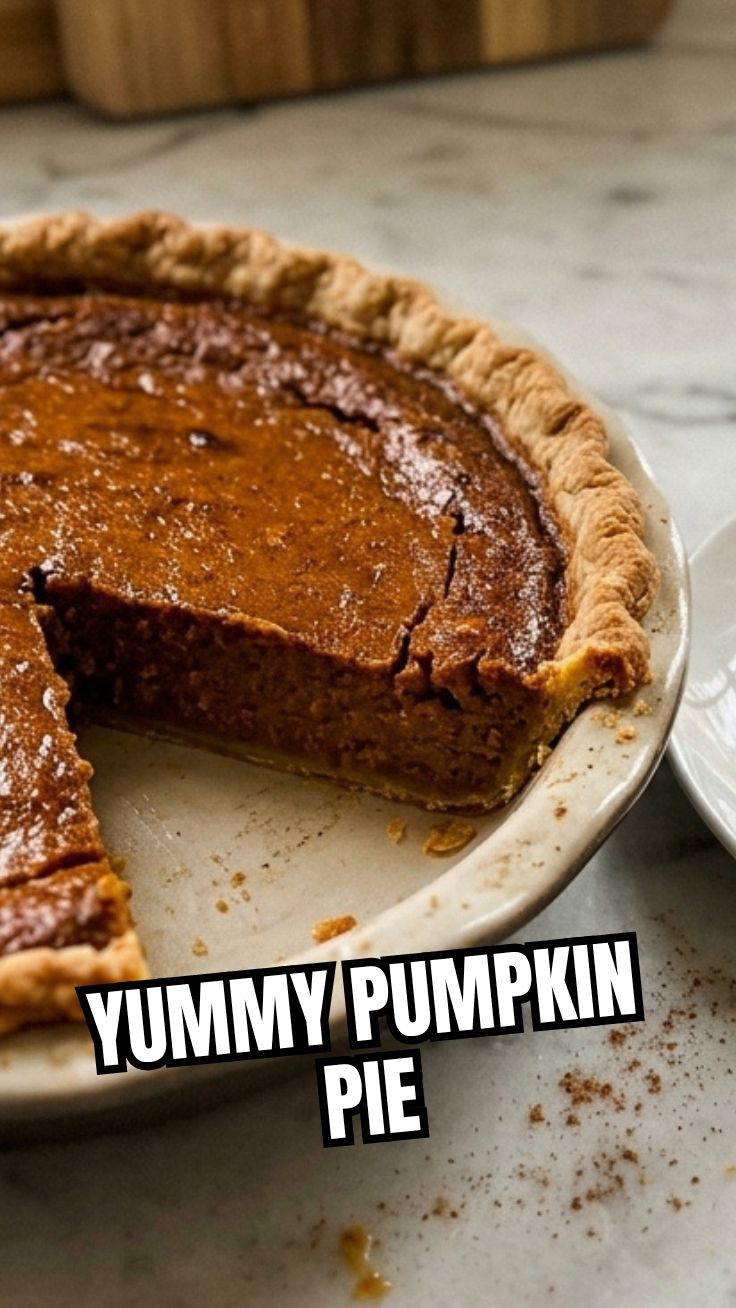
Planning your bake is key to a stress-free experience. This recipe requires:
- Prep Time: 15 minutes
- Cook Time: 50-60 minutes
- Cooling/Resting Time: At least 2-3 hours (or overnight)
For best results, bake your pie the day before you plan to serve it, allowing ample time for the custard to set completely. This prevents a watery center and ensures clean slices.
Step-by-Step Instructions
Follow these steps for a perfectly baked pie every time:
1. Preheat Oven & Prepare Crust: Preheat your oven to 425°F (220°C). If your pie crust isn’t pre-made, fit it into your 9-inch pie plate and crimp the edges decoratively. Some bakers like to par-bake their crust for 10 minutes at this temperature to prevent a soggy bottom, but it’s often not necessary for Pumpkin Pie.
2. Combine Wet Ingredients: In a large mixing bowl, whisk together the pumpkin puree, evaporated milk, and eggs until thoroughly combined and smooth.
3. Incorporate Dry Ingredients: In a separate small bowl, combine the granulated sugar, salt, and pumpkin pie spice. Gradually add this dry mixture to the wet pumpkin mixture, whisking until no lumps remain and the filling is uniform.
4. Fill and Bake: Carefully pour the prepared filling into your unbaked pie crust. Place the pie on a baking sheet (to catch any spills) and transfer it to the preheated oven.
5. Initial High Heat Bake: Bake at 425°F (220°C) for 15 minutes. This high heat helps the crust set quickly and prevents sogginess.
6. Reduce Heat & Continue Baking: Reduce the oven temperature to 350°F (175°C) and continue baking for another 35-45 minutes, or until a knife inserted near the center comes out clean. The center might still be slightly wobbly, but it will set as it cools. If the crust edges are browning too quickly, cover them with aluminum foil or a pie crust shield.
7. Cool Completely: Remove the pie from the oven and place it on a wire rack to cool completely. This crucial step allows the custard to firm up. Do not slice while warm!
Nutritional Benefits & Advantages
Pumpkin is more than just a seasonal flavor; it’s a nutritional powerhouse! It’s rich in Vitamin A (from beta-carotene), which is vital for vision and immune function, and a good source of Vitamin C, potassium, and fiber. The eggs provide protein, while milk contributes calcium. While it is a dessert, a slice of homemade Pumpkin Pie offers a dose of beneficial nutrients alongside its delicious taste, especially when compared to highly processed alternatives.
Tips, Variations & Cooking Advice
- Spice it Up (or Down): Feel free to adjust the amount of pumpkin pie spice to your preference. For a stronger flavor, add an extra half teaspoon; for a milder taste, reduce it slightly.
- Homemade Crust: For an even richer flavor, consider making your own buttery, flaky pie crust from scratch.
- Sweetener Alternatives: You can substitute some of the granulated sugar with brown sugar for a deeper, molasses-like flavor.
- Dairy-Free: Use a dairy-free evaporated milk substitute (like evaporated coconut milk) and a dairy-free pie crust for a delicious alternative.
- Crust Designs: Get creative with your crust! Use cookie cutters to make leaf shapes to adorn the top or a braid around the edge.
- Prevent Cracks: To prevent the top of the pie from cracking, avoid overbaking. The slightest wobble in the center is a good sign.
Common Mistakes to Avoid
- Using Pumpkin Pie Filling: Always use 100% pure pumpkin puree, not the pre-spiced and sweetened “pumpkin pie filling.”
- Overbaking: This leads to a dry, cracked filling. The pie is done when a knife inserted near the edge comes out clean; the center will set as it cools.
- Soggy Bottom: Ensure your oven is hot enough initially. Some prefer to par-bake the crust, but a hot oven and proper cooling often suffice.
- Not Cooling Completely: Slicing the pie before it’s fully cooled and set will result in a messy, undercooked appearance. Patience is key!
Storage & Meal Prep Tips
Baked Pumpkin Pie should be stored in the refrigerator, loosely covered with plastic wrap or aluminum foil, for up to 3-4 days. It can also be frozen for longer storage: wrap the cooled pie tightly in several layers of plastic wrap and then aluminum foil. It will keep for up to 1 month. Thaw in the refrigerator overnight before serving. Reheating is generally not recommended for custards as it can alter the texture, but it can be gently warmed in a low oven if desired.
Conclusion
Crafting a homemade Pumpkin Pie is a rewarding experience that yields delicious results. By following these detailed steps, you’ll create a perfectly spiced, beautifully baked pie that embodies the spirit of the season. The rich, creamy texture and the comforting aroma of fresh pumpkin pie spice will undoubtedly make this a cherished tradition. Don’t hesitate – bake your best pie yet! We’d love to hear about your baking success; share your creations in the comments below!
FAQs
Q1: My pie’s top cracked. What went wrong?
A1: Cracking usually indicates overbaking. Next time, aim for a slight jiggle in the center when you remove it from the oven, as it will continue to set as it cools.
Q2: Can I use fresh pumpkin instead of canned?
A2: Yes, absolutely! Roasting and pureeing your own pumpkin adds an even fresher flavor. Just make sure it’s thick and free of excess moisture.
Q3: How can I prevent the crust from getting soggy?
A3: Ensure your oven is preheated properly. You can also brush the bottom of the crust with a lightly beaten egg white before filling and baking, or par-bake the crust for 10-15 minutes before adding the filling.
Q4: What if I don’t have pumpkin pie spice?
A4: You can make your own! A good substitute blend is ¾ teaspoon ground cinnamon, ¼ teaspoon ground ginger, ⅛ teaspoon ground nutmeg, and a pinch of ground cloves.
Q5: Can I make mini pumpkin pies?
A5: Yes! Use a muffin tin lined with small pie crusts. Reduce baking time accordingly, usually to about 20-30 minutes, or until set.