Master the Art of Homemade Pumpkin Perfection: Your Ultimate Guide to a Decadent Pumpkin Cheesecake
Ever wondered how to capture the quintessential flavors of autumn in a single, show-stopping dessert? The answer lies in the sublime simplicity of a homemade pumpkin cheesecake. Forget those store-bought imitations; crafting your own Pumpkin Cheesecake at home not only guarantees unparalleled freshness and flavor but also fills your kitchen with an intoxicating aroma that signals holiday cheer. This comprehensive guide will walk you through every step to create a velvety, perfectly spiced masterpiece that will have everyone asking for your secret recipe. We’ll delve into the nuances of texture, the magic of autumn spices, and even how to perfect that delightful pumpkin spice cheesecake experience, ensuring your dessert is not just delicious but truly memorable.
Ingredients & Kitchen Tools
Gathering your mise en place is the first step to baking success. Here’s a detailed list with helpful clarifications:
Ingredients:
- For the Crust:
* 1 ½ cups graham cracker crumbs (about 12–14 full sheets, crushed) – Provides a classic, slightly sweet, and crunchy base.
* ¼ cup granulated sugar – Balances the graham cracker flavor and helps with caramelization.
* 6 tablespoons unsalted butter, melted – Binds the crumbs together for a sturdy crust.
- For the Filling:
* 24 ounces cream cheese, softened (3 blocks, full-fat recommended) – The foundation of cheesecakes; softened for a smooth, lump-free batter.
* 1 cup granulated sugar – Sweetens the cheesecake and enhances overall flavor.
* ½ cup packed light brown sugar – Adds depth and a hint of molasses, complementing the pumpkin.
* 15 ounces canned pumpkin puree (NOT pumpkin pie filling) – The star ingredient, offering natural pumpkin flavor and moisture.
* 2 large eggs + 1 egg yolk, at room temperature – Provide structure and richness, room temperature eggs emulsify better.
* 1 teaspoon vanilla extract – Enhances all other flavors.
* 1 teaspoon ground cinnamon – Essential fall spice for warmth and aroma.
* ½ teaspoon ground ginger – Adds a subtle spicy kick.
* ¼ teaspoon ground nutmeg – Earthy and aromatic, a classic pumpkin pie spice.
* ⅛ teaspoon ground cloves (optional) – For an extra layer of warm, pungent spice.
* Pinch of salt – Balances sweetness and brightens flavors.
- For the Topping (Optional):
* 1 cup heavy cream, chilled – For a light, airy whipped cream.
* 2 tablespoons powdered sugar – Sweetens the whipped cream.
* ½ teaspoon vanilla extract – Enhances whipped cream flavor.
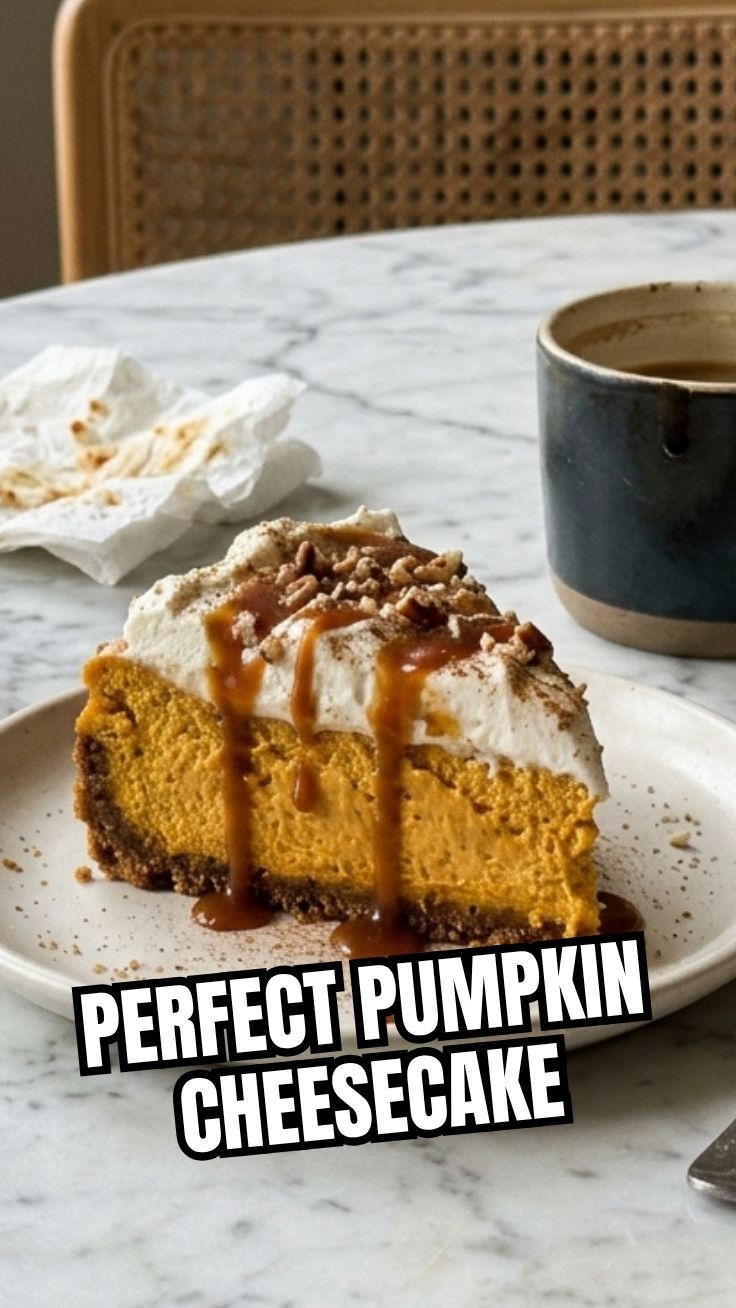
* Chopped pecans or a sprinkle of extra cinnamon – For garnish.
Kitchen Tools:
- 9-inch springform pan: Essential for easily releasing the cheesecake.
- Aluminum foil: To create a water bath barrier.
- Large mixing bowls (2-3): For separate ingredients and mixing.
- Electric mixer (stand or hand-held): For achieving a smooth, well-combined batter.
- Rubber spatula: For scraping down bowls and incorporating ingredients.
- Measuring cups and spoons: For accurate ingredient quantities.
- Parchment paper: Optional, for lining the bottom of the springform pan to prevent sticking.
- Large roasting pan: For the water bath.
Prep Time & Cooking Schedule
Crafting this decadent dessert requires a mindful schedule to ensure perfection. Here’s how to plan your baking adventure:
- Prep Time: 30 minutes
- Bake Time: 60-75 minutes (or until the edges are set and the center jiggles slightly)
- Cooling Time (Room Temperature): 1-2 hours
- Chill Time (Refrigerator): 6-8 hours (or preferably overnight for optimal setting)
The lengthy chill time is crucial; it allows the cheesecake to fully set, preventing cracks and ensuring a firm, sliceable texture. Don’t rush this step!
Step-by-Step Instructions
Follow these detailed steps to create your perfect Pumpkin Cheesecake:
1. Prepare the Crust: Preheat your oven to 350°F (175°C). In a medium bowl, combine graham cracker crumbs, granulated sugar, and melted butter. Press the mixture firmly into the bottom of a 9-inch springform pan. You can use the bottom of a glass or your knuckles. Bake for 8-10 minutes until lightly golden. Remove from oven and let cool completely. Wrap the outside of the springform pan tightly with heavy-duty aluminum foil, covering the bottom and sides, preparing it for the water bath.
2. Make the Filling: In a large mixing bowl, beat softened cream cheese with an electric mixer on medium speed until smooth and creamy, about 2-3 minutes. This is crucial for a lump-free cheesecake. Gradually add the granulated sugar and brown sugar, continuing to beat until well combined and fluffy. Scrape down the sides of the bowl.
3. Incorporate Pumpkin and Spices: Add the pumpkin puree, vanilla extract, cinnamon, ginger, nutmeg, cloves (if using), and salt to the cream cheese mixture. Beat on low speed until just combined. Overmixing at this stage can incorporate too much air.
4. Add Eggs: Beat in the eggs and egg yolk one at a time, mixing on low speed only until each egg is just incorporated. Do not overmix after adding the eggs, as this can lead to cracks in your cheesecake. You’re aiming for a silky-smooth pumpkin spice cheesecake batter.
5. Bake in a Water Bath: Pour the cheesecake batter over the cooled crust in the foil-wrapped springform pan. Place the springform pan into a larger roasting pan. Carefully pour hot water into the roasting pan until it reaches halfway up the sides of the springform pan. This water bath ensures even baking and a moist, crack-free cheesecake.
6. Bake: Bake for 60-75 minutes. The cheesecake is done when the edges are set, but the center still has a slight wobble when gently jiggled.
7. Cooling and Chilling: Carefully remove the springform pan from the water bath and remove the foil. Let the cheesecake cool completely on a wire rack at room temperature for 1-2 hours. Once cooled, cover loosely with plastic wrap and refrigerate for at least 6-8 hours, or ideally overnight, for best results.
8. Serve: Once chilled, run a thin knife around the edge of the pan before releasing the spring. Slice and serve plain or with an optional dollop of whipped cream and a sprinkle of chopped pecans or cinnamon.
Nutritional Benefits & Advantages
Beyond its irresistible taste, this Pumpkin Cheesecake offers some surprising nutritional perks. Pumpkin, the star ingredient, is a powerhouse of Vitamin A (in the form of beta-carotene), essential for vision, immune function, and skin health. It’s also a good source of Vitamin C, contributing to antioxidant protection, and fiber, which aids in digestion and can help with satiety. While cheesecake is an indulgence, making it at home allows you to control the quality of ingredients, opting for full-fat dairy for better nutrient absorption, and using natural spices like cinnamon and ginger, which are known for their anti-inflammatory properties.
Tips, Variations & Cooking Advice
- Crust Variations: Instead of graham crackers, try gingersnaps for an extra spicy kick, or even digestive biscuits. For a gluten-free option, use gluten-free graham cracker crumbs.
- Flavor Boosts: Enhance the spice profile by adding a pinch of ground cardamom or allspice. For a boozier twist, add a tablespoon of dark rum or brandy to the filling.
- No Water Bath? While highly recommended for preventing cracks, if you’re truly against a water bath, you can bake it directly. Just remember to have a pan of hot water on the bottom rack of your oven to provide humidity.
- Portion Control: For individual servings, bake the batter in cupcake liners for delicious pumpkin spice cheesecake bites. Adjust baking time accordingly.
- Decorating Ideas: Drizzle with caramel sauce, sprinkle with toasted pecans, or pipe decorative whipped cream patterns for a professional touch.
Common Mistakes to Avoid
- Overmixing the Batter: This is the nemesis of a smooth cheesecake. Overmixing incorporates too much air, which expands during baking and then collapses, leading to cracks. Mix until just combined.
- Using Cold Cream Cheese/Eggs: Cold ingredients don’t emulsify well, resulting in a lumpy batter. Always ensure your cream cheese and eggs are at room temperature.
- Skipping the Water Bath: This hot water bath provides humidity and gentle, even heat, preventing the center from rising too high and then sinking or cracking.
- Opening the Oven Door Frequently: Resist the urge! Each time you open the door, cold air rushes in, causing temperature fluctuations that can also lead to cracks.
- Not Chilling Long Enough: Patience is key. An under-chilled cheesecake will be soft, difficult to slice cleanly, and lack the firm, creamy texture it’s famous for.
Storage & Meal Prep Tips
Leftover Pumpkin Cheesecake should be stored in an airtight container in the refrigerator for up to 5-7 days. For longer storage, cheesecake freezes beautifully! Slice the cooled cheesecake into individual portions, wrap each slice tightly in plastic wrap, then an additional layer of aluminum foil. Place the wrapped slices in a freezer-safe bag or container and freeze for up to 2-3 months. Thaw frozen cheesecake slices in the refrigerator overnight before serving. Do not refreeze thawed cheesecake.
Conclusion
There you have it—your ultimate guide to creating a truly spectacular homemade Pumpkin Cheesecake. With its creamy texture, aromatic spices, and irresistible pumpkin flavor, this dessert is more than just a treat; it’s a celebration of autumn’s bounty. By following these pro tips and clear instructions, you’ll master not only the classic rendition but also achieve that perfect pumpkin spice cheesecake experience without any stress. Don’t hesitate to give this recipe a try and share your baking triumphs in the comments below! What are your favorite fall desserts?
FAQs
Q1: Why did my cheesecake crack?
A1: Cracks are often caused by quick temperature changes, overmixing the batter (incorporating too much air), or not using a water bath. Ensure ingredients are at room temperature and the cheesecake cools gradually.
Q2: Can I use canned pumpkin pie filling instead of puree?
A2: No, pumpkin pie filling contains added sugars and spices, which will alter the flavor and sweetness of your cheesecake. Always use 100% pure canned pumpkin puree.
Q3: How do I know when my cheesecake is done?
A3: The edges should be set and slightly puffed, while the very center (about 2-3 inches) will still have a slight jiggle when gently shaken. It will continue to set as it cools.
Q4: Can I make this cheesecake gluten-free?
A4: Absolutely! Simply substitute the graham cracker crumbs with gluten-free graham cracker or cookie crumbs for the crust. The filling is naturally gluten-free.
Q5: What’s the best way to prevent the crust from becoming soggy?
A5: Ensure the crust is adequately baked and completely cooled before adding the filling. The water bath primarily affects the filling, but a well-baked and cooled crust helps maintain its integrity.