Unlock the Secret to Tender, Flavorful Pot Roast: Your Ultimate Guide to Culinary Comfort
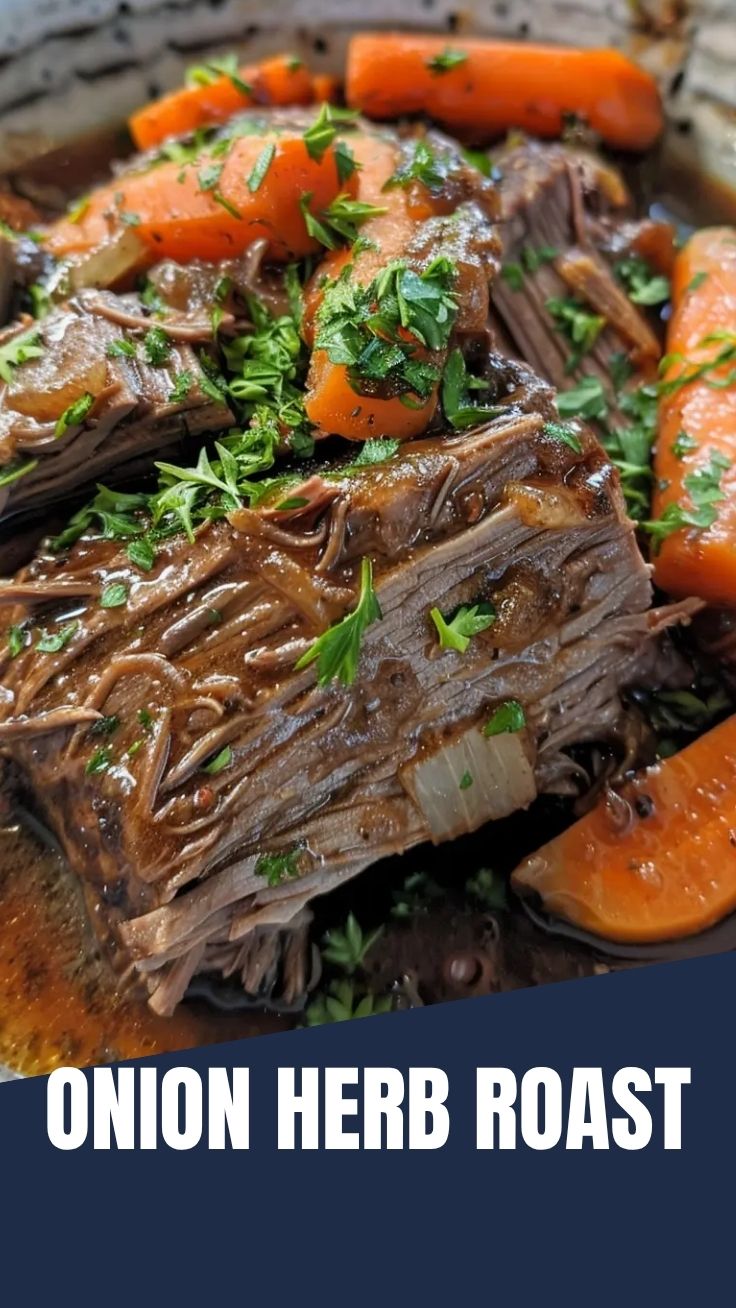
Ever dreamt of a meal that effortlessly melds succulent meat with rich, savory vegetables, filling your home with an aroma that promises pure indulgence? That dream becomes a delicious reality with a perfectly prepared Pot Roast. Forget bland, dry cuts; we’re about to dive into creating a dish so tender it practically melts in your mouth, a true testament to the magic of slow cooking. This recipe isn’t just about food; it’s about comfort, tradition, and the simple joy of sharing a heartwarming meal with loved ones. And with our detailed guide, even a novice can master this culinary classic using a Slow Cooker.
Ingredients & Kitchen Tools
3-4 lb Chuck Roast: The ideal cut for pot roast due to its marbling and ability to tenderize beautifully with slow cooking. Substitution: Brisket or Rump Roast can also work, though they might require slight adjustments in cooking time.*
- 2 tbsp Olive Oil: For searing the beef, creating a delicious crust and locking in flavors.
- 1 large Yellow Onion (chopped): Adds foundational sweetness and aromatic depth.
- 4 Carrots (peeled and cut into large chunks): Provides natural sweetness and essential nutrients.
- 4 Celery Stalks (cut into large chunks): Contributes an earthy, savory flavor to the broth.
4-5 Red Potatoes (quartered): Hearty and satisfying, absorbing the rich flavors of the roast. Substitution: Yukon Gold or standard Russet potatoes can be used.*
- 4 cloves Garlic (minced): Pungent and aromatic, a crucial flavor enhancer.
2 cups Beef Broth (low sodium): The liquid base for the tenderizing process and flavor development. Substitution: Red wine or a combination of broth and water can be used for variations.*
- 1 can (14.5 oz) Diced Tomatoes (undrained): Adds acidity and a subtle sweetness, helping to tenderize the meat.
- 2 tbsp Tomato Paste: Intensifies the tomato flavor and adds richness.
- 1 tsp Dried Thyme: Classic herb for savory dishes, adding an earthy aroma.
- 1 tsp Dried Rosemary: Robust herb that pairs perfectly with beef.
- 2 Bay Leaves: Infuses a subtle, herbal note into the broth.
- Salt and Black Pepper to taste: Essential for seasoning and bringing out all the flavors.
- Optional: Fresh Parsley (for garnish): Adds a touch of freshness and color.
Kitchen Tools:
- Large Slow Cooker (6-quart or larger): The star of the show for hands-off, tender cooking.
- Large Skillet or Dutch Oven: For searing the chuck roast.
- Cutting Board and Sharp Knife: For preparing vegetables and meat.
- Measuring Spoons and Cups: For accurate ingredient quantities.
- Tongs: For handling the hot meat.
Prep Time & Cooking Schedule
- Active Prep Time: 20-25 minutes (searing beef, chopping vegetables)
- Slow Cooker Cook Time:
* HIGH: 4-5 hours
* LOW: 7-8 hours
- Resting Time: 15-20 minutes (after cooking, before shredding/serving)
This schedule allows for flexible meal planning. Start your Pot Roast in the morning for an evening meal on LOW, or get it going in the early afternoon for a dinner on HIGH. The beauty of the slow cooker is its adaptability!
Step-by-Step Instructions
1. Prepare the Chuck Roast: Pat the chuck roast dry with paper towels. Season generously with salt and black pepper on all sides. This initial seasoning is crucial for a flavorful overall dish.
2. Sear the Beef: Heat olive oil in a large skillet or Dutch oven over medium-high heat until shimmering. Carefully place the seasoned chuck roast in the hot pan and sear for 3-4 minutes per side until a deep a golden-brown crust forms. This browning step adds immense flavor (the Maillard reaction!) that you wouldn’t get otherwise.
3. Sauté Aromatics: Remove the seared beef from the skillet and set aside. Add chopped onions, carrots, and celery to the same skillet. Sauté for 5-7 minutes until softened, scraping up any browned bits from the bottom of the pan. Stir in the minced garlic and tomato paste, cooking for another minute until fragrant.
4. Deglaze and Transfer: Pour in the beef broth, scraping the bottom of the pan to release all the flavorful fond. Add the diced tomatoes (undrained), dried thyme, dried rosemary, and bay leaves. Bring to a gentle simmer.
5. Assemble the Slow Cooker: Place the seared Pot Roast into your slow cooker. Pour the vegetable and broth mixture over the beef. Arrange the quartered potatoes around the meat, ensuring they are partially submerged in the liquid.
6. Slow Cook: Cover the slow cooker and cook on LOW for 7-8 hours or on HIGH for 4-5 hours, or until the beef is incredibly tender and easily shredded with a fork. The cooking time will vary slightly depending on your slow cooker and the size of your roast.
7. Rest and Serve: Once cooked, carefully remove the beef from the slow cooker and place it on a cutting board. Tent loosely with foil and let it rest for 15-20 minutes. This allows the juices to redistribute, ensuring a more succulent result. While the meat rests, you can discard the bay leaves from the vegetables and gravy.
8. Shred and Serve: After resting, shred the pot roast using two forks, or slice it against the grain. Serve hot with the tender vegetables and plenty of the rich, savory gravy from the slow cooker. Garnish with fresh parsley if desired.
Nutritional Benefits & Advantages
This hearty Pot Roast is a powerhouse of nutrition. Chuck roast is an excellent source of protein, essential for muscle repair and growth, as well as iron and B vitamins. The abundance of vegetables like carrots, celery, and potatoes provides a rich supply of dietary fiber, vitamins A and C, and important minerals, supporting digestive health and boosting immunity. Cooking it in a slow cooker also helps retain more nutrients by minimizing evaporation and high-heat exposure typically found in other cooking methods. It’s a balanced, wholesome, and satisfying one-pot meal.
Tips, Variations & Cooking Advice
- Flavor Boost: For an extra layer of flavor, add a splash of red wine (Cabernet Sauvignon or Merlot works well) to the broth mixture in step 4.
- Herb Power: Experiment with fresh herbs! A sprig of fresh rosemary or thyme added during the last hour of cooking will infuse an even brighter aroma.
- Thickening the Gravy: If you prefer a thicker gravy, after the meat is removed, whisk 2 tablespoons of cornstarch with 2 tablespoons of cold water to create a slurry. Stir this into the hot liquid in the slow cooker, set it to HIGH, and cook for 15-30 minutes until thickened.
- Spicy Kick: A pinch of red pepper flakes can add a subtle heat to the dish.
- Dietary Adaptations:
* Gluten-Free: This recipe is naturally gluten-free! Ensure your beef broth is certified gluten-free.
* Dairy-Free: This recipe is naturally dairy-free.
- Portion Control: To adjust for smaller or larger groups, simply scale the ingredients up or down, remembering that cooking times might need slight adjustment, especially for significantly larger cuts of meat.
Common Mistakes to Avoid
- Skipping the Searing: Don’t skip searing the beef! This step is crucial for developing deep, rich flavors through the Maillard reaction. Unseared pot roast will lack complexity.
- Overcrowding the Slow Cooker: Ensure there’s enough room for air circulation. If the slow cooker is too full, it can affect cooking consistency.
- Peeking Too Often: Every time you lift the lid, heat escapes, and your cooking time will be extended. Resist the urge to peek frequently!
- Not Enough Liquid: While you don’t want to drown the meat, ensuring adequate liquid is essential for tenderizing and creating that delicious gravy. The liquid should come about halfway up the roast.
- Underseasoning: Pot roast needs bold seasoning. Don’t be shy with salt and pepper, especially before searing.
Storage & Meal Prep Tips
- Refrigeration: Leftover Pot Roast can be stored in an airtight container in the refrigerator for 3-4 days. Separate the meat from the gravy and vegetables for easier reheating if desired.
- Freezing: This dish freezes beautifully! Once completely cooled, transfer portions of the pot roast, vegetables, and gravy to freezer-safe containers or heavy-duty freezer bags. It can be frozen for up to 3 months. Thaw overnight in the refrigerator before reheating.
- Reheating: Gently reheat on the stovetop over medium-low heat or in the microwave until warmed through. Adding a splash of extra beef broth can help maintain moisture and prevent drying out. For best results, reheat slowly to preserve texture and flavor.
Conclusion
There you have it – the ultimate guide to creating a mouthwatering Pot Roast that will impress without the stress. This recipe celebrates the magic of patient cooking, transforming simple ingredients into a dish that’s rich in flavor, tender in texture, and deeply comforting for the soul. The ease of a Slow Cooker truly makes this a weeknight warrior or a weekend feast. Don’t just read about it; dive in and experience the joy of making this culinary classic at home. We’d love to hear about your creations in the comments below!
FAQs
Q1: Can I use frozen chuck roast in the slow cooker?
A1: It’s generally not recommended to place frozen meat directly into a slow cooker due to food safety concerns (meat spending too long in the “danger zone” temperature range). Always thaw your chuck roast completely in the refrigerator before cooking.
Q2: My pot roast isn’t tender. What went wrong?
A2: Lack of tenderness usually means it hasn’t cooked long enough. Slow cookers operate at lower temperatures, requiring longer cooking times to break down connective tissues in the meat. Continue cooking until it’s easily shredded with a fork.
Q3: Can I add other vegetables?
A3: Absolutely! Mushrooms, parsnips, or even bell peppers can be wonderful additions. Add hardier vegetables like parsnips at the beginning, and softer ones like mushrooms during the last hour of cooking.
Q4: How do I prevent my vegetables from getting mushy?
A4: Cut your vegetables into larger chunks so they hold their shape better during the long cooking process. You can also add very soft vegetables like peas or green beans during the last 30-60 minutes to ensure they retain some texture.
Q5: My gravy is too thin. How can I fix it?
A5: You can thicken the gravy as mentioned in the “Tips, Variations & Cooking Advice” section by creating a cornstarch slurry. Alternatively, remove some of the liquid and reduce it in a saucepan on the stovetop until it reaches your desired consistency, then mix it back in.