Unleash Your Inner Confectioner: Crafting the Perfect Homemade Rice Crispy Treats
Ever wondered what secret ingredient makes those iconic crispy, gooey treats so undeniably addictive? It’s not magic, it’s a perfect blend of simplicity and satisfying sweetness! Today, we’re diving into the delightful world of crafting your own homemade Rice Crispy Treats, a timeless dessert that promises smiles with every bite. Forget the store-bought versions; preparing these at home is not only incredibly easy but allows you to customize them to your heart’s content, ensuring a fresher, more flavorful experience. Whether you call them Rice Crispy Treats or Rice Krispie squares, the joy of making them yourself is truly unmatched. Let’s get started on your sweet adventure!
Ingredients & Kitchen Tools
Gathering your supplies is the first step to sweet success!
- Unsalted Butter (3 tablespoons): Provides richness and helps the marshmallows melt smoothly. Unsalted butter allows you to control the sweetness.
- Mini Marshmallows (10 ounces, about 6 cups): The star of the show, delivering that classic chewy texture. Mini marshmallows melt faster and more evenly.
- Rice Cereal (6 cups): The beloved crispy foundation. Ensure it’s fresh for optimal crunch.
- Vanilla Extract (1 teaspoon, optional): Enhances the flavor profile with a subtle warmth.
- Salt (1/4 teaspoon, optional): A pinch of salt balances the sweetness and elevates other flavors.
- 9×13 inch baking pan: Essential for forming and cooling your treats.
- Parchment paper or aluminum foil: For easy removal and cleanup.
- Large saucepan or Dutch oven: To melt the butter and marshmallows.
- Rubber spatula or wooden spoon: For mixing everything together without sticking.
- Cooking spray or butter: To coat your hands or the spatula for pressing.
Prep Time & Cooking Schedule
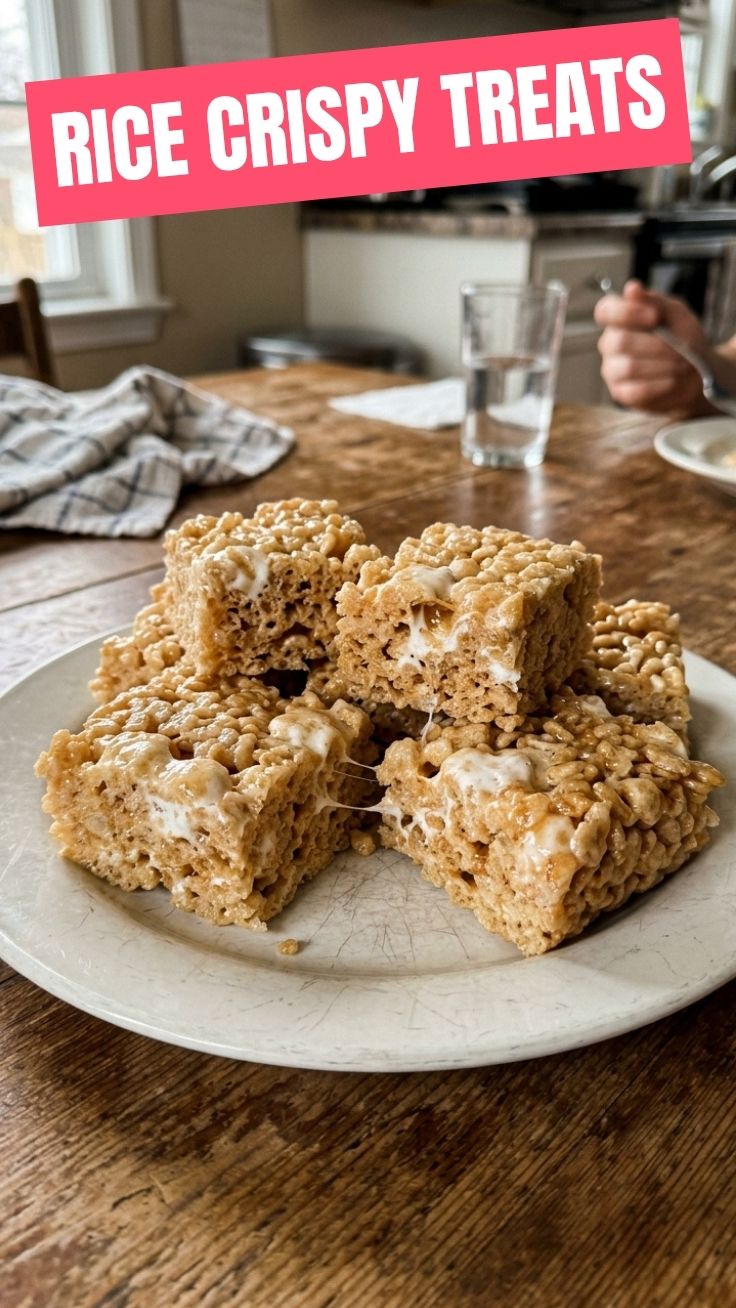
Good news – this recipe is incredibly quick!
- Prep Time: 10 minutes
- Cook Time: 5-7 minutes
- Resting Time: 30 minutes (to set and cool)
This means you can have these delightful treats ready to enjoy in under an hour, making them perfect for last-minute cravings or spontaneous gatherings.
Step-by-Step Instructions
Follow these simple steps for perfect Rice Crispy Treats every time!
1. Prepare Your Pan: Line a 9×13 inch baking pan with parchment paper or aluminum foil, leaving an overhang on the sides for easy lifting. Lightly grease the paper/foil with cooking spray or butter.
2. Melt Butter: In a large saucepan or Dutch oven, melt the unsalted butter over low heat. Low heat is key to prevent the butter from burning and the marshmallows from browning too quickly.
3. Add Marshmallows: Once the butter is melted, add the mini marshmallows to the saucepan. Continue to cook over low heat, stirring constantly with a rubber spatula, until the marshmallows are completely melted and smooth. This typically takes about 5-7 minutes.
4. Flavor It Up (Optional): Remove the saucepan from the heat. Stir in the vanilla extract and salt (if using).
5. Incorporate Cereal: Add the rice cereal to the melted marshmallow mixture. Stir quickly and thoroughly until the cereal is evenly coated. Ensure every flake is lovingly enveloped in that sweet goodness to create perfect Rice Krispie squares.
6. Press into Pan: Transfer the mixture to your prepared baking pan. Lightly grease your hands or a rubber spatula with butter or cooking spray. Gently and evenly press the mixture into the pan. Avoid pressing too hard, as this can make the treats dense and less chewy.
7. Cool and Cut: Let the treats cool completely at room temperature for at least 30 minutes, or until firm. Once cooled, use the parchment paper overhang to lift the entire slab out of the pan. Place it on a cutting board and cut into squares or desired shapes.
Nutritional Benefits & Advantages
While these treats are undoubtedly a sweet indulgence, they offer a few straightforward advantages. The base ingredient, rice cereal, is typically low in fat and cholesterol-free. When made at home, you have complete control over the amount and type of butter used, and you can even opt for lower-sugar marshmallows if preferred. They are also a great option for those with nut allergies, offering a safe and delicious snack.
Tips, Variations & Cooking Advice
- Brown Butter Boost: For a more sophisticated flavor profile, brown the butter slightly before adding the marshmallows. This adds a nutty, rich aroma.
- Chocolate Drizzle: Once cooled, melt some chocolate chips and drizzle over the top for an extra layer of decadence.
- Sprinkle Fun: Add festive sprinkles to the warm mixture before pressing it into the pan, or sprinkle them on top for a pop of color.
- Extra Marshmallow Gooeyness: Press a few extra mini marshmallows into the top of the treats right after spreading them in the pan for pockets of extra gooeyness.
- Dietary Adaptations:
* Gluten-Free: Ensure your rice cereal is certified gluten-free. Most basic rice cereals are naturally gluten-free, but always check the label.
* Dairy-Free: Use a plant-based butter alternative (like coconut oil or vegan butter) and ensure your marshmallows are dairy-free (most are, but some brands may contain milk products).
Common Mistakes to Avoid
- High Heat: Cooking butter and marshmallows over high heat can burn the butter and make the marshmallows brittle, resulting in hard, unappetizing treats. Always use low heat.
- Over-Compacting: Pressing the mixture too firmly into the pan will yield dense, hard treats instead of light, chewy ones. Gentle pressing is key.
- Stale Cereal: Using old or stale rice cereal will result in a less crispy texture. Always use fresh cereal.
- Skipping Grease: Not greasing your hands or spatula before pressing can lead to a sticky, frustrating mess.
Storage & Meal Prep Tips
Homemade Rice Crispy Treats are best enjoyed fresh, but they store well for a few days.
- Storage: Store cut squares in an airtight container at room temperature. Layer them between sheets of parchment paper to prevent sticking.
- Shelf Life: They will stay fresh and chewy for 2-3 days. Beyond that, they tend to harden.
- Freezing: Freezing is not recommended as it changes the texture, often making them crumbly upon thawing.
- Reheating: Avoid reheating in the microwave, as this can make them tough. If they’ve hardened slightly, simply let them sit at room temperature for a bit to soften naturally.
Conclusion
There you have it – the ultimate guide to creating unbelievably delicious homemade Rice Crispy Treats! This recipe proves that sometimes, the simplest things bring the most joy. With minimal effort, you can whip up a batch of these classic Rice Krispie squares that are far superior to any store-bought version. So, go ahead, gather your ingredients, and embark on this sweet journey. We encourage you to try this recipe, experiment with the variations, and share your delightful creations!
FAQs
Q1: My treats turned out hard. What went wrong?
A1: This usually happens from cooking the marshmallows over too high heat, leading to crystallization, or pressing the mixture too firmly into the pan. Remember to use low heat and press gently.
Q2: Can I use flavored marshmallows?
A2: Absolutely! Flavored marshmallows (like strawberry or chocolate) can add a fun twist. Adjust vanilla extract or other flavorings accordingly.
Q3: How can I make them extra gooey?
A3: To achieve extra gooeyness, reduce the amount of rice cereal by a cup or add an extra cup of mini marshmallows to the recipe. You can also mix in some extra mini marshmallows after removing the melted mixture from the heat, allowing them to partially melt.
Q4: Can I add mix-ins like chocolate chips or nuts?
A4: Yes! Wait until the mixture has cooled slightly before adding chocolate chips or candies to prevent them from melting completely. If adding nuts, you can mix them in with the rice cereal.
Q5: What’s the best way to cut them cleanly?
A5: For clean cuts, use a sharp, lightly greased knife. You can also run the knife under hot water and wipe it dry between cuts to prevent sticking. Allow them to cool completely before cutting.