Master the Art of Homemade Key Lime Pie Perfection: Your Ultimate Guide
Ever wondered if that vibrant, tangy, and irresistibly creamy Key Lime Pie you adore could actually be a homemade masterpiece? The answer is a resounding yes! Forget relying on store-bought versions; crafting this iconic dessert at home not only guarantees superior flavor and freshness but also offers a rewarding culinary experience. This comprehensive guide will equip you with all the knowledge and techniques needed to bake a show-stopping key lime delight that will impress even the most discerning palates.
Ingredients & Kitchen Tools
Gathering the right ingredients and tools is the first step to success. Here’s what you’ll need:
For the Graham Cracker Crust:
- 1 ½ cups graham cracker crumbs: Approximately 10-12 full graham crackers crushed fine. Provides a sweet, buttery, and slightly spiced base.
- ¼ cup granulated sugar: Enhances the sweetness of the crust.
- 6 tablespoons unsalted butter, melted: Binds the crumbs together, creating a firm and flavorful crust.
For the Key Lime Filling:
- 14 oz can sweetened condensed milk: The primary sweetener and thickener for the filling. Do not substitute this!
- ½ cup fresh key lime juice: Approximately 8-10 key limes. Essential for that distinct tart, floral flavor. Nellie & Joe’s is a popular brand if fresh isn’t available.
- 4 large egg yolks: Add richness, structure, and a beautiful pale yellow hue to the filling.
- 1 teaspoon key lime zest: The aromatic oils in the zest intensify the citrus flavor without adding extra tartness.
Optional Garnishes:
- Whipped cream
- Extra key lime slices or zest
Kitchen Tools:
- 9-inch pie plate: A standard pie dish is perfect.
- Mixing bowls: For crust and filling preparation.
- Whisk: To combine ingredients smoothly.
- Measuring cups and spoons: For accurate ingredient portions.
- Citrus juicer: To extract the most juice from your key limes.
- Microplane or fine grater: For zesting the key limes.
- Rubber spatula: For scraping bowls and folding.
Prep Time & Cooking Schedule
This recipe requires a bit of chilling time, so plan accordingly!
- Prep time: 20 minutes
- Cook time: 15-17 minutes
- Chilling time: Minimum 4 hours (ideally overnight)
The lengthy chilling time is crucial for the Key Lime Pie to properly set and develop its signature creamy texture. Don’t rush this step!
Step-by-Step Instructions
Follow these simple steps for a perfect Key Lime Pie every time:
1. Preheat Oven & Prepare Crust: Preheat your oven to 350°F (175°C). In a medium bowl, combine the graham cracker crumbs, granulated sugar, and melted butter. Mix until the crumbs are evenly moistened. Press the mixture firmly into the bottom and up the sides of your 9-inch pie plate. Bake for 8-10 minutes, or until lightly golden. This pre-baking step creates a crispier crust. Remove from oven and let cool completely.
2. Make the Filling: While the crust cools, whisk together the sweetened condensed milk, fresh key lime juice, egg yolks, and key lime zest in a large bowl until well combined and smooth. The mixture will thicken slightly as you whisk.
3. Assemble & Bake Pie: Pour the Key Lime Pie filling into the cooled graham cracker crust. Bake for 15-17 minutes, or until the filling is set around the edges but still slightly jiggly in the center. Avoid overbaking, as this can make the filling rubbery.
4. Chill Thoroughly: Remove the pie from the oven and let it cool completely on a wire rack to room temperature. Once cool, cover loosely with plastic wrap and refrigerate for at least 4 hours, or preferably overnight. The longer it chills, the firmer and more enjoyable the pie will be.
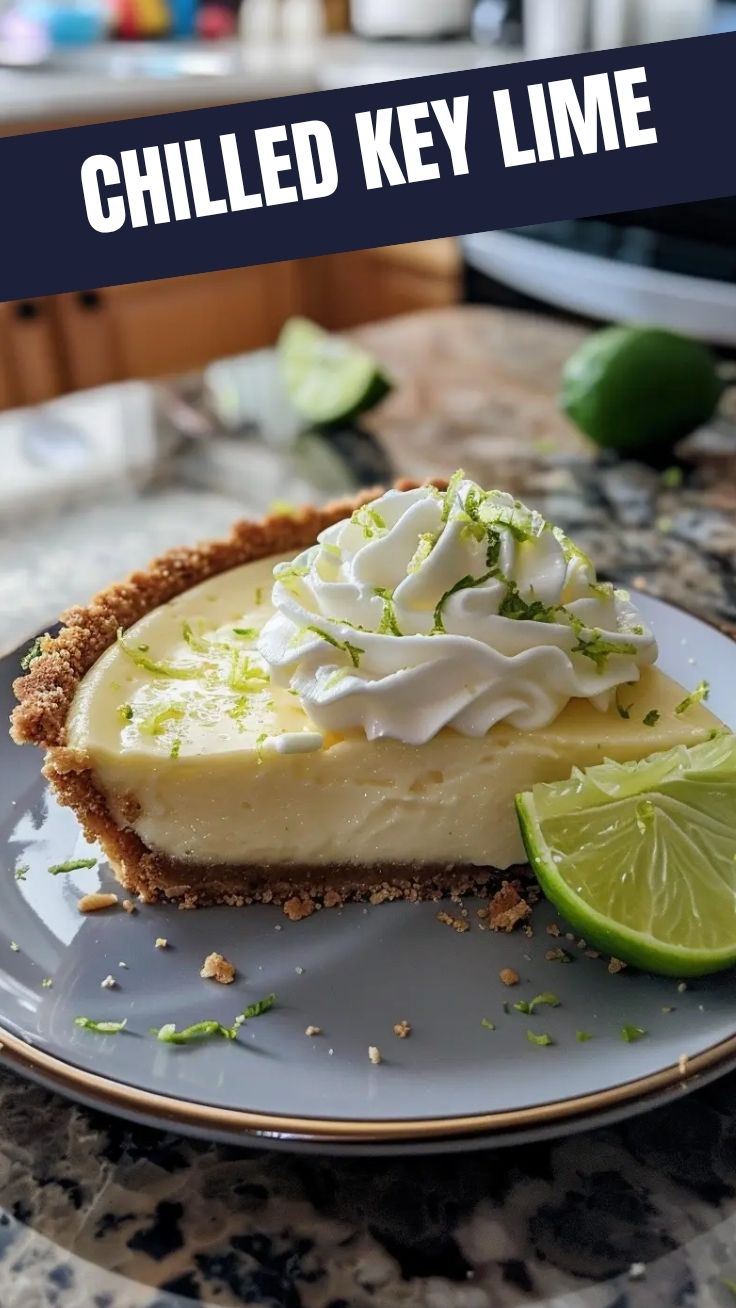
5. Garnish & Serve: Once thoroughly chilled, slice and serve. Garnish with fresh whipped cream and extra key lime zest or slices, if desired.
Nutritional Benefits & Advantages
While a dessert, Key Lime Pie does offer some surprising nutritional advantages. Key limes are an excellent source of Vitamin C, a powerful antioxidant that supports immune function and skin health. The presence of dairy from the sweetened condensed milk contributes calcium for bone health. While it’s certainly a treat, enjoying a slice in moderation can be part of a balanced diet. Moreover, making it at home allows you to control the quality of ingredients and avoid artificial additives often found in commercially prepared versions.
Tips, Variations & Cooking Advice
- Perfecting the Crust: For an extra crispy crust, increase the butter by 1-2 tablespoons. You can also substitute crushed shortbread or vanilla wafers for graham crackers.
Zest First: Always zest your key limes before* juicing them; it’s much easier!
- No key limes? If fresh key limes are unavailable, you can use bottled key lime juice (like Nellie & Joe’s). Avoid regular lime juice, as the flavor profile is different.
- Meringue Topping: For a classic look, consider topping your chilled pie with a fluffy meringue. Beat egg whites with sugar until stiff peaks form, spread over the pie, and lightly brown with a kitchen torch or under the broiler.
- Mini Pies: Use a muffin tin with paper liners to create adorable individual Key Lime Pie tarts. Adjust baking time accordingly.
Common Mistakes to Avoid
- Overbaking: The most common mistake! Overbaking leads to a firm, rubbery filling. The center should still have a slight jiggle when you remove it from the oven.
- Under-chilling: Rushing the chilling process results in a runny, unstable pie. Patience is key for a perfectly set slice.
- Using Regular Lime Juice: While regular limes are fine for many recipes, their flavor is distinctly different (and less aromatic) than key limes. For an authentic Key Lime Pie, stick to key limes or their bottled juice.
- Incorrect Sweetened Condensed Milk: Do not confuse sweetened condensed milk with evaporated milk. They are not interchangeable for this recipe.
Storage & Meal Prep Tips
Your homemade Key Lime Pie should be stored in the refrigerator, covered loosely with plastic wrap or aluminum foil. It will stay fresh for up to 3-4 days. While it can be frozen, the texture of the filling may change slightly upon thawing, becoming a bit softer. If freezing, wrap tightly in plastic wrap and then foil, and store for up to one month. Thaw overnight in the refrigerator before serving.
Conclusion
There you have it – the ultimate guide to crafting a truly spectacular homemade Key Lime Pie. From the perfectly crumbly crust to the delightfully tart and creamy filling, every bite is a taste of sunshine. Mastering this recipe is not just about baking a dessert; it’s about creating an experience. So, roll up your sleeves, grab some fragrant key limes, and embark on this delicious culinary journey. We encourage you to try this recipe and share your results! What are your favorite Key Lime Pie memories?
FAQs
Q1: Can I make the crust ahead of time?
A1: Yes, absolutely! You can bake the graham cracker crust and store it at room temperature, covered, for up to 2 days before filling.
Q2: My pie filling is too runny. What went wrong?
A2: The most likely culprit is insufficient chilling time. The pie needs at least 4 hours (and ideally overnight) in the refrigerator to fully set. Overbaking can also sometimes lead to a slightly watery consistency.
Q3: Can I use Meyer lemons instead of key limes?
A3: While Meyer lemons have a lovely floral and slightly less tart flavor, they will result in a different taste profile than a traditional Key Lime Pie. If you’re going for authenticity, stick to key limes.
Q4: How do I get the most juice from my key limes?
A4: Roll the key limes firmly on a countertop before slicing and juicing. You can also briefly microwave them for 10-15 seconds to soften them and release more juice.