Bake the Perfect Apple Pie (Classic): Your Guide to a Flaky, Flavorful Masterpiece!
Is there anything more comforting than the aroma of a freshly baked apple pie wafting through your home? While store-bought versions offer convenience, the unparalleled satisfaction of creating a homemade Apple Pie (Classic) from scratch is a culinary reward like no other. This isn’t just about baking; it’s about crafting a moment, a memory, and a dessert that truly speaks to the soul. Forget complicated confections; we’re diving into the simple art of an authentic apple pie that will quickly become a family favorite, perhaps even rivaling your cherished Grandma’s apple pie recipe. Join us as we unlock the secrets to a perfectly flaky crust and a sweet, spiced apple filling that will have everyone asking for seconds.
Ingredients & Kitchen Tools
Here’s what you’ll need to conjure up this delightful dessert:
- For the Crust:
* 2 ½ cups all-purpose flour: (Sifted for a lighter crust) The foundation of your pie.
* 1 teaspoon salt: (Enhances flavor) Don’t skip this; it balances the sweetness.
* 1 cup (2 sticks) unsalted butter: (Very cold, cut into ½-inch cubes) Crucial for flakiness; warmth makes it tough.
* ½ cup ice water: (Start with this amount, add more if needed) Keeps the dough cold and prevents gluten development.
- For the Filling:
* 6-8 medium apples: (A mix of tart and sweet, like Granny Smith and Honeycrisp, peeled, cored, and sliced ¼-inch thick) The heart of the pie; variety provides complexity.
* ½ cup granulated sugar: (Adjust to apple sweetness) Sweetens the filling.
* ¼ cup packed light brown sugar: (Adds depth and molasses notes) Complements the fruit.
* 2 tablespoons all-purpose flour: (Thickens the filling) Prevents a watery pie.
* 1 teaspoon ground cinnamon: (Classic spice pairing) Essential apple pie flavor.
* ¼ teaspoon ground nutmeg: (Subtle warmth) Enhances the cinnamon.
* ⅛ teaspoon ground cloves: (A pinch adds complexity) Use sparingly; it’s potent.
* 1 tablespoon lemon juice: (Prevents browning, brightens flavor) A must-have.
* 2 tablespoons unsalted butter: (Cut into small pieces) Melts into the filling for richness.
- For Assembly:
* 1 egg: (Beaten with 1 tablespoon water for egg wash) For a golden, shiny crust.
* 1 tablespoon coarse sugar: (For sprinkling on top) Adds sparkle and crunch.
- Kitchen Tools:
* 9-inch pie plate: (Standard size)
* Large mixing bowls: (For dough and filling)
* Pastry blender or food processor: (For cutting in butter)
* Rolling pin: (For shaping the crust)
* Measuring cups and spoons: (For precise ingredient amounts)
* Paring knife and vegetable peeler: (For apples)
* Whisk: (For egg wash)
Prep Time & Cooking Schedule
- Prep Time: 45 minutes (includes making the dough and slicing apples)
- Chilling Time for Dough: 1-2 hours (crucial for a flaky crust)
- Cook Time: 50-60 minutes
- Resting Time: 2-3 hours (allows filling to set, prevents a soupy pie)
Plan ahead! The chilling time for the dough and the subsequent resting time for the baked pie are vital for perfect texture and presentation. Resist the urge to cut into it immediately!
Step-by-Step Instructions
1. Prepare the Pie Dough: In a large bowl, whisk together the flour and salt. Cut the very cold butter into the flour mixture using a pastry blender or your fingertips until the mixture resembles coarse crumbs with some pea-sized pieces of butter remaining. Gradually add ice water, one tablespoon at a time, mixing lightly until the dough just comes together. Be careful not to overmix. Divide the dough in half, flatten each into a disk, wrap in plastic, and refrigerate for at least 1 hour. This chilling step is essential for a tender, flaky crust, a hallmark of any excellent Apple Pie (Classic).
2. Prepare the Apple Filling: In a large bowl, combine the sliced apples, granulated sugar, brown sugar, flour, cinnamon, nutmeg, cloves, and lemon juice. Toss gently to coat all the apples evenly.
3. Assemble the Pie: On a lightly floured surface, roll out one disk of dough into a 12-inch circle. Carefully transfer it to your 9-inch pie plate. Trim the edges, leaving about ½ inch overhang.
4. Fill and Top: Spoon the apple filling into the pie crust, mounding it slightly in the center. Dot the top of the filling with the small pieces of butter.
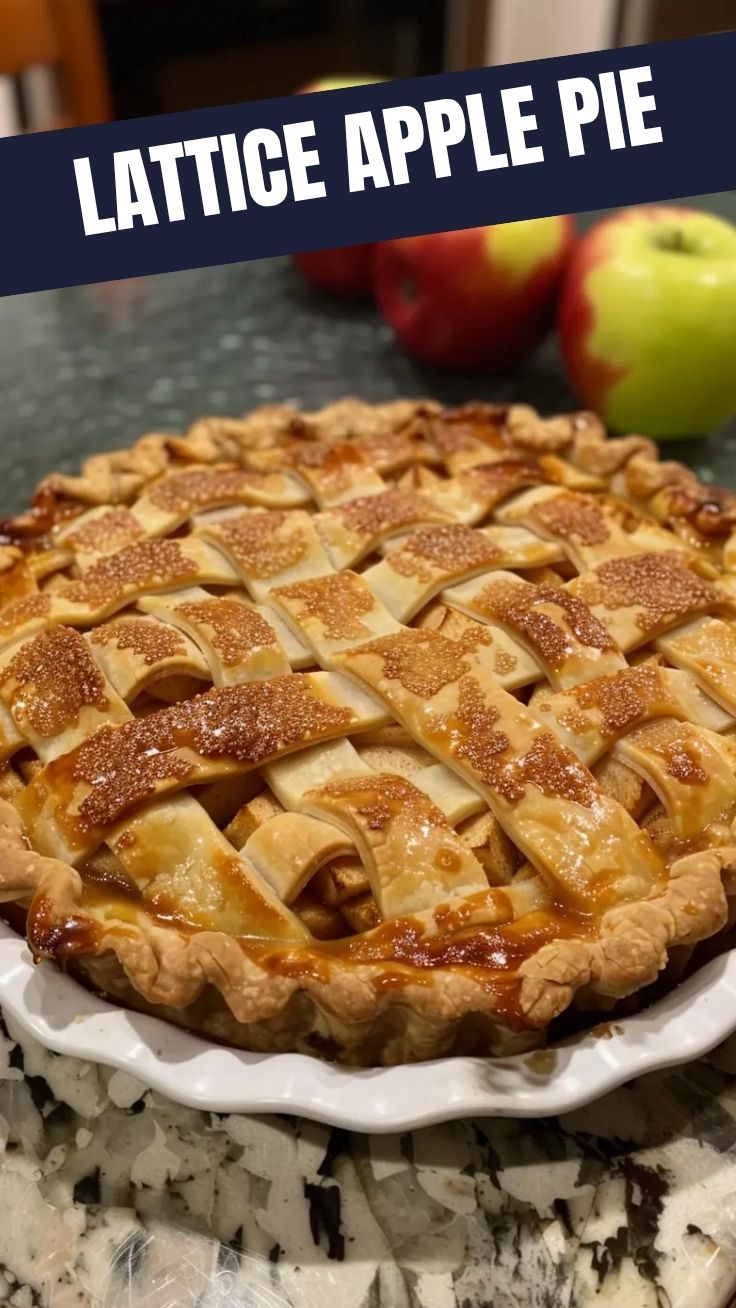
5. Add the Top Crust: Roll out the second disk of dough. You can either place it directly over the filling or create a lattice top for a more decorative finish, a technique often seen in classic Grandma’s apple pie recipe. Trim and crimp the edges of both crusts together. Cut several slits in the top crust (if not using a lattice) to allow steam to escape.
6. Bake: Brush the top crust with the egg wash and sprinkle with coarse sugar. Bake at 425°F (220°C) for 15 minutes, then reduce the oven temperature to 375°F (190°C) and continue baking for 35-45 minutes, or until the crust is golden brown and the filling is bubbling. If the crust begins to brown too quickly, cover the edges with aluminum foil.
7. Cool: Let the pie cool completely on a wire rack for at least 2-3 hours before slicing and serving. This allows the pie filling to set properly.
Nutritional Benefits & Advantages
Apples, the star of this dish, are a fantastic source of dietary fiber, promoting digestive health and helping to regulate blood sugar levels. They also contain essential vitamins like Vitamin C, an antioxidant that supports immune function. While the pie crust and sugar contribute to the calorie count, enjoying a slice in moderation offers these fruit-derived benefits, especially when made with fresh, wholesome ingredients.
Tips, Variations & Cooking Advice
- Apple Varieties: Don’t be afraid to experiment with different apple combinations! Braeburn, Gala, and Mutsu are also excellent choices.
- Spice It Up: For an extra kick, add a pinch of ground ginger or cardamom to the filling.
- Dairy-Free Option: Use a dairy-free butter alternative for the crust and filling.
- Gluten-Free Crust: There are many excellent gluten-free pie crust recipes available that can be substituted.
- Lattice Top: For a show-stopping presentation, learn to weave a beautiful lattice crust.
- Don’t Overwork the Dough: This is key for a flaky crust. Handle it as little as possible.
Common Mistakes to Avoid
- Warm Butter: Using warm butter for the crust melts it into the flour, resulting in a tough, rather than flaky, texture. Keep it very cold!
- Overmixing Dough: Overmixing develops gluten, making the crust tough. Mix just until combined.
- Not Chilling Dough: Skipping the chilling step makes the dough difficult to roll and can lead to shrinkage.
- Cutting Too Soon: Slicing into a hot pie results in a runny, soupy filling. Patience is a virtue here!
- Underbaked Bottom Crust: Ensure your oven rack is in the lowest position for even baking, preventing a soggy bottom.
Storage & Meal Prep Tips
Leftover apple pie can be stored at room temperature, loosely covered, for up to 2 days. For longer storage, refrigerate for up to 4-5 days. To reheat, warm individual slices in the microwave for a short period or in a preheated oven at 300°F (150°C) for 10-15 minutes until warmed through. Freezing is also an option; a whole baked pie can be wrapped tightly in plastic and foil and frozen for up to 3 months. Thaw overnight in the refrigerator before reheating.
Conclusion
Mastering the homemade Apple Pie (Classic) is a rewarding culinary journey, yielding a dessert that speaks volumes of comfort and home. This guide equips you with the knowledge and techniques to achieve that perfect balance of flaky crust and tender, spiced apple filling, perhaps even surpassing memories of your cherished Grandma’s apple pie recipe. Don’t be intimidated; embrace the process and savor the delicious results. We encourage you to try this recipe and share your triumphs in the comments below! What are your favorite apple varieties to use?
FAQs
Q1: My pie crust always shrinks! What am I doing wrong?
A1: Overworking the dough or not chilling it long enough are common culprits. Ensure your butter is ice cold, mix
just until combined, and chill the dough for at least an hour (or even overnight).
Q2: How do I prevent a soggy bottom crust?
A2: Make sure your oven rack is on the lowest setting to direct more heat to the bottom. You can also pre-bake your
bottom crust (blind bake) for about 10-15 minutes before adding the filling, or sprinkle a layer of breadcrumbs
or crushed cornflakes on the bottom crust before adding the apples.
Q3: Can I use frozen apples for this recipe?
A3: While fresh apples are preferred, you can use frozen. Thaw them completely and drain any excess liquid
very well to prevent a watery pie filling. You might need to add a bit more flour to the filling as well.
Q4: How do I know when the pie is fully cooked?
A4: The crust should be golden brown, and the filling should be bubbling through the vents or lattice. You can also
insert a thin knife into a vent; if it goes in easily, the apples are tender.
Q5: What’s the best way to reheat leftover apple pie?
A5: For the best texture, reheat slices in a preheated oven at 300°F (150°C) for 10-15 minutes. This
helps crisp up the crust again. A microwave works for speeding it up, but the crust won’t be as crisp.