Crispy, Juicy, and Perfectly Seasoned: Your Guide to Homemade Fried Chicken
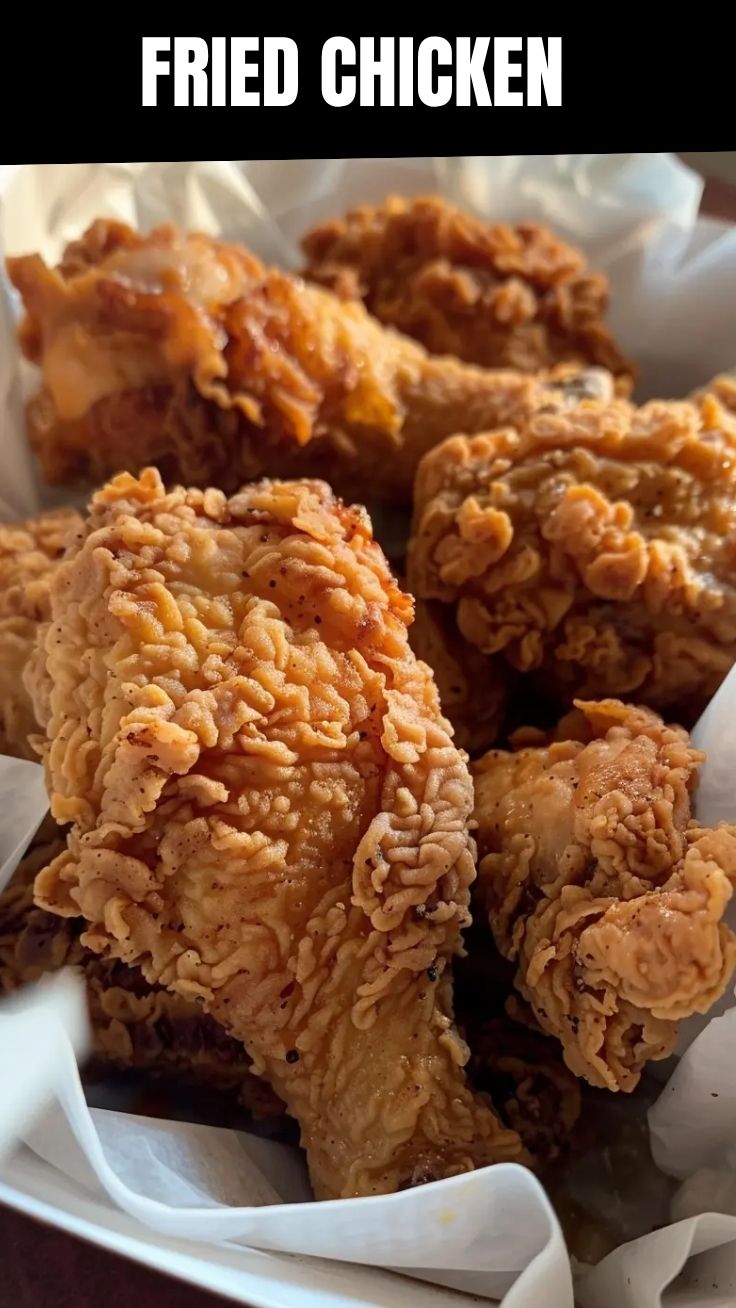
Craving that irresistible crunch and succulent interior of perfectly cooked Fried Chicken? If you’ve ever dreamt of recreating that restaurant-quality experience in your own kitchen, you’re in the right place. Beyond the sheer satisfaction of a home-cooked meal, preparing Southern Fried Chicken from scratch allows you to control every ingredient, ensuring a healthier, more flavorful, and truly personalized dish. Forget processed alternatives; we’re diving deep into the art and science of achieving culinary perfection, exploring techniques that guarantee a golden-brown crust and a moist, tender interior every single time.
Ingredients & Kitchen Tools
Crafting the perfect batch of fried chicken requires a specific set of ingredients and tools. Here’s what you’ll need:
- Whole Chicken (cut into 8 pieces): A 3-4 lb chicken is ideal, ensuring a mix of white and dark meat. You can also use chicken pieces like thighs or drumsticks for specific preferences.
- Buttermilk (2 cups): The secret to tenderizing the chicken and enhancing flavor. Its acidity breaks down proteins.
- All-Purpose Flour (3 cups): Forms the crispy coating.
- Cornstarch (1/2 cup): Adds extra crispiness and helps prevent greasiness.
- Salt (2 tablespoons): Essential for seasoning the chicken from within and the coating.
- Black Pepper (1 tablespoon): Provides a classic peppery kick.
- Paprika (1 tablespoon): Adds color and a mild, sweet pepper flavor.
- Garlic Powder (1 tablespoon): Contributes aromatic depth.
- Onion Powder (1 tablespoon): Enhances the savory profile.
- Cayenne Pepper (1 teaspoon, optional): For a touch of heat.
- Vegetable Oil or Peanut Oil (4-6 cups): High smoke point oils are best for deep-frying, ensuring even cooking and a neutral flavor.
- Large Bowl: For marinating the chicken.
- Shallow Dish or Tray: For dredging the chicken in flour.
- Dutch Oven or Deep Skillet: Ideal for maintaining consistent oil temperature and ensuring even frying.
- Tongs: For safely handling hot chicken.
- Wire Rack with Paper Towels: For draining excess oil and maintaining crispiness.
- Meat Thermometer: Crucial for ensuring the chicken is cooked through to a safe internal temperature (165°F / 74°C).
Prep Time & Cooking Schedule
- Prep Time: 20-30 minutes
- Marinating Time: Minimum 4 hours, ideally overnight (for maximum tenderness and flavor).
- Cook Time: 20-25 minutes per batch (depending on chicken piece size and oil temperature).
- Resting Time: 5-10 minutes after frying
Planning ahead is key to achieving perfectly tender and flavorful fried chicken. The marinating step is non-negotiable for that signature moist interior. Start marinating your chicken the day before to ensure it has ample time to soak up all the buttermilk goodness.
Step-by-Step Instructions
1. Prepare the Chicken: If using a whole chicken, cut it into 8 pieces (2 drumsticks, 2 thighs, 2 wings, 2 breast halves). Pat the chicken pieces thoroughly dry with paper towels.
2. Buttermilk Marinade: In a large bowl, place the chicken pieces and pour buttermilk over them, ensuring all pieces are submerged. Cover and refrigerate for at least 4 hours, or preferably overnight. This tenderizes the chicken and forms the base for our crispy coating, crucial for excellent Fried Chicken.
3. Prepare the Dredging Mixture: In a shallow dish, whisk together the flour, cornstarch, salt, black pepper, paprika, garlic powder, onion powder, and cayenne pepper (if using).
4. Dredge the Chicken: Remove chicken from the buttermilk, allowing excess to drip off (do not rinse). Dredge each piece thoroughly in the flour mixture, pressing firmly to ensure an even and thick coating. Shake off any excess. For extra crispiness, you can double-dredge: dip coated chicken back into buttermilk for a second, then back into the flour mixture. This is a classic technique for perfect Southern Fried Chicken.
5. Heat the Oil: Pour vegetable or peanut oil into a Dutch oven or deep skillet until it’s about 2-3 inches deep. Heat the oil over medium-high heat until it reaches 350°F (175°C). Use a thermometer to ensure accuracy.
6. Fry the Chicken: Carefully lower 3-4 chicken pieces into the hot oil, ensuring not to overcrowd the pan. Fry for 6-8 minutes per side, turning occasionally, until golden brown and cooked through. Breast pieces may cook faster than thighs or drumsticks.
7. Check for Doneness: The internal temperature should reach 165°F (74°C).
8. Drain and Rest: Transfer fried chicken to a wire rack set over paper towels to drain excess oil. Let it rest for 5-10 minutes before serving.
Nutritional Benefits & Advantages
While often seen as comfort food, homemade fried chicken can offer some nutritional advantages. Chicken itself is a lean protein source, essential for muscle repair and growth. When prepared at home, you control the type and quality of oil used, opting for healthier unsaturated fats like peanut or vegetable oil. The buttermilk tenderization process also helps make the protein more digestible. Compared to fast-food versions, homemade fried chicken typically contains less sodium and fewer artificial additives, making it a more wholesome choice.
Tips, Variations & Cooking Advice
- Spice it up: Add a pinch of chili powder or smoked paprika to your dredge for a different flavor profile.
- Herbaceous twist: Incorporate dried thyme, rosemary, or sage into the flour mixture.
- Gluten-Free: Use a gluten-free all-purpose flour blend (ensure it contains xanthan gum) and cornstarch for the coating.
- Air Fryer Version: For a lighter option, air fry at 375°F (190°C) for 25-30 minutes, flipping halfway, until golden and crispy. You might need to spray lightly with oil.
- Brining (Alternative to Buttermilk): A salt-water brine can also tenderize and season chicken if you’re out of buttermilk.
Common Mistakes to Avoid
- Overcrowding the Pan: This drops the oil temperature, leading to greasy, soggy chicken. Fry in batches.
- Not Patting Chicken Dry: Excess moisture creates steam, preventing a crisp crust.
- Frying at Wrong Temperature: Too low, and the chicken is greasy; too high, and the outside burns before the inside cooks. Use a thermometer!
- Skipping the Rest: Resting allows juices to redistribute, resulting in a more tender and flavorful bite.
- Not Seasoning Enough: Don’t be shy with salt and pepper in the flour mixture.
Storage & Meal Prep Tips
Leftover fried chicken can be a delightful treat! Store cooled chicken in an airtight container in the refrigerator for up to 3-4 days. For best results when reheating, use an oven or air fryer rather than a microwave. Preheat your oven to 375°F (190°C) and bake for 15-20 minutes, or until heated through and crispy again. You can also freeze cooked fried chicken for up to 3 months. Thaw overnight in the refrigerator before reheating.
Conclusion
Mastering homemade Fried Chicken is a culinary triumph that’s well within your reach. By following these detailed steps, understanding the science behind the perfect crunch, and embracing the joy of cooking from scratch, you’ll be able to create a dish that’s not only incredibly delicious but also a source of pride. Go ahead, give this recipe a try, and savor the unparalleled taste of perfectly seasoned, crispy, and tender Southern Fried Chicken, right in your own home. Share your triumphs in the comments below!
FAQs
Q1: Can I use boneless chicken breasts for this recipe?
A1: Yes, you can. Boneless breasts will cook faster, so adjust frying time accordingly (likely 10-15 minutes total), and ensure they reach 165°F (74°C).
Q2: What if I don’t have buttermilk?
A2: You can make a substitute by adding 1 tablespoon of lemon juice or white vinegar to a cup of regular milk and letting it sit for 5-10 minutes until it curdles slightly.
Q3: How do I prevent the chicken from being greasy?
A3: The key is maintaining the correct oil temperature (350°F / 175°C) and not overcrowding the pan. Also, draining on a wire rack immediately after frying helps a lot.
Q4: Can I bake this chicken instead of frying?
A4: While you won’t get the same deep-fried crunch, you can bake it for a healthier alternative. Follow the dredging steps, then bake at 400°F (200°C) for 35-45 minutes, flipping halfway, until cooked through.
Q5: What’s the best way to get a really thick, crispy coating?
A5: Double dredging is your best friend! After the first dredge in flour, dip the chicken back into the buttermilk briefly, then dredge a second time in the flour mixture. This builds a robust, craggy crust.