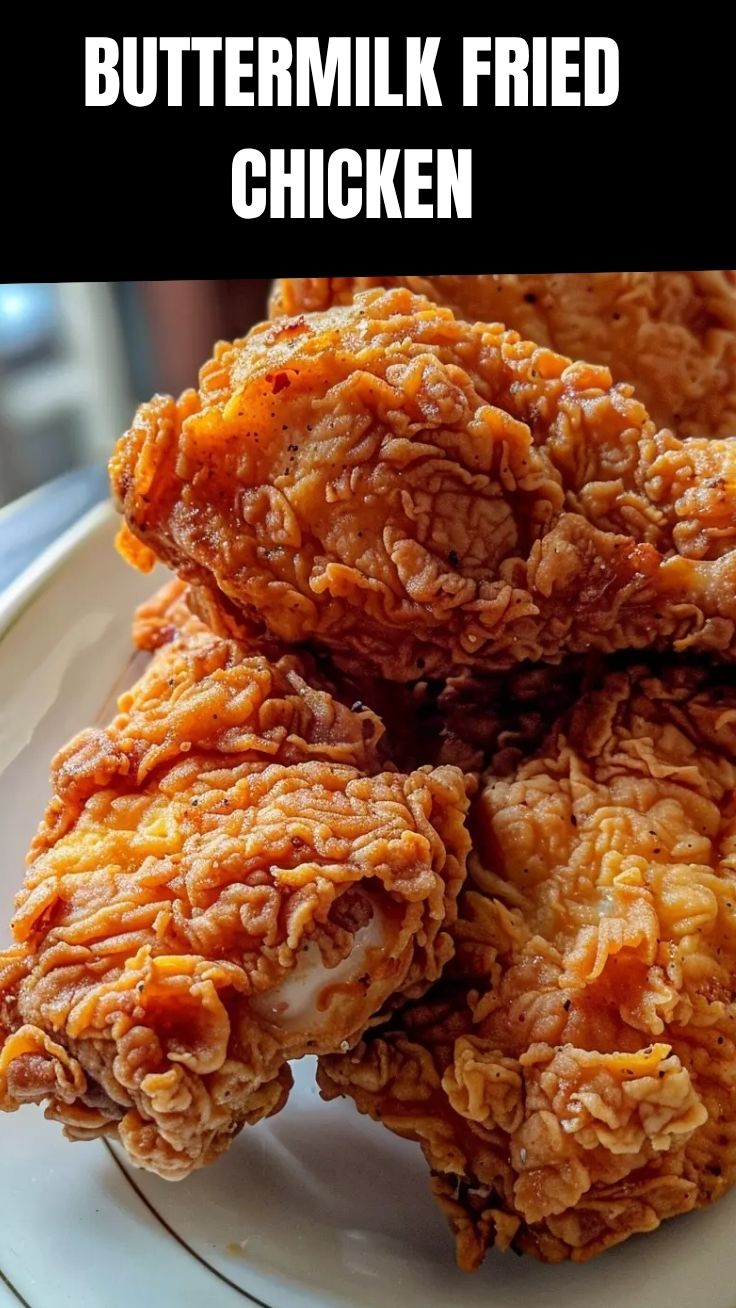
Crispy Perfection: Mastering Homemade Buttermilk Fried Chicken
Tired of lackluster takeout and yearning for that irresistible crunch and juicy tenderness of perfectly fried chicken? Imagine biting into a piece of chicken so flavorful, so exquisitely crispy, that it transports you straight to a sun-drenched Southern porch. Crafting your own homemade Buttermilk Fried Chicken isn’t just about saving money; it’s about unlocking a culinary superpower, a skill that will impress your family and friends time and again. This isn’t just a recipe; it’s a journey into the heart of comfort food, allowing you to control every delicious detail from seasoning to sizzle. Prepare to elevate your cooking prowess and discover the secrets to truly exceptional crispy fried chicken right in your own kitchen.
Ingredients & Kitchen Tools
- Whole Chicken (cut into 8 pieces): A 3-4 pound bird, preferably organic or free-range for best flavor and texture. Cutting into pieces ensures even cooking.
- Buttermilk (2 cups): The star ingredient for tenderizing and adding a tangy depth. Full-fat works best.
- All-Purpose Flour (2 cups): Forms the crispy coating. You can substitute with a gluten-free blend if needed.
- Cornstarch (1/2 cup): Enhances crispiness and prevents the coating from becoming soggy.
- Smoked Paprika (1 tbsp): Adds a smoky depth and warm color.
- Garlic Powder (1 tbsp): Essential for savory flavor.
- Onion Powder (1 tbsp): Complements garlic powder for an aromatic base.
- Cayenne Pepper (1 tsp, or to taste): Provides a subtle kick. Adjust based on your spice preference.
- Dried Thyme (1 tsp): Earthy and aromatic, a classic pairing with chicken.
- Salt (2 tsp): Crucial for seasoning the chicken from within and the coating.
- Black Pepper (1 tsp): Freshly ground is always best for maximum flavor.
- Eggs (2 large): Helps the flour mixture adhere to the chicken.
- Hot Sauce (1 tbsp, optional): For an extra layer of flavor and slight heat in the marinade.
- Vegetable Oil or Peanut Oil (at least 4-6 cups): High smoke point oils are best for deep frying. Sufficient quantity to submerge the chicken pieces.
- Large Mixing Bowls (2): For marinating and dredging.
- Whisk: To combine dry ingredients.
- Tongs: For safely handling chicken in hot oil.
- Heavy-Bottomed Pot or Dutch Oven: Essential for maintaining consistent oil temperature during frying.
- Wire Rack with Baking Sheet: For draining excess oil and keeping chicken crispy.
- Meat Thermometer: To ensure chicken is cooked through (internal temperature 165°F/74°C).
- Paper Towels: For blotting excess oil.
Prep Time & Cooking Schedule
- Prep Time: 20 minutes (Plus chilling/marinating time)
- Marinating Time: Minimum 4 hours, ideally overnight (12-24 hours) for maximum tenderness and flavor infusion. This step is crucial for the success of your buttermilk fried chicken.
- Cook Time: 20-30 minutes per batch
- Total Time: Approximately 1-2 days (mostly passive marinating) for the best results, or 1-2 hours on cook day.
Plan to start your marinating at least the day before you intend to fry. This allows the buttermilk to work its magic, tenderizing the chicken and infusing it with flavor, which is key to that ultimate juicy bite.
Step-by-Step Instructions
1. Prepare the Marinade: In a large bowl, whisk together the buttermilk, 1 teaspoon of salt, 1/2 teaspoon of black pepper, and optional hot sauce. Add the cut-up chicken pieces, ensuring they are fully submerged. Cover the bowl and refrigerate for at least 4 hours, or preferably overnight (up to 24 hours). This long soak is the secret to tender, flavorful Buttermilk Fried Chicken.
2. Make the Dredging Mix: In another large bowl, combine the flour, cornstarch, smoked paprika, garlic powder, onion powder, cayenne pepper, dried thyme, 1 teaspoon of salt, and 1/2 teaspoon of black pepper. Whisk thoroughly until well combined.
3. Set Up Dredging Station: Crack the eggs into a shallow dish and whisk them lightly. Remove the chicken from the buttermilk marinade, allowing excess to drip off, but do not rinse. First, dip each chicken piece into the whisked egg, then generously dredge it in the flour mixture, pressing firmly to ensure an even and thick coating. Shake off any excess flour. Place the coated chicken on a wire rack while you coat the remaining pieces. This double-layer method is vital for the crispy coating characteristic of authentic Southern fried chicken.
4. Heat the Oil: Pour enough vegetable or peanut oil into a heavy-bottomed pot or Dutch oven to reach about 2-3 inches deep. Heat the oil over medium-high heat until it reaches 350°F (175°C). Use a candy or deep-fry thermometer to monitor the temperature; maintaining it is crucial for crispiness without burning.
5. Fry the Chicken: Carefully lower 2-3 pieces of coated chicken into the hot oil, ensuring not to overcrowd the pot, which would lower the oil temperature. Fry for 6-8 minutes per side, turning occasionally, until golden brown and the internal temperature reaches 165°F (74°C) when measured with a meat thermometer at the thickest part of the chicken (avoiding the bone). For larger pieces like thighs and drumsticks, this can take up to 10-12 minutes per side.
6. Drain and Rest: Once cooked, transfer the fried chicken to a wire rack set over a baking sheet to allow excess oil to drain. This helps maintain crispiness. If you have multiple batches, you can keep the cooked chicken warm in a preheated oven at 200°F (95°C).
7. Serve: Serve hot and enjoy immediately with your favorite sides like mashed potatoes, coleslaw, or biscuits.
Nutritional Benefits & Advantages
While often seen as an indulgent treat, homemade fried chicken can offer some surprising benefits. Chicken itself is a lean source of high-quality protein, essential for muscle repair and growth. Buttermilk not only tenderizes but also provides probiotics beneficial for gut health. By making it at home, you control the quality of ingredients and the type of oil used, opting for healthier fats and reducing excessive sodium often found in restaurant versions. Plus, a crispy, savory meal like this can be a powerful mood booster!
Tips Variations & Cooking Advice
- Double Dredging for Extra Crunch: For an even thicker, craggier crust, dip the floured chicken back into the buttermilk (or egg wash) and then into the flour mixture a second time.
- Spice It Up: Add more cayenne, a pinch of chipotle powder, or even some chili flakes to the flour mixture for a spicier kick.
- Herb Variations: Experiment with different dried herbs in your flour mix, like sage or oregano, for alternative flavor profiles.
- Gluten-Free Option: Substitute all-purpose flour with a 1-to-1 gluten-free baking flour blend. Ensure it contains xanthan gum for proper binding.
- Air Fryer Method (Healthier Alternative): While true deep-fried taste is hard to replicate, you can achieve decent crispiness with an air fryer. Reduce oil significantly, spray chicken lightly with oil, and air fry at 375°F (190°C) for 20-30 minutes, flipping halfway, until cooked through.
- Brine for Juiciness: If you don’t have buttermilk, a simple salt and sugar brine can also tenderize chicken effectively. However, buttermilk adds a unique tang.
Common Mistakes to Avoid
- Overcrowding the Pot: This is the most common mistake. It drastically lowers oil temperature, resulting in greasy, soggy chicken. Fry in small batches.
- Not Maintaining Oil Temperature: Too low, and the chicken gets greasy; too high, and the outside burns before the inside cooks. Use a thermometer and adjust heat as needed.
- Skipping the Marinade: The buttermilk marinade is non-negotiable for tender, flavorful chicken. Don’t rush this step.
- Under-Seasoning: Seasoning isn’t just for the coating; the chicken itself needs seasoning, which the buttermilk brine helps achieve. Don’t be shy with salt and pepper in the flour mix.
- Rinsing Off Buttermilk: A thin layer of buttermilk clinging to the chicken helps the flour adhere better.
Storage & Meal Prep Tips
Leftover fried chicken can be a delightful treat! Store cooked and cooled chicken in an airtight container in the refrigerator for up to 3-4 days. To reheat and maintain crispiness, avoid the microwave. Instead, place chicken on a wire rack set on a baking sheet and bake in a preheated oven at 375°F (190°C) for 15-20 minutes, or until heated through and crispy. You can also reheat in an air fryer at 350°F (175°C) for 8-10 minutes. Fried chicken also freezes well for up to 2-3 months; thaw overnight in the refrigerator before reheating.
Conclusion
There’s an undeniable satisfaction that comes from mastering a classic, and now you have all the tools and knowledge to create your own perfectly crispy, incredibly flavorful Buttermilk Fried Chicken. From the crucial long-duration soak in the tangy marinade to the perfectly seasoned crunch of the coating, this recipe promises a journey into culinary bliss. Don’t hesitate to dive in and experience the joy of preparing this iconic dish. Whether you’re craving that nostalgic bite of Southern fried chicken or simply aiming to impress, this ultimate guide will lead you to crispy perfection every time. We encourage you to try this recipe, experiment with the variations, and share your delicious results in the comments below!
FAQs
Q1: Can I use chicken breasts instead of whole chicken?
A1: Yes, you can use boneless, skinless chicken breasts. However, bone-in pieces tend to stay juicier. Adjust frying time accordingly, as breasts will cook faster (typically 5-7 minutes per side).
Q2: What if I don’t have buttermilk?
A2: You can make a homemade substitute by adding 1 tablespoon of white vinegar or lemon juice to 1 cup of regular milk. Let it sit for 5-10 minutes until it slightly curdles, then use as directed. For best results, traditional buttermilk is recommended.
Q3: How do I know if my oil is hot enough without a thermometer?
A3: Carefully drop a pinch of flour into the oil. If it immediately sizzles and floats to the top, the oil is ready. If it sinks and doesn’t do much, it’s not hot enough. If it smokes immediately, it’s too hot. A thermometer is highly recommended for safety and consistency.
Q4: My fried chicken isn’t as crispy as I’d like. What went wrong?
A4: Common culprits include overcrowding the pot (lowers oil temp), insufficient oil temperature, or not shaking off excess flour from the coating (which can make it gummy). Ensure your oil is at 350°F and fry in small batches. Also, the cornstarch in the flour blend is key for extra crispiness.