Bake the Best Chocolate Chip Cookies: Your Ultimate Guide
Ever wondered if you could bake the perfect batch of Chocolate Chip Cookies right in your own kitchen? The kind that are crisp on the outside, chewy on the inside, and bursting with rich, melty chocolate? Absolutely! There’s an unparalleled joy in creating homemade treats, and these cookies are no exception. Beyond the sheer delight of warm, freshly baked goods, taking control of your ingredients ensures a healthier, more customizable dessert. This comprehensive guide will walk you through mastering this beloved classic, transforming you into a cookie connoisseur. Get ready to impress your friends and family with a sensational chocolate chip cookie recipe that will become your go-to.
Ingredients & Kitchen Tools
Crafting the perfect cookie requires a few essential ingredients and tools. Here’s what you’ll need:
- 1 cup (2 sticks) unsalted butter, softened: Room temperature butter creams beautifully, incorporating air for a lighter texture.
- ¾ cup granulated sugar: Provides sweetness and contributes to browning.
- ¾ cup packed light brown sugar: Adds moisture, chewiness, and a delightful caramel note.
- 2 large eggs: Binds ingredients, adds richness, and helps with leavening.
- 1 teaspoon vanilla extract: Enhances all the other flavors. Use good quality!
- 2 ¼ cups all-purpose flour: The structural backbone of your cookies.
- 1 teaspoon baking soda: A leavening agent that helps cookies spread and achieve a soft texture.
- ½ teaspoon salt: Balances sweetness and enhances flavor. Don’t skip it!
- 2 cups chocolate chips (semi-sweet or milk chocolate): The star of the show! High-quality chips melt beautifully. (Optional substitution: Chopped chocolate bars for irregular melting pockets.)
Kitchen Tools:
- Large mixing bowls: For combining wet and dry ingredients.
- Electric mixer (stand or hand-held): Essential for creaming butter and sugars evenly.
- Measuring cups and spoons: For precise ingredient measurement.
- Rubber spatula: For scraping bowls and folding ingredients.
- Baking sheets: Heavy-duty ones prevent scorching.
- Parchment paper or silicone baking mats: For non-stick baking and easy cleanup.
- Wire cooling rack: Allows cookies to cool evenly and prevent sogginess.
- Cookie scoop (optional, but recommended): For uniform cookie size, ensuring even baking.
Prep Time & Cooking Schedule
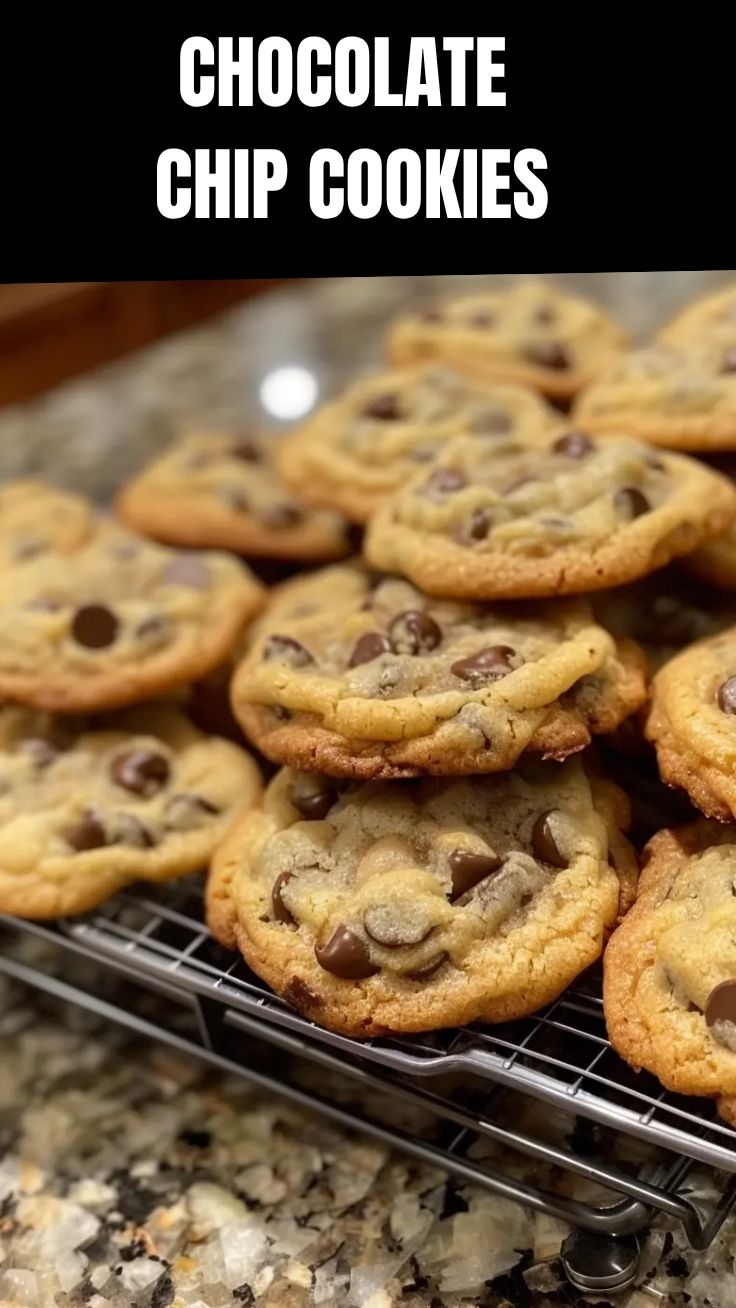
- Prep Time: 15 minutes
- Chill Time: 30 minutes (minimum, but longer is better for flavor development)
- Bake Time: 10-12 minutes per batch
- Yields: Approximately 2 dozen cookies
The chilling time is crucial! It allows the dough to firm up, preventing excessive spreading, and gives the flavors a chance to meld. Plan to make your dough a bit ahead of time for the best results.
Step-by-Step Instructions
1. Preheat & Prepare: Preheat your oven to 375°F (190°C). Line baking sheets with parchment paper or silicone mats.
2. Cream Wet Ingredients: In a large bowl, using an electric mixer, cream together the softened butter, granulated sugar, and brown sugar on medium speed until light and fluffy (about 2-3 minutes). This aeration is key for a tender crumb.
3. Add Eggs & Vanilla: Beat in the eggs one at a time, mixing well after each addition. Stir in the vanilla extract until just combined. Overmixing here can lead to tough cookies.
4. Combine Dry Ingredients: In a separate medium bowl, whisk together the flour, baking soda, and salt. Whisking ensures even distribution of leavening agents.
5. Gradually Combine: Slowly add the dry ingredients to the wet ingredients, mixing on low speed until just combined. Be careful not to overmix, as this can develop the gluten too much, resulting in a tough cookie.
6. Fold in Chocolate Chips: Gently fold in the chocolate chips with a rubber spatula until evenly distributed.
7. Chill the Dough: Cover the dough and refrigerate for at least 30 minutes. This chilling process is essential for achieving the best Chocolate Chip Cookies texture and flavor. It allows the flour to fully hydrate and prevents the cookies from spreading too much during baking.
8. Scoop & Bake: Drop rounded tablespoons of dough (or use a cookie scoop for uniformity) onto the prepared baking sheets, leaving about 2 inches between cookies. Bake for 10-12 minutes, or until the edges are golden brown and the centers are still slightly soft. This ensures that perfect chewy interior. For a truly professional outcome, mastering this chocolate chip cookie recipe means nailing that precise bake time.
9. Cool: Let the cookies cool on the baking sheet for 5 minutes before transferring them to a wire rack to cool completely. This allows them to set up without breaking.
Nutritional Benefits & Advantages
While Chocolate Chip Cookies are certainly a treat, making them at home allows for mindful ingredient choices. Dark chocolate, for instance, contains antioxidants and can be added for extra health benefits. Using real butter provides healthy fats, and controlling sugar levels is a significant advantage over store-bought versions. Plus, the sheer joy and comfort derived from baking can positively impact mental well-being!
Tips, Variations & Cooking Advice
- Brown Butter: For a rich, nutty flavor, brown your butter before adding it to the recipe. Let it cool slightly before proceeding.
- Half Chocolate, Half Nuts: Introduce chopped walnuts or pecans (about 1 cup) with the chocolate chips for added crunch and flavor.
- Sea Salt Finish: Sprinkle a pinch of flaky sea salt on top of the cookies before baking to enhance the chocolate flavor.
- Chill Longer: For even chewier cookies and deeper flavor, chill the dough overnight or up to 72 hours.
- Dietary Adaptations:
* Gluten-Free: Substitute the all-purpose flour with a 1:1 gluten-free baking flour blend.
* Dairy-Free: Use a high-quality vegan butter substitute and dairy-free chocolate chips.
- Portion Changes: For mini cookies, use a smaller scoop and reduce baking time. For giant cookies, use a larger scoop and increase baking time by a few minutes.
Common Mistakes to Avoid
- Overmixing the Dough: Leads to tough, dense cookies. Mix until just combined.
- Not Chilling the Dough: Results in flat, overly spread-out cookies. Don’t skip the chill!
- Using Melted Butter: Softened butter is key for proper creaming and texture. Melted butter will make your cookies greasy and flat.
- Overbaking: This will dry out your cookies, making them hard instead of chewy. Look for golden edges and slightly soft centers.
- Crowding the Baking Sheet: Give cookies enough space to spread without touching, ensuring even baking.
Storage & Meal Prep Tips
Store baked cookies in an airtight container at room temperature for up to 3-4 days. To maintain freshness and chewiness, you can place a piece of bread in the container with the cookies.
Freezing Dough: Scoop cookie dough onto a parchment-lined baking sheet and freeze until solid. Transfer the frozen dough balls to a freezer-safe bag or container for up to 3 months. Bake from frozen, adding an extra 2-3 minutes to the baking time. This is fantastic for having fresh cookies on demand!
Conclusion
Mastering the perfect batch of Chocolate Chip Cookies is a rewarding culinary journey that brings warmth and happiness to any home. By following this detailed guide, you’re well-equipped to bake cookies that are sure to become a cherished treat for all. Remember, the key to success lies in quality ingredients, careful technique, and a little bit of love. So go ahead, whip up this amazing chocolate chip cookie recipe, share your culinary creations with the world, and revel in the sweet satisfaction of a job well done! We’d love to hear about your baking adventures and see your delicious results in the comments below!
FAQs
Q1: Why are my cookies flat and greasy?
A1: This usually happens if your butter was too warm or melted, or if you didn’t chill your dough. Ensure your butter is softened, not melted, and always chill the dough.
Q2: Can I use different types of chocolate?
A2: Absolutely! Experiment with dark chocolate, white chocolate, milk chocolate, or even chopped candy bars for unique flavor profiles.
Q3: How do I store leftover cookie dough?
A3: Store raw cookie dough in an airtight container in the refrigerator for up to 3 days, or freeze as individual dough balls for up to 3 months.
Q4: My cookies are hard after baking, what went wrong?
A4: Most likely, they were overbaked. Watch for golden edges and slightly soft centers. They will continue to set as they cool.
Q5: What’s the best way to get perfectly round cookies?
A5: A cookie scoop ensures uniform size and shape. For an extra touch after baking, use a larger round cookie cutter slightly bigger than your cookies and swirl it around the freshly baked, still-warm cookies to push them into a perfect circle.