Unlocking Culinary Bliss: The Ultimate Guide to Homemade Chicken Pot Pie
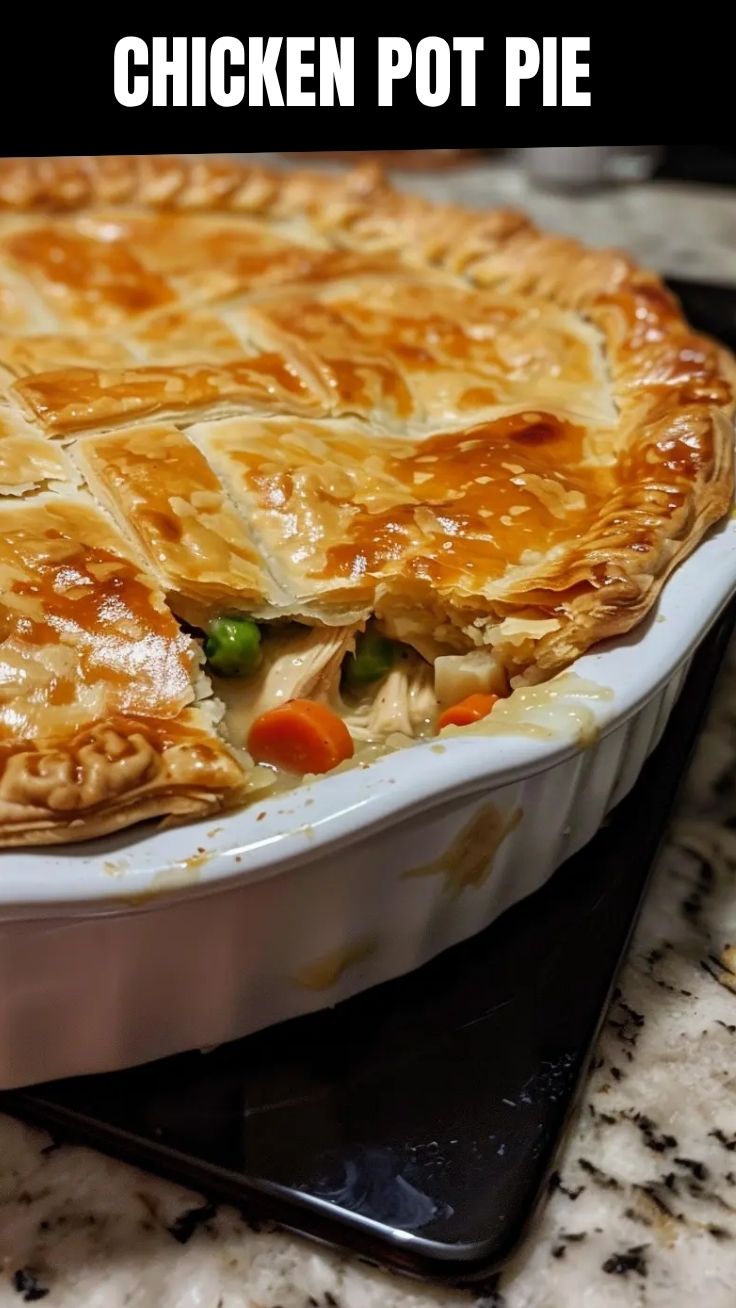
Are you craving a dish that wraps you in a warm, flavorful hug, a true quintessential comfort food that speaks to the soul? Look no further! Crafting a homemade Chicken Pot Pie from scratch isn’t just about cooking; it’s an experience, a journey into culinary satisfaction that store-bought versions simply can’t replicate. This comprehensive guide will empower you to create a flaky, creamy, and undeniably delicious masterpiece, a labor of love that promises to gather everyone around the table. Embrace the joy of transforming simple ingredients into a gourmet meal, proving that the best comfort food is always the one made with your own hands.
Ingredients & Kitchen Tools
Gathering your mise en place is the first step to success!
For the Filling:
- 2 tablespoons unsalted butter: Adds richness and helps sauté vegetables.
- 1 cup chopped yellow onion: Aromatic base.
- 1 cup chopped carrots: Sweetness and texture.
- 1 cup chopped celery: Earthy flavor and crunch.
- 1 cup frozen peas: Adds sweetness and vibrant color.
- 1 cup cooked chicken, shredded or diced: The star protein. Rotisserie chicken works wonderfully!
- ½ cup chicken broth: Provides liquid and flavor for the sauce.
- ½ cup heavy cream: Creates a rich, velvety consistency.
- ¼ cup all-purpose flour: Thickens the filling. Can substitute with a gluten-free thickener like cornstarch (use 2 tbsp mixed with 2 tbsp cold water).
- ½ teaspoon dried thyme: Classic savory herb for depth.
- Salt and freshly ground black pepper: To taste, enhances all flavors.
For the Crust:
- 2 pre-made pie crusts (store-bought or homemade): Simplifies the process; ensure they are thawed if frozen.
- 1 large egg, beaten: For an egg wash, giving a golden-brown finish.
Kitchen Tools:
- Large skillet or Dutch oven: For sautéing vegetables and simmering the filling.
- 9-inch pie dish: The vessel for your culinary creation.
- Whisk: To blend flour and liquids smoothly.
- Measuring cups and spoons: Precision is key for perfect flavor.
- Rolling pin (if making homemade crust): For achieving the ideal crust thickness.
- Pastry brush: For applying the egg wash.
Prep Time & Cooking Schedule
Planning makes perfection!
- Prep Time: Approximately 25 minutes. This includes chopping vegetables, shredding chicken, and preparing your workspace.
- Cook Time: 30-35 minutes. This accounts for baking the pie until golden brown and bubbly.
- Resting Time: 10-15 minutes after baking. Crucial for allowing the filling to set and preventing burns from hot steam. This also ensures cleaner slices.
Step-by-Step Instructions
Let’s turn those ingredients into an unforgettable Chicken Pot Pie, a true expression of comfort food!
1. Preheat Oven & Prepare Crust: Preheat your oven to 400°F (200°C). Place one pie crust into your 9-inch pie dish, gently pressing it to fit the bottom and sides. Trim any excess, leaving a slight overhang.
2. Sauté Aromatics: In a large skillet or Dutch oven, melt butter over medium heat. Add chopped onion, carrots, and celery. Sauté for 5-7 minutes until the vegetables begin to soften.
3. Create the Roux & Filling: Sprinkle the flour over the softened vegetables and cook, stirring constantly, for 1 minute to create a roux. Gradually whisk in the chicken broth and heavy cream, ensuring no lumps form. Bring to a gentle simmer, stirring until the mixture thickens.
4. Combine Ingredients: Remove from heat. Stir in the shredded chicken, frozen peas, dried thyme, salt, and pepper. Mix until all ingredients are well combined and coated in the creamy sauce.
5. Assemble the Pie: Pour the chicken filling into the pie crust-lined dish.
6. Top Crust: Place the second pie crust over the filling. Trim and crimp the edges of both crusts together to seal. Cut several slits in the top crust to allow steam to escape during baking.
7. Egg Wash & Bake: Brush the top crust evenly with the beaten egg. Bake for 30-35 minutes, or until the crust is golden brown and the filling is bubbly.
8. Rest & Serve: Let the pie rest for 10-15 minutes before slicing and serving. This allows the filling to set, making it easier to cut and preventing it from being too runny.
Nutritional Benefits & Advantages
This homemade Chicken Pot Pie is more than just delicious; it’s packed with wholesome goodness. Chicken provides lean protein essential for muscle repair and satiety. The medley of vegetables—carrots, peas, celery, and onions—offers a rich source of vitamins, minerals, and dietary fiber, promoting digestive health and boosting immunity. By making it yourself, you control the quality of ingredients, reducing processed additives and excessive sodium often found in store-bought options. It’s a balanced meal providing carbohydrates for energy, protein for strength, and a spectrum of micronutrients for overall well-being.
Tips, Variations & Cooking Advice
- Flavor Boost: Add a pinch of sage or rosemary to the filling for an enhanced aromatic profile.
- Crust Alternatives: For a lighter option, use puff pastry instead of traditional pie crust for the top. For a gluten-free version, choose certified gluten-free pie crusts and gluten-free flour for the roux.
- Vegetarian Version: Replace chicken with cooked chickpeas, white beans, or a mix of roasted root vegetables like potatoes and parsnips. Use vegetable broth instead of chicken broth.
- Spice It Up: A tiny pinch of cayenne pepper can add a subtle kick to the filling without overpowering the classic flavors.
- Texture Play: Don’t like peas? Swap them for corn, green beans, or even diced mushrooms for variety.
Common Mistakes to Avoid
- Overfilling the Pie: This can lead to spillage in your oven and a soggy bottom crust. Leave about a ½ inch of space from the top of the crust.
- Not Resting the Pie: Cutting into a hot pot pie immediately will result in a messy, runny filling. Patience here is key!
- Skipping the Egg Wash: While not strictly necessary for cooking, the egg wash provides that beautiful, golden, professional-looking crust.
- Underseasoning: Taste your filling before pouring it into the crust. Adjust salt and pepper as needed; remember, flavors can dull slightly during baking.
Storage & Meal Prep Tips
Leftovers of your delicious Chicken Pot Pie are a treat!
- Refrigeration: Once completely cooled, cover the pie dish tightly with plastic wrap or aluminum foil. It will stay fresh in the refrigerator for up to 3-4 days.
- Freezing: For longer storage, slice individual portions, wrap them tightly in plastic wrap, then an additional layer of aluminum foil. Freeze for up to 2-3 months. Thaw in the refrigerator overnight before reheating.
- Reheating: To reheat an entire pie, cover loosely with foil and bake at 325-350°F (160-175°C) until warmed through (20-30 minutes). For individual slices, microwave briefly or reheat in a toaster oven for a crispier crust.
Conclusion
There’s nothing quite like the warmth and satisfaction derived from a homemade Chicken Pot Pie. This culinary endeavor, transforming simple ingredients into a rich, flavorful, and flaky masterpiece, truly embodies the essence of comfort food. By following these detailed steps and embracing the tips, you’ve not only created a meal but a cherished memory. We encourage you to try this recipe, experiment with the variations, and share your delightful results! May your kitchen be filled with the tantalizing aroma of this classic dish, bringing joy and a full belly to everyone you share it with.
FAQs
Q1: Can I use raw chicken directly in the pot pie filling?
A1: While you could, it’s highly recommended to use pre-cooked chicken. Raw chicken might not cook evenly within the pie, and it won’t allow you to season the chicken and vegetables properly before baking, affecting overall flavor.
Q2: My pie crust is getting too dark before the filling is bubbly. What should I do?
A2: If your crust is browning too quickly, you can create a “foil tent” by loosely covering the pie with aluminum foil. This will protect the crust from over-browning while allowing the filling to continue cooking.
Q3: Can I make this pot pie ahead of time?
A3: Absolutely! You can prepare the filling completely and assemble the pie in the dish, then cover and refrigerate for up to 24 hours before baking. You can also freeze the unbaked pie for up to 3 months; thaw it in the refrigerator overnight before baking.
Q4: How can I ensure my bottom crust isn’t soggy?
A4: To fend off a dreaded soggy bottom, try blind baking your bottom crust for about 8-10 minutes before adding the filling. Also, ensure your filling isn’t overly wet when you pour it in, and make sure your oven is adequately preheated to initiate crust cooking immediately.