The Ultimate Guide to Crafting Perfect Sweet Treats at Home
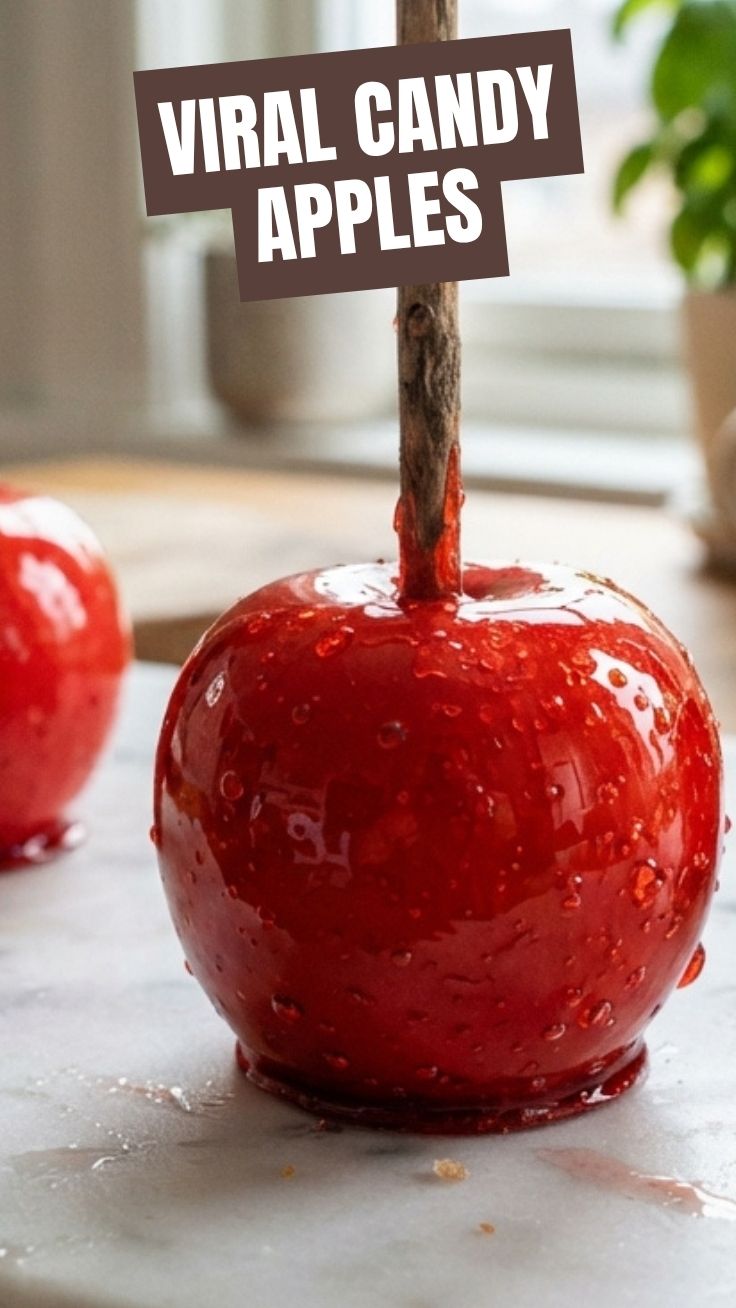
Are you ready to transform simple apples into dazzling, gourmet confections that evoke fond memories of carnivals and autumn festivals? There’s a particular magic in creating homemade treats, and few things capture that enchantment quite like a perfectly made batch of Candy Apples. Beyond the nostalgia, preparing these delightful sweets yourself offers unparalleled control over ingredients, allowing you to tailor the sweetness and texture to your exact preference. Whether you’re aiming for that classic hard, glossy shell or the chewiness of caramel apples, mastering this recipe at home is incredibly rewarding. It’s an opportunity to create edible art and a fantastic activity to share with family and friends. Let’s dive into making these iconic treats.
Ingredients & Kitchen Tools
Gathering the right components is the first step to success. Here’s what you’ll need:
- 6-8 Medium Apples (e.g., Granny Smith, Fuji, Honeycrisp): Choose firm, slightly tart apples that can hold up to the coating. Granny Smiths offer a delightful contrast to the sweetness.
- 3 cups Granulated Sugar: The foundation of your candy coating.
- 1 cup Water: Helps dissolve the sugar for the syrup.
- ½ cup Light Corn Syrup: Prevents crystallization, ensuring a smooth, glossy finish.
- ½ teaspoon Red or Other Food Coloring (gel or liquid): For that iconic vibrant hue. Gel coloring offers more intense colors with less liquid.
- ½ teaspoon Flavoring Extract (e.g., cinnamon, vanilla, almond – optional): Adds an extra layer of taste.
- Wooden Skewers/Lollipop Sticks: For easy handling and dipping.
- Heavy-Bottomed Saucepan (2-3 quart): Essential for even heat distribution to prevent scorching.
- Candy Thermometer: Crucial for achieving the exact temperature for the perfect hard crack stage.
- Parchment Paper or Silicone Mat: For cooling the apples without sticking.
- Baking Sheet: To hold the parchment paper and cooling apples.
- Pastry Brush: To brush down sugar crystals from the sides of the pan (optional, but helpful).
- Heat-Resistant Rubber Spatula or Wooden Spoon: For stirring.
- Bowl of Ice Water: For testing the candy stage (optional, but a good backup to the thermometer).
Prep Time & Cooking Schedule
- Prep Time: 20 minutes (Includes washing apples, inserting sticks, and gathering ingredients).
- Cook Time: 20-30 minutes (This is dedicated solely to cooking the candy syrup to the hard crack stage).
- Cooling Time: 30-60 minutes (For the candy coating to fully set).
Understanding the schedule is key to planning. Start by preparing your apples and workspace. The cooking itself requires your full attention, as the syrup heats quickly. Ensure your cooling station is ready before you begin cooking the candy.
Step-by-Step Instructions
1. Prepare the Apples: Thoroughly wash and dry your apples. This step is critical; any wax or moisture can prevent the candy from sticking. Remove the stems and firmly insert a wooden skewer or lollipop stick into the stem end of each apple, pushing it about halfway through. Arrange them on a baking sheet lined with parchment paper.
2. Combine Ingredients: In your heavy-bottomed saucepan, combine the granulated sugar, water, and corn syrup. Stir gently over medium heat until the sugar dissolves completely. Wipe down any sugar crystals on the sides of the pan with a wet pastry brush if they form (this prevents grainy candy).
3. Cook the Syrup: Insert your candy thermometer. Increase the heat to medium-high and bring the mixture to a boil without stirring. Do not stir once boiling, as this can encourage crystallization. Cook until the thermometer reads exactly 300°F (149°C), which is the hard crack stage. This typically takes 15-20 minutes.
4. Add Color and Flavor: Once at 300°F, remove the pan from the heat. Carefully stir in the food coloring and any optional flavoring extract. Work quickly but cautiously, as the syrup is extremely hot. The vibrant color is what makes these Candy Apples so appealing.
5. Dip the Apples: Tilt the saucepan to one side to create a deeper pool of syrup. Carefully dip each apple into the hot syrup, rotating it to ensure an even, complete coating. Lift the apple, allowing any excess syrup to drip back into the pan. If you prefer a chewier coating, similar to caramel apples, you might slightly undercook the syrup (around 285-290°F), though this changes the classic hard candy texture.
6. Cool and Set: Place the dipped apples on the prepared parchment-lined baking sheet. Allow them to cool and harden completely at room temperature for at least 30-60 minutes.
Nutritional Benefits & Advantages
While Candy Apples are undoubtedly a treat, they do offer some surprising nutritional elements. Apples themselves are rich in dietary fiber, which aids digestion, and contain vitamin C, an important antioxidant. The act of making them at home also allows you to control the quality of ingredients, opting for organic apples if desired, and avoiding artificial preservatives often found in store-bought versions. It’s a delightful way to get a serving of fruit wrapped in a sweet, fun package!
Tips, Variations & Cooking Advice
- Flavor Variations: Experiment with extracts! Beyond cinnamon or vanilla, try cherry, butter rum, or even a touch of chili powder for an adult twist.
Decorative Toppings: After dipping but before* the candy hardens, roll the apples in sprinkles, chopped nuts, mini chocolate chips, or crushed cookies for extra flair and texture.
- Double Dipping: For a thicker, more substantial candy coating, you can allow the first coat to set slightly, then re-dip.
- Small Batch: If you’re feeling ambitious and want to try smaller, more manageable portions, a small candy apple kit gives you specific amounts, but you can always scale down these ingredients – just maintain the sugar-to-water-to-corn syrup ratio.
Common Mistakes to Avoid
- Not Cleaning Apples Thoroughly: Wax or residue from apples will prevent the candy from sticking. A quick scrub with hot water and baking soda can help.
- Cooking Syrup Without a Thermometer: Guessing the temperature is the quickest way to end up with sticky, soft candy or burnt, brittle candy. A candy thermometer is non-negotiable.
- Stirring While Boiling: Once the sugar syrup boils, avoid stirring. Agitation can cause sugar crystals to form, resulting in a grainy rather than smooth coating.
- High Humidity: Candy making is sensitive to humidity. Avoid making candy apples on rainy or very humid days, as the candy may become sticky and refuse to harden properly.
Storage & Meal Prep Tips
Candy Apples are best enjoyed fresh, ideally within 24-48 hours. Store them individually wrapped in cellophane or waxed paper at room temperature. Avoid refrigerating, as condensation can make the candy sticky and dissolve its sheen. If you’ve added toppings, consider them delicate and protect them from crushing. They are not suitable for freezing.
Conclusion
Crafting homemade Candy Apples is a truly rewarding experience that brings a touch of whimsical delight to any occasion. With careful attention to detail and adherence to the hard crack stage, you can achieve that perfectly glossy, crunchy shell that contrasts beautifully with the crisp apple within. Whether you prefer the classic hard candy coating or a softer, chewiness reminiscent of caramel apples, this recipe provides the foundation for creating memorable treats. Don’t be afraid to experiment with colors, flavors, and toppings to personalize your batch. Give this recipe a try and share your stunning creations in the comments below!
FAQs
Q1: My candy coating is sticky, what went wrong?
A1: This usually means the syrup didn’t reach the hard crack stage (300°F). It might have been slightly undercooked or left in a humid environment. Ensure you use a reliable candy thermometer and cook to the exact temperature.
Q2: Can I use different types of apples?
A2: Yes, while Granny Smith apples are popular for their tartness, Fuji, Honeycrisp, or Gala apples also work well. Choose firm apples that aren’t too ripe to prevent muddiness.
Q3: How can I prevent crystallization on the sides of the pan?
A3: Use a wet pastry brush to gently wipe down any sugar crystals that form on the sides of the pan during the early stages of heating and before it comes to a rolling boil. Avoid stirring once boiling.
Q4: Can I reheat the candy syrup if it cools down too much while dipping?
A4: Yes, you can gently reheat the syrup over low heat, ensuring it reaches the hard crack stage again. Be careful not to scorch it.
Q5: What’s the difference between candy apples and caramel apples?
A5: Candy apples feature a hard, brittle, often brightly colored sugar coating that shatters when bitten. Caramel apples have a softer, chewier, sticky caramel coating made from butter, brown sugar, and cream.