Unlock the Secret to the Perfect Slice: Mastering Homemade Banana Bread
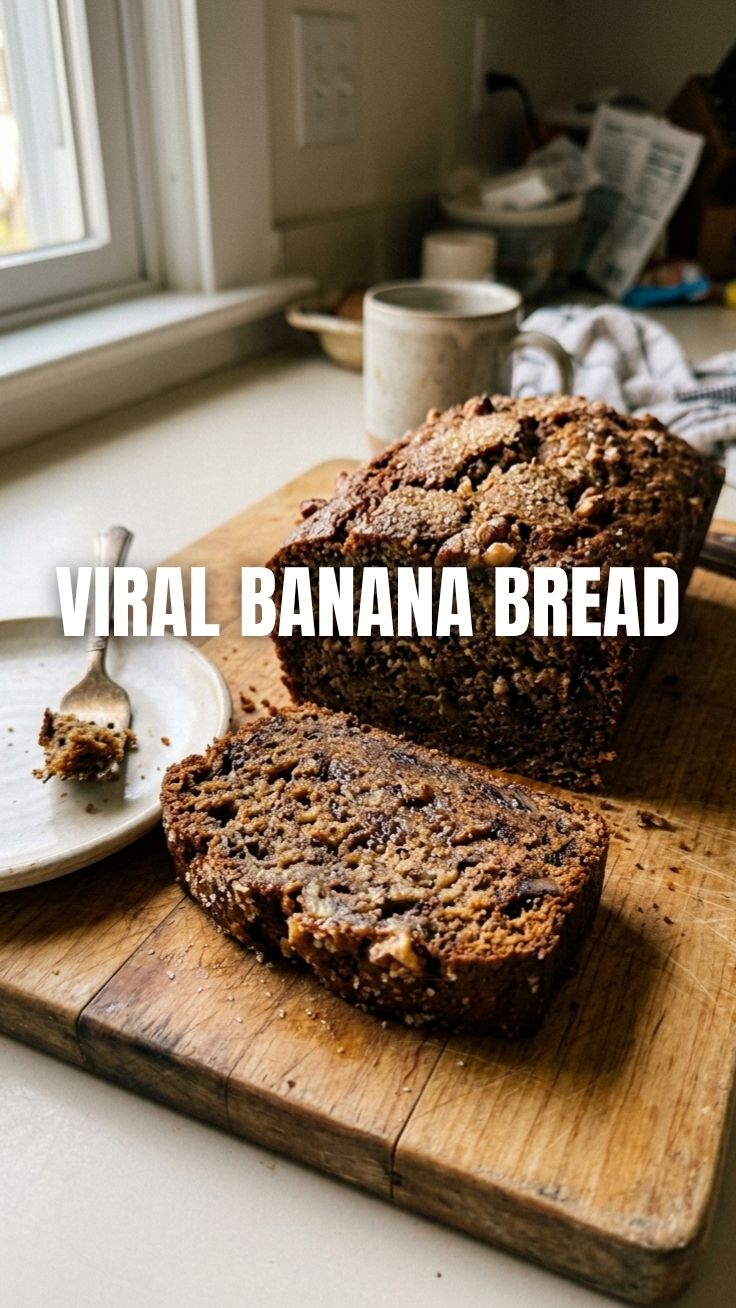
Ever wonder what makes a slice of homemade Banana Bread so irresistibly comforting? In a world of fast-paced convenience, there’s an undeniable magic in creating something delicious from scratch. Beyond the delightful aroma that fills your kitchen, baking at home allows for control over ingredients, ensuring fresh, wholesome goodness in every bite. Today, we’re diving deep into the art of crafting the ultimate moist and flavorful Banana Bread, a timeless classic that truly celebrates the humble and versatile Banana. Get ready to transform ripe Bananas into a culinary masterpiece that will become a staple in your recipe repertoire.
Ingredients & Kitchen Tools
Gather your culinary arsenal! Here’s what you’ll need for this delectable journey:
- Ripe Bananas (3 medium): The star of the show. Look for those with plenty of brown spots; they’re sweeter and easier to mash.
- All-Purpose Flour (1 ½ cups): Provides structure.
- Granulated Sugar (½ cup): For sweetness and crispy edges.
- Brown Sugar (¼ cup packed): Adds moisture and a hint of caramel.
- Large Eggs (2): Binds ingredients together.
- Unsalted Butter (½ cup, melted): Adds richness and flavor.
- Baking Soda (1 teaspoon): A leavening agent for lift.
- Salt (½ teaspoon): Balances sweetness and enhances flavor.
- Vanilla Extract (1 teaspoon): Essential for a warm, inviting aroma.
- Optional Add-ins: Chocolate chips, walnuts, pecans, or dried cranberries (½ cup).
Kitchen Tools:
- Large Mixing Bowl: For combining ingredients.
- Fork or Potato Masher: To mash the bananas.
- Whisk: For dry ingredients.
- Rubber Spatula: For scraping bowls and folding.
- Loaf Pan (9×5 inch): The vessel for your delicious creation.
- Parchment Paper: For easy release and cleanup (optional).
- Measuring Cups & Spoons: For accurate ingredient quantities.
Prep Time & Cooking Schedule
- Prep Time: 15 minutes (Includes mashing bananas and mixing ingredients).
- Cook Time: 50-65 minutes (Cooking times can vary based on oven, so keep an eye on it!).
- Cooling Time: 15-20 minutes in the pan, then fully on a wire rack.
This recipe is ideal for a weekend baking project or a proactive weeknight treat. The cooling time is crucial for the bread to set properly and prevent it from crumbling.
Step-by-Step Instructions
Let’s get baking! Follow these clear steps for a perfectly moist Banana Bread:
1. Preheat & Prep: Preheat your oven to 350°F (175°C). Grease and flour a 9×5 inch loaf pan, or line it with parchment paper for easier removal.
2. Mash the Bananas: In a large bowl, mash the ripe Bananas with a fork until mostly smooth desired, with a few small lumps for texture. Don’t overdo it!
3. Combine Wet Ingredients: Add the melted butter, granulated sugar, brown sugar, eggs, and vanilla extract to the mashed Banana in the bowl. Whisk until well combined.
4. Whisk Dry Ingredients: In a separate medium bowl, whisk together the flour, baking soda, and salt.
5. Combine Wet and Dry: Gradually add the dry ingredients to the wet ingredients, mixing until just combined. Be careful not to overmix, as this can lead to a tough loaf. If adding optional mix-ins like chocolate chips or nuts, gently fold them in now.
6. Bake: Pour the batter into the prepared loaf pan and spread evenly. Bake for 50-65 minutes, or until a wooden skewer or toothpick inserted into the center comes out clean.
7. Cool: Let the Banana Bread cool in the pan for 15-20 minutes before carefully transferring it to a wire rack to cool completely.
Nutritional Benefits & Advantages
Beyond its delicious taste, this Banana Bread offers several advantages. The primary ingredient, the Banana, is a fantastic source of potassium, which is crucial for heart health and muscle function. Bananas also provide dietary fiber, aiding digestion and promoting a feeling of fullness. While this recipe includes sugar, you can reduce the amount slightly or use natural sweeteners for a healthier twist. The homemade aspect ensures you avoid preservatives and artificial flavors often found in store-bought alternatives.
Tips, Variations & Cooking Advice
- Don’t Overmix: Overmixing develops gluten, leading to a tough, dry loaf. Mix until just combined.
- Ripeness Matters: The riper the bananas, the sweeter and more flavorful your bread will be.
- Spice it up: Add ½ teaspoon of cinnamon or a pinch of nutmeg for extra warmth.
- Gluten-Free Option: Substitute all-purpose flour with a 1:1 gluten-free baking blend.
- Dairy-Free: Use a plant-based milk and oil instead of butter, or a dairy-free butter alternative.
- Mini Loaves: Bake in mini loaf pans, reducing cooking time to 25-35 minutes.
Common Mistakes to Avoid
- Under-ripe Bananas: They lack sweetness and won’t mash as easily, resulting in a less flavorful bread.
- Overmixing the Batter: This is a cardinal sin in baking! It leads to dry, dense bread.
- Opening the Oven Too Soon: Resist the urge to peek during the first 30 minutes, as it can cause the bread to sink.
- Not Cooling Properly: Slicing hot bread leads to crumbling and a gummy texture. Patience is key!
Storage & Meal Prep Tips
- Countertop: Store wrapped tightly in plastic wrap or in an airtight container at room temperature for up to 3-4 days.
- Refrigerator: For extended freshness, store in an airtight container in the refrigerator for up to a week.
- Freezer: Slice the Banana bread, wrap individual slices in plastic wrap, then place them in a freezer-safe bag or container for up to 2-3 months. Thaw at room temperature or gently warm in the microwave or oven.
- Reheating: For a warm, fresh-from-the-oven experience, reheat slices in a toaster oven or microwave for a few seconds.
Conclusion
There’s nothing quite like the aroma and taste of freshly baked Banana Bread. This recipe is a testament to the fact that with a few simple ingredients and a little love, you can create something truly extraordinary. Whether you’re using up those overripe Bananas or simply craving a comforting treat, this homemade version will quickly become a family favorite. So, go ahead, gather your ingredients, and embark on this delightful baking journey. Share your delicious results with us, and happy baking!
FAQs
Q1: Can I use frozen bananas for this recipe?
A1: Yes, absolutely! Thaw them completely and drain any excess liquid before mashing. Frozen bananas tend to be sweeter and mash more easily.
Q2: My Banana Bread is dry. What went wrong?
A2: Common culprits for dry bread include overmixing the batter, too much flour, or overbaking. Ensure you’re measuring accurately and mixing until just combined.
Q3: How can I tell if my bananas are ripe enough?
A3: Ripe bananas will have a significant amount of brown spots on their skin. The more brown, the sweeter and softer the banana will be, making it perfect for Banana bread.
Q4: Can I make this a healthier version?
A4: You can reduce the sugar by ¼ cup, substitute some all-purpose flour with whole wheat flour, or add extra mix-ins like oats or flax seeds for added fiber.
Q5: What’s the best way to prevent the top of my loaf from burning?
A5: If you notice the top browning too quickly, you can loosely tent the loaf pan with aluminum foil during the last 15-20 minutes of baking.