Craving a Sweet, Salty, and Perfectly Chewy Treat? Your Kitchen Holds the Key!
Ever found yourself yearning for that classic, comforting aroma filling your home – the one that instantly transports you back to cozy afternoons or childhood memories? We’re talking about the magic of homemade cookies, specifically those golden-brown delights with that unmistakable nutty flavor. Today, we’re diving into the wonderful world of Peanut Butter Cookies, a timeless favorite that’s surprisingly simple to master. Forget store-bought versions; crafting these at home not only gives you complete control over the ingredients but also infuses each bite with an unparalleled freshness and a touch of personal artistry. Get ready to discover your new go-to Easy Peanut Butter Cookie Recipe that promises delightful results every single time.
Ingredients & Kitchen Tools
Gathering your culinary arsenal is the first step to baking bliss!
- 1 cup (2 sticks) Unsalted Butter, softened: This provides richness and helps with texture. Make sure it’s at room temperature for easy creaming.
- 1 cup Granulated Sugar: For sweetness and a crisp exterior.
- 1 cup Packed Light Brown Sugar: Adds moisture, chewiness, and a deeper molasses flavor.
- 1 cup Creamy Peanut Butter: The star of the show! Choose a good quality, creamy variety (not natural, as oil separation can affect consistency).
- 2 Large Eggs: Bind the ingredients together and add moisture.
- 2 teaspoons Vanilla Extract: Enhances all the other flavors. Pure vanilla is always best.
- 2 ½ cups All-Purpose Flour: Provides structure. Sifting it can lead to a lighter cookie.
- 1 teaspoon Baking Soda: The leavening agent that helps the cookies rise and spread.
- ½ teaspoon Salt: Balances the sweetness and enhances the peanut butter flavor.
Kitchen Tools:
- Large Mixing Bowls (2): One for wet ingredients, one for dry.
- Electric Mixer (stand or hand-held): Essential for creaming butter and sugars until light and fluffy.
- Rubber Spatula: For scraping down the bowl and folding ingredients.
- Measuring Cups & Spoons: Accuracy is key in baking.
- Baking Sheets: Preferably heavy-duty, for even heat distribution.
- Parchment Paper or Silicone Baking Mats: Prevents sticking and makes cleanup a breeze.
- Fork: For creating the classic crosshatch pattern.
- Wire Cooling Rack: Allows air circulation for even cooling, preventing soggy bottoms.
Prep Time & Cooking Schedule
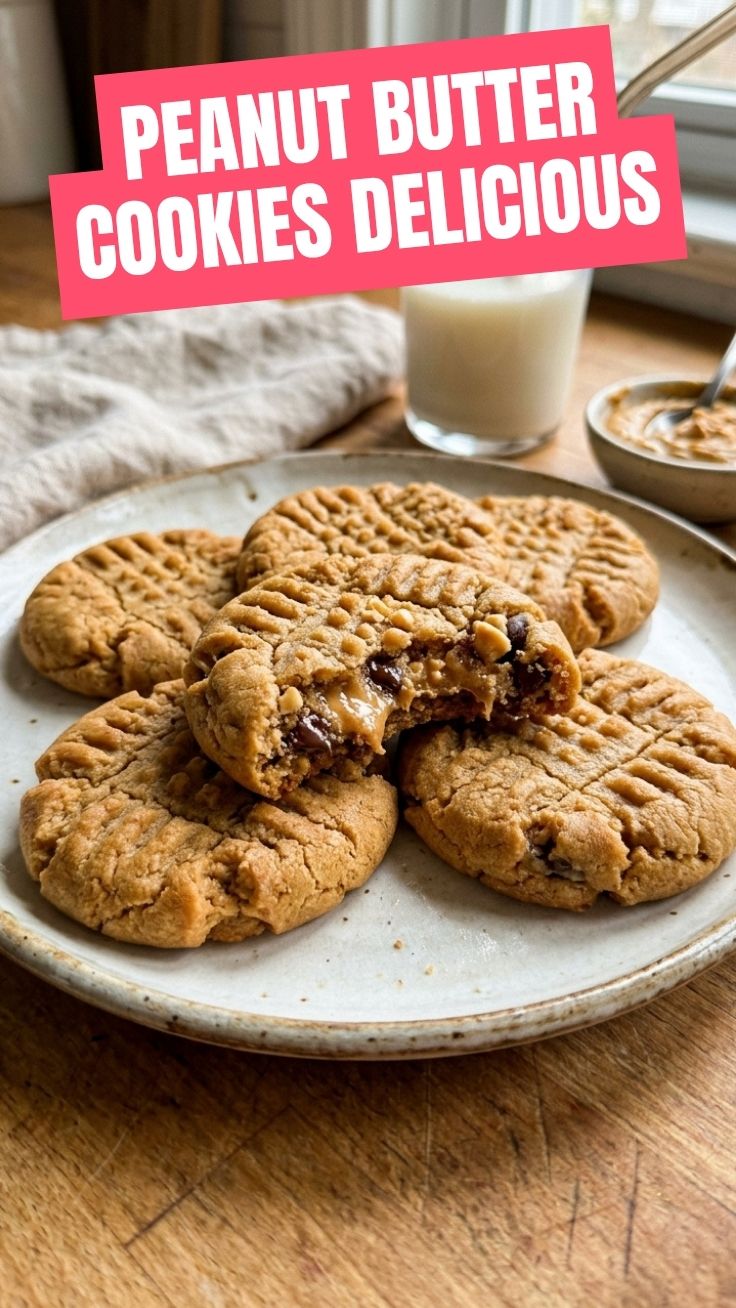
This recipe is designed for maximum flavor and minimal fuss!
Prep Time: 15 minutes
Chilling Time (Optional but Recommended): 30 minutes (or overnight for best results)
Cook Time: 10-12 minutes per batch
Resting Time: 5 minutes after baking, before transferring to a cooling rack.
The optional chilling time solidifies the butter, preventing excessive spreading and yielding a thicker, chewier cookie with more intense flavor. If you’re short on time, you can skip it, but for truly outstanding cookies, it’s worth the wait!
Step-by-Step Instructions
1. Prep Your Workspace: Preheat your oven to 375°F (190°C). Line your baking sheets with parchment paper or silicone mats.
2. Cream Wet Ingredients: In a large mixing bowl, using an electric mixer, cream together the softened butter, granulated sugar, and brown sugar on medium speed until light and fluffy (about 2-3 minutes). This aeration is crucial for a tender cookie.
3. Add Peanut Butter & Eggs: Beat in the creamy peanut butter until well combined. Then, add the eggs one at a time, mixing well after each addition. Stir in the vanilla extract.
4. Combine Dry Ingredients: In a separate medium bowl, whisk together the all-purpose flour, baking soda, and salt.
5. Gradually Add Dry to Wet: With the mixer on low speed, gradually add the dry ingredients to the wet ingredients, mixing just until combined. Be careful not to overmix, as this can lead to tough cookies.
6. Chill the Dough (Optional but Recommended): Cover the bowl with plastic wrap and refrigerate for at least 30 minutes. This step is a game-changer for producing perfectly textured Peanut Butter Cookies that hold their shape beautifully.
7. Scoop & Shape: Roll the dough into 1-inch balls. Place them about 2 inches apart on the prepared baking sheets.
8. The Classic Crosshatch: Using a fork, gently press down on each cookie ball to create a crosshatch pattern. This iconic design helps them bake evenly and gives them their signature look.
9. Bake: Bake for 10-12 minutes, or until the edges are lightly golden brown and the centers are just set. They might look slightly underdone in the middle, but they will continue to set as they cool. This is the secret to a chewy Easy Peanut Butter Cookie Recipe.
10. Cool: Let the cookies cool on the baking sheets for 5 minutes before transferring them to a wire rack to cool completely.
Nutritional Benefits & Advantages
Beyond their incredible taste, these cookies offer some surprising benefits. Peanut butter is a fantastic source of protein and healthy fats, particularly monounsaturated fats, which are beneficial for heart health. It also contains fiber, magnesium, and potassium. While these are certainly a treat, enjoying them in moderation can be part of a balanced diet, providing a quick energy boost and satisfying a sweet craving with more nutritional value than many other desserts.
Tips, Variations & Cooking Advice
- Add-ins: Elevate your cookies with chocolate chips (milk, dark, or white!), chopped nuts like pecans or walnuts, or even a sprinkle of sea salt before baking for a salty-sweet twist.
- Texture Control: For a softer cookie, reduce baking time by 1-2 minutes. For a crispier cookie, bake for an additional 1-2 minutes until more golden.
- Dietary Adaptations:
* Gluten-Free: Substitute the all-purpose flour with a 1:1 gluten-free baking flour blend.
* Dairy-Free: Use a good quality plant-based butter substitute.
- Peanut Butter Type: While creamy is recommended for consistency, you can experiment with crunchy peanut butter for added texture. Avoid natural peanut butter that requires stirring, as its oil separation can make the dough difficult to manage.
Common Mistakes to Avoid
- Overmixing the Dough: This develops the gluten in the flour, resulting in tough, chewy cookies instead of tender ones. Mix just until the ingredients are combined.
- Not Softening Butter Enough (or Too Much): Butter that’s too cold won’t cream properly, leading to dense cookies. Butter that’s too melted creates greasy cookies that spread too much. Room temperature is key.
- Skipping the Chilling Step: While optional, skipping chilling can lead to cookies that spread too thin.
- Baking on Hot Sheets: Always use cool or room-temperature baking sheets to prevent the dough from melting too quickly when it hits the oven.
Storage & Meal Prep Tips
These cookies are fantastic for meal prep or simply to have on hand for a sweet treat.
- Storage: Store cooled cookies in an airtight container at room temperature for up to 5-7 days.
- Freezing Baked Cookies: Once completely cooled, place cookies in a single layer in an airtight freezer-safe container or freezer bag. They can be frozen for up to 3 months. Thaw at room temperature.
- Freezing Cookie Dough: Roll the cookie dough into balls, flatten with a fork (or not, if you prefer), and freeze them on a baking sheet until solid. Transfer the frozen dough balls to a freezer-safe bag. Bake from frozen, adding an extra 2-3 minutes to the baking time.
Conclusion
There you have it – a comprehensive guide to crafting the most delightful Peanut Butter Cookies right in your own kitchen! This isn’t just an Easy Peanut Butter Cookie Recipe; it’s a doorway to creating cherished memories, comforting aromas, and irresistible treats. By following these steps and tips, you’re guaranteed to produce a batch of perfectly chewy, nutty, and satisfying cookies that will impress everyone fortunate enough to snag one. Don’t hesitate – gather your ingredients and embark on this delicious baking adventure today! Share your results with us and let us know what you think. Happy baking!
FAQs
Q1: Can I use natural peanut butter?
A1: It’s generally not recommended for this recipe as the oil separation in natural peanut butter can make the dough too oily or crumbly, affecting consistency. Creamy, conventional peanut butter works best.
Q2: My cookies spread too much. What went wrong?
A2: This can happen if the butter was too soft/melted, the oven wasn’t preheated properly, or the dough wasn’t chilled. Ensure your butter is just softened (not melted) and consider chilling the dough for at least 30 minutes.
Q3: How do I know when the cookies are done?
A3: The edges should be lightly golden brown, and the centers should appear just set but still slightly soft. They will continue to cook slightly as they cool on the baking sheet.
Q4: Can I make these without an electric mixer?
A4: Yes, but it will require more arm strength! You can cream the butter and sugars by hand with a sturdy whisk or wooden spoon, but ensure they are very well combined and fluffy.
Q5: What’s the best way to get uniform cookie sizes?
A5: A cookie scoop is your best friend for achieving consistent sizes, which helps ensure even baking across the batch.