Master the Art of Homemade Tuna Salad: Your Ultimate Guide
Are you tired of bland, store-bought spreads, and yearning for a fresh, flavorful, and incredibly satisfying meal? Preparing a delicious Tuna Salad at home isn’t just about saving money; it’s about crafting a dish that perfectly suits your palate and nourishes your body. This comprehensive guide will walk you through every step of creating a vibrant and delectable tuna salad recipe, packed with essential nutrients and bursting with flavor. Forget complicated techniques – this recipe is designed for ease and guaranteed deliciousness.
Ingredients & Kitchen Tools
Crafting the perfect tuna salad begins with quality ingredients and the right tools. Here’s what you’ll need:
- Canned Tuna (2 cans, 5 oz each, packed in water or olive oil, drained): The star of our show. Water-packed is leaner, while olive oil-packed offers richer flavor.
- Mayonnaise (½ cup): Binds everything together. Adjust to your desired creaminess.
- Celery (2 stalks, finely diced): Adds a delightful crunch and fresh vegetal notes.
- Red Onion (¼ cup, finely diced): Provides a sharp, zesty counterpoint. For a milder flavor, rinse after dicing.
- Fresh Dill (2 tablespoons, chopped): Aromatic herb that brightens the entire dish.
- Dijon Mustard (1 teaspoon): Adds a subtle tang and depth of flavor.
- Lemon Juice (1 tablespoon, freshly squeezed): Cuts through richness, adding essential acidity.
- Salt (½ teaspoon, or to taste): Enhances all the flavors.
- Black Pepper (¼ teaspoon, freshly ground, or to taste): Aromatic seasoning.
- Optional Add-ins: Capers (1 tbsp, briny kick), hard-boiled eggs (2, chopped, added protein and creaminess), sweet pickle relish (1 tbsp, for a sweet and tangy profile).
Kitchen Tools:
- Large Mixing Bowl: For combining all ingredients.
- Fork: To flake the tuna.
- Sharp Knife: For precise dicing of vegetables.
- Cutting Board: Protects your countertop.
- Measuring Cups and Spoons: For accurate ingredient quantities.
- Rubber Spatula: For mixing and scraping the bowl.
Prep Time & Cooking Schedule
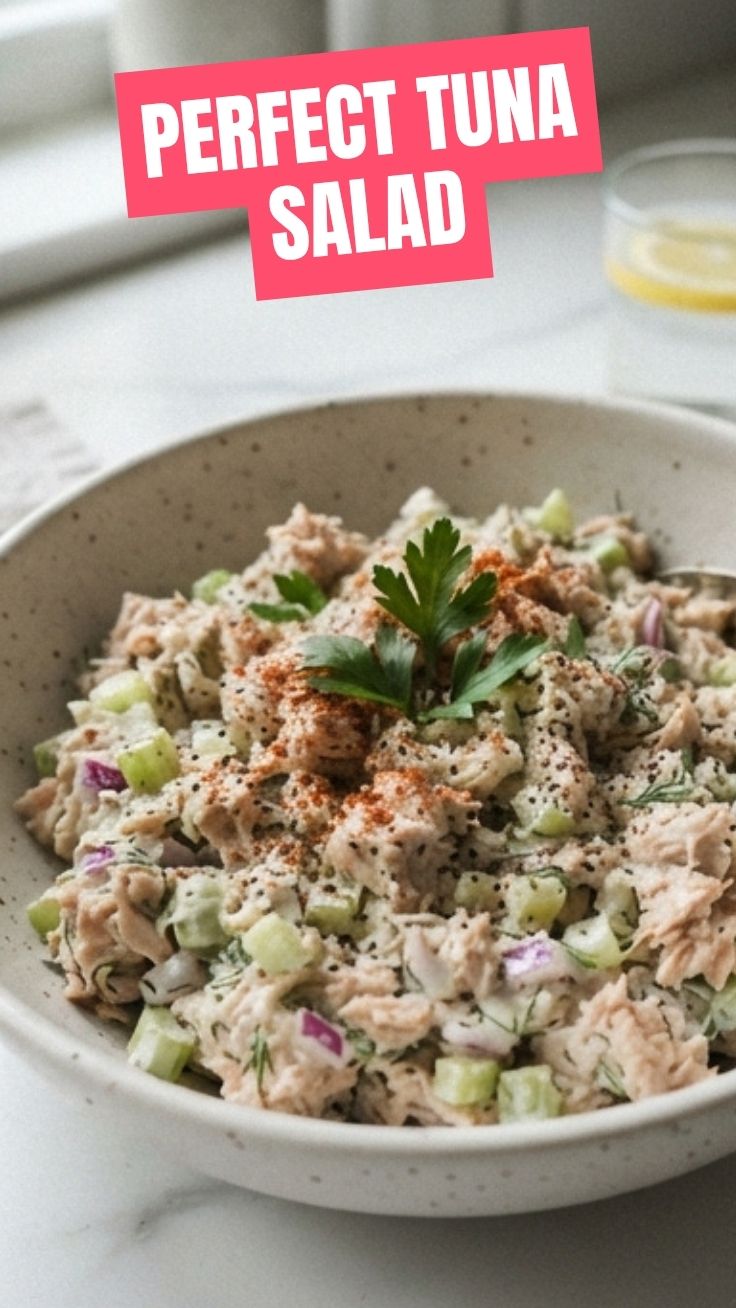
This recipe is incredibly quick and requires no cooking!
- Prep Time: 10-15 minutes
- Resting Time: 15-30 minutes (optional, but highly recommended for flavors to meld)
Plan to prepare this dish about 30 minutes before serving if you want the flavors to fully develop. It’s a perfect last-minute addition to any meal or a quick lunch solution.
Step-by-Step Instructions
Follow these simple steps to create your perfect Tuna Salad:
1. Drain the Tuna: Open your cans of tuna and drain them thoroughly. For tuna packed in water, you can press it gently to remove excess liquid. For tuna in olive oil, a gentle drain is usually sufficient. Place the drained tuna into your large mixing bowl.
2. Flake the Tuna: Using a fork, gently flake the tuna until it’s broken into small, manageable pieces. Avoid over-mashing; you want some texture.
3. Dice Vegetables: Finely dice the celery and red onion. The smaller the dice, the more evenly distributed the flavors and textures will be. Add them to the bowl with the tuna.
4. Add Herbs and Seasonings: Chop the fresh dill and add it to the bowl. Stir in the mayonnaise, Dijon mustard, and fresh lemon juice.
5. Season and Mix: Add the salt and black pepper. Mix all the ingredients gently but thoroughly until everything is well combined and the tuna is coated in the creamy dressing. Taste and adjust seasonings as needed. This is your chance to perfect your tuna salad recipe!
6. Rest (Optional but Recommended): For the best flavor, cover the bowl and refrigerate for at least 15-30 minutes. This allows the flavors to meld and deepen.
Nutritional Benefits & Advantages
Tuna salad, especially when made with quality ingredients, offers a host of nutritional benefits. Tuna is an excellent source of lean protein, crucial for muscle repair and growth, and omega-3 fatty acids, known for their heart-healthy and anti-inflammatory properties. Celery and red onion add fiber, vitamins, and antioxidants, while lemon juice provides a boost of Vitamin C. Opting for light mayonnaise or Greek yogurt can further reduce fat content while maintaining creaminess. This dish is a fantastic option for a quick, high-protein meal that keeps you feeling full and satisfied.
Tips, Variations & Cooking Advice
- Spice It Up: Add a pinch of cayenne pepper or a dash of hot sauce for a spicy kick.
- Herbaceous Delights: Experiment with other fresh herbs like parsley, chives, or tarragon for different flavor profiles.
- Creamy Alternatives: For a lighter version, substitute half of the mayonnaise with plain Greek yogurt or a plant-based mayo.
- Texture Play: Add chopped pickles, olives, or roasted red peppers for additional texture and flavor complexity.
- Elevate Your Sandwich: Serve your tuna salad on toasted sourdough, in a lettuce wrap, or as a topping for crackers or cucumber slices.
- Dietary Adaptations: This recipe is naturally gluten-free. For a dairy-free version, ensure your mayonnaise is dairy-free, or use an avocado-based dressing.
Common Mistakes to Avoid
- Not Draining Tuna Properly: Excess water or oil will make your tuna salad watery and dilute the flavor.
- Over-Mashing the Tuna: Aim for flaky pieces, not a paste. Over-mashing can lead to a mushy texture.
- Lack of Seasoning: Don’t be afraid to taste and adjust! Salt, pepper, and acid (lemon juice) are crucial for balancing flavors.
- Skipping the Fresh Herbs: Dried herbs won’t give you the same vibrant flavor. Fresh dill makes a significant difference.
- Serving Immediately: While edible, allowing the salad to rest in the fridge for a short period truly enhances the flavor.
Storage & Meal Prep Tips
Homemade tuna salad is excellent for meal prepping. Store it in an airtight container in the refrigerator for up to 3-4 days. It’s important to keep it well-chilled to maintain freshness and safety. Freezing tuna salad is generally not recommended as the mayonnaise can separate and alter the texture upon thawing. For reheating, it’s best enjoyed cold, but if you prefer it warm (e.g., for a tuna melt), gently heat it in a pan over low heat or in the microwave, being careful not to overheat which can dry out the tuna.
Conclusion
There you have it – a perfectly balanced, incredibly flavorful, and easy-to-make Tuna Salad that will quickly become a household favorite. This versatile dish is not just a quick lunch solution but a canvas for culinary creativity. By following this comprehensive guide, you’ve mastered the art of crafting a delightful tuna salad recipe that’s far superior to anything you’d buy. We encourage you to try this recipe, experiment with your favorite add-ins, and share your delicious creations!
FAQs
Q1: Can I use fresh tuna instead of canned tuna?
A1: Absolutely! If using fresh tuna, simply pan-sear or bake it until cooked through, then flake it before mixing with the other ingredients. Adjust cooking times based on tuna thickness.
Q2: How can I make my tuna salad less watery?
A2: Ensure you thoroughly drain the tuna. If you’re using fresh vegetables, you can lightly salt them and let them sit for a few minutes to draw out excess moisture before adding them to the salad.
Q3: What are some good alternatives to mayonnaise for a lighter option?
A3: Plain Greek yogurt, mashed avocado, or even a light vinaigrette can be excellent substitutes for all or part of the mayonnaise, offering different flavor profiles and calorie counts.
Q4: Can I prepare this tuna salad ahead of time for a party?
A4: Yes, tuna salad is an excellent make-ahead dish. Prepare it up to 24 hours in advance and store it in an airtight container in the refrigerator. Give it a good stir before serving.
Q5: What are some creative ways to serve tuna salad besides sandwiches?
A5: Tuna salad is delicious served in lettuce cups, stuffed into bell peppers or tomatoes, alongside crackers or crudités, or even as a protein boost on top of a green salad.