Unlock Turkey Perfection: Your Guide to a Flawless Roast
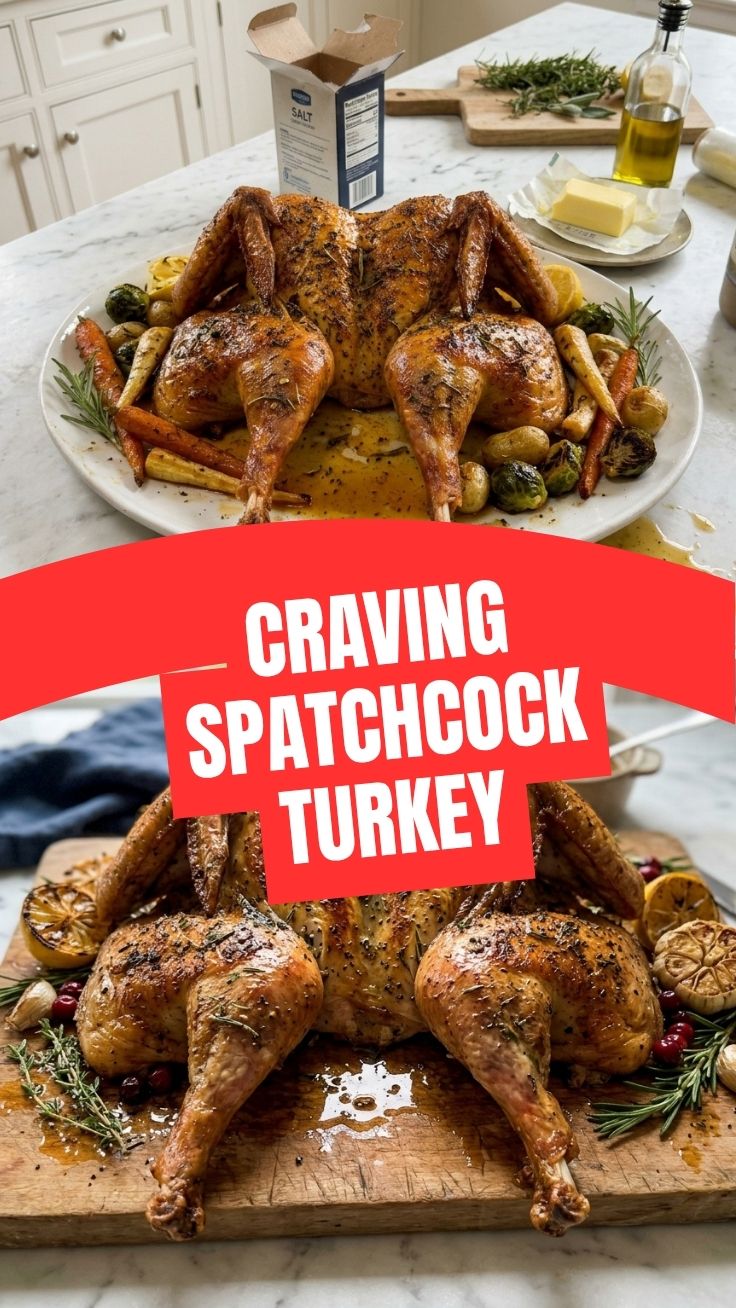
Ever wondered how to achieve that perfectly juicy, crispy-skinned roast turkey every single time, without the usual holiday stress? Preparing a celebratory meal at home is not just about the food; it’s about crafting memories and savoring the process. This guide is your passport to culinary success, focusing on a revolutionary technique that guarantees an even cook and fantastic flavor. We’ll dive deep into making a magnificent Spatchcock Turkey, a method that not only speeds up cooking but also ensures every piece is succulent and infused with flavor, whether you’re working with a traditional bird or a expertly brined turkey.
Ingredients & Kitchen Tools
To embark on this journey to turkey perfection, gather these essentials:
- Whole Turkey (12-14 lbs): Fresh or thawed. A smaller bird is generally easier to spatchcock.
- Butter (1/2 cup, unsalted): Softened for easy application, adding richness under the skin.
- Fresh Herbs (rosemary, thyme, sage): Roughly chopped, infusing aromatic depth.
- Garlic (4-6 cloves): Minced, for a pungent kick.
- Olive Oil (2 tbsp): To help with browning and crispiness.
- Lemon (1, halved): Adds brightness and helps tenderize.
- Onion (1, quartered): For aromatics in the roasting pan.
- Salt & Black Pepper (to taste): Essential for seasoning. Kosher salt is recommended for its texture.
- Vegetable Broth or Water (1 cup): For the roasting pan, keeping the bird moist and creating pan drippings.
- Heavy-Duty Kitchen Shears: Absolutely crucial for cutting through the turkey’s backbone.
- Large Roasting Pan with a Rack: Ensures even air circulation around the bird.
- Meat Thermometer (leave-in preferred): The secret weapon for perfect doneness.
- Cutting Board (large, sturdy): For spatchcocking and carving.
- Gloves (optional): For easier handling of the turkey.
Prep Time & Cooking Schedule
- Active Prep Time: 30-45 minutes (includes spatchcocking and seasoning)
- Marinating Time (Optional, but recommended for brined turkey): 12-24 hours. If your turkey is already brined, this step is covered!
- Roasting Time: 1.5 – 2.5 hours (depending on turkey size and oven calibration)
- Resting Time: 20-30 minutes
Planning is key! Allocate enough time the day before for thawing if your turkey is frozen. The spatchcocking itself takes less time than you might think, and the payoff in quicker cooking and superior results is immense.
Step-by-Step Instructions
1. Prepare Your Turkey: Pat the turkey very dry with paper towels. This is critical for crispy skin.
2. Spatchcock the Bird: Place the turkey breast-side down on your cutting board. Using sturdy kitchen shears, cut along both sides of the backbone, from the tail to the neck. Remove the backbone (save it for stock!). Flip the turkey over, breast-side up, and firmly press down on the breastbone until it flattens with a satisfying crack. This is the art of the Spatchcock Turkey.
3. Seasoning: In a small bowl, combine the softened butter, minced garlic, chopped fresh herbs, salt, and pepper. Gently separate the skin from the breast and thigh meat, being careful not to tear it. Rub about half of the butter mixture directly onto the meat under the skin. Apply the remaining butter mixture over the entire exterior of the turkey.
4. Roasting Setup: Place the flattened turkey on a V-rack inside a large roasting pan. Arrange the lemon halves and quartered onion around the pan, then pour in the vegetable broth or water.
5. Roast: Preheat your oven to 425°F (220°C). Roast the turkey for 30 minutes, then reduce the oven temperature to 350°F (175°C). Continue roasting, periodically basting with pan juices, until a meat thermometer inserted into the thickest part of the thigh (without touching bone) reads 165°F (74°C). For a truly succulent and flavorful outcome, especially if you started with a brined turkey, ensure you monitor the internal temperature closely to prevent overcooking.
6. Rest: Once done, remove the turkey from the oven, tent it loosely with foil, and let it rest for 20-30 minutes. This allows the juices to redistribute, resulting in a more tender and flavorful bird.
Nutritional Benefits & Advantages
Turkey is a lean protein powerhouse, rich in essential amino acids necessary for muscle repair and growth. It’s also an excellent source of B vitamins (especially B6 and B12), selenium, zinc, and phosphorus, all vital for energy production, immune function, and bone health. Opting for a home-roasted turkey allows you to control sodium levels and avoid additives often found in processed meats. Furthermore, the skin, while delicious, can be removed to reduce fat content for a lighter meal.
Tips, Variations & Cooking Advice
- Flavor Boost: For an extra layer of flavor, tuck extra sprigs of herbs and garlic cloves into the roasting pan.
- Spicy Kick: Add a pinch of cayenne pepper or red pepper flakes to your butter mixture for a subtle heat.
- Gluten-Free Gravy: Use cornstarch or a gluten-free flour blend to thicken your pan drippings for a delicious, diet-friendly gravy.
- Compound Butter: Experiment with different herb combinations (e.g., tarragon, chives) or a hint of citrus zest in your butter.
- Crispier Skin: For ultimate crispiness, pat the turkey exceptionally dry and consider adding a tablespoon of baking powder to your salt mixture before applying to the skin.
Common Mistakes to Avoid
- Not Drying the Turkey: A wet surface prevents the skin from crisping up.
- Overcooking: The biggest culprit of dry turkey. Always trust your meat thermometer.
- Skipping the Rest: Resting is non-negotiable for juicy meat. Don’t rush this step!
- Forgetting the Pan Liquid: Without broth or water, your pan drippings can burn, and the oven environment will be too dry.
- Cutting Without Spatchcocking: Attempting to roast a whole, untrussed bird often leads to uneven cooking, with the breast drying out before the thighs are done.
Storage & Meal Prep Tips
Leftover turkey can be a blessing! Store cooked turkey meat in airtight containers in the refrigerator for up to 3-4 days. For longer storage, freeze portioned turkey meat in freezer-safe bags or containers for up to 3 months. When reheating, add a splash of broth to prevent drying out, and reheat gently in the microwave or oven until warmed through. Leftovers are fantastic in sandwiches, salads, stir-fries, or even a comforting turkey soup.
Conclusion
Mastering the art of the Spatchcock Turkey transforms what can be an intimidating undertaking into a remarkably straightforward and consistently excellent culinary achievement. By following these steps, and perhaps starting with a perfectly prepared brined turkey, you’re not just cooking a meal; you’re creating a showstopper that will earn rave reviews. We encourage you to try this method for your next festive gathering or even a special weeknight dinner. Share your pictures and tell us your favorite part of this simplified roasting experience in the comments below!
FAQs
Q1: Can I use a frozen turkey for this method?
A1: Yes, but ensure it is fully thawed before attempting to spatchcock. Thawing in the refrigerator typically takes 24 hours for every 5 pounds of turkey.
Q2: What if I don’t have kitchen shears?
A2: While heavy-duty kitchen shears are ideal, a sharp chef’s knife can be used carefully to remove the backbone. Be mindful of hand safety.
Q3: My turkey skin isn’t getting crispy, what did I do wrong?
A3: The most common reasons are not drying the turkey enough, or your oven temperature might not be accurate. Ensure the turkey is pat dry and consider a higher initial temperature for a shorter period.
Q4: Can I stuff a spatchcock turkey?
A4: It’s not recommended as the open cavity makes it difficult for the stuffing to cook evenly and safely. Instead, cook your stuffing in a separate baking dish.
Q5: How do I make gravy from the pan drippings?
A5: After removing the turkey, skim excess fat from the drippings. Deglaze the pan with a little wine or broth, then whisk in a slurry of flour or cornstarch dissolved in water to thicken to your desired consistency. Season to taste.