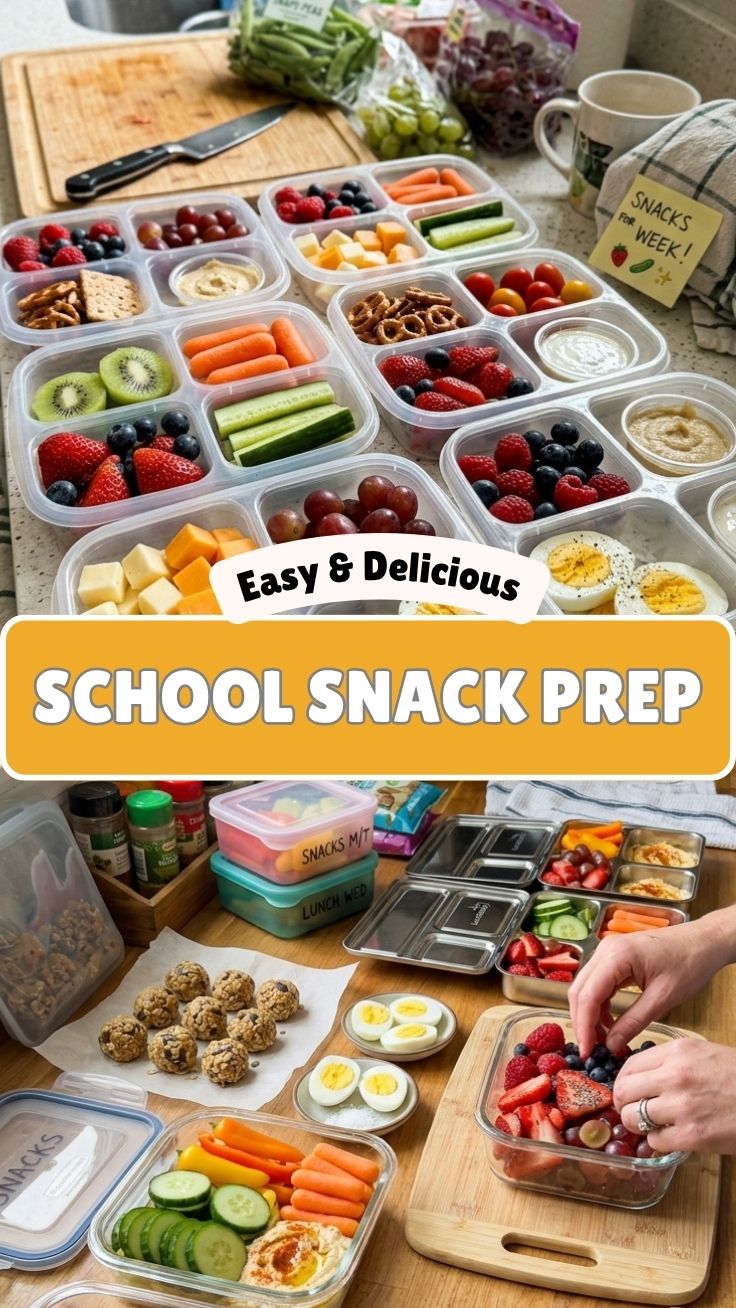
Fueling Young Minds: The Ultimate Guide to School Snack Prep (Healthy)
Are you constantly searching for ways to ensure your children are fueled with nutritious, delicious snacks that keep them energized throughout their busy school days? The grab-and-go options often leave much to be desired, packed with sugar and artificial ingredients. Preparing snacks at home offers unparalleled control over what your kids consume, fostering healthier eating habits from a young age. This comprehensive guide will equip you with everything you need for stellar School Snack Prep (Healthy), ensuring their lunchboxes are brimming with goodness. We’ll delve into a fantastic, easy recipe that exemplifies how enjoyable and effortless creating Healthy school snacks can be, empowering you to consistently provide wholesome options.
Ingredients & Kitchen Tools
To embark on your healthy snack creation journey, gather these essential items:
- 1 cup rolled oats (old-fashioned): Provides sustained energy through complex carbohydrates and fiber.
- ½ cup natural peanut butter (unsweetened, creamy or chunky): A great source of protein and healthy fats. You can substitute with almond butter or sunflower seed butter for nut allergies.
- ¼ cup honey or maple syrup: Natural sweetener, binding agent. Adjust to taste.
- 1 teaspoon vanilla extract: Enhances flavor.
- ½ cup unsweetened shredded coconut: Adds texture and healthy fats, optional.
- ¼ cup mini chocolate chips (dark chocolate preferred): A touch of indulgence, optional.
- Kitchen Scale (optional): For precise ingredient measurement, especially helpful for consistent results.
- Large Mixing Bowl: For combining all ingredients thoroughly.
- Rubber Spatula: For mixing and scraping.
- Measuring Cups & Spoons: Essential for accurate ingredient amounts.
- Baking Sheet: To chill the prepared snacks.
- Parchment Paper or Silicone Mat: Prevents sticking and makes cleanup easier.
- Airtight Container: For storing your finished healthy bites.
Prep Time & Cooking Schedule

This recipe is a marvel of efficiency, designed for busy parents!
- Prep Time: 15 minutes
- Chill Time: 30 minutes (minimum)
- Total Time: 45 minutes
The beauty of these energy bites is their no-bake nature. You can whip them up in the evening after the kids are in bed, or even with them as a fun, interactive kitchen activity on a weekend afternoon. The chill time is crucial for the bites to firm up, making them easy to handle and perfectly portable for lunchboxes.
Step-by-Step Instructions
Let’s get rolling with this fantastic recipe, perfect for simplifying your School Snack Prep (Healthy) routine and ensuring a steady supply of Healthy school snacks.
1. Combine Wet Ingredients: In your large mixing bowl, combine the natural peanut butter, honey (or maple syrup), and vanilla extract. Mix well with a rubber spatula until smooth and thoroughly incorporated.
2. Add Dry Ingredients: Gradually add the rolled oats, shredded coconut (if using), and mini chocolate chips (if using) to the wet mixture. Stir continuously until all ingredients are evenly distributed and the mixture begins to come together. The consistency should be thick and slightly sticky. If it feels too dry, add a touch more honey or peanut butter; if too wet, a tablespoon of extra oats can help.
3. Form the Bites: Line a baking sheet with parchment paper or a silicone mat. Using clean hands, roll the mixture into small, bite-sized balls, about 1-inch in diameter. The warmth of your hands will help bind them.
4. Chill and Firm: Arrange the formed energy bites on the prepared baking sheet. Place the baking sheet in the refrigerator for at least 30 minutes to allow the bites to firm up. This step is crucial for preventing them from becoming too crumbly.
5. Store and Enjoy: Once firm, transfer the energy bites to an airtight container. They are now ready for lunchboxes, after-school fuel, or a quick, healthy treat!
Nutritional Benefits & Advantages
These energy bites are packed with goodness. The rolled oats provide sustained energy release, keeping hunger at bay. Natural peanut butter delivers essential proteins and healthy monounsaturated fats, crucial for brain development and satiety. Honey or maple syrup offer a natural sweetness without the refined sugars often found in store-bought snacks. Plus, the optional shredded coconut adds beneficial medium-chain triglycerides (MCTs) and delightful flavor. These bites are a far superior alternative to processed snacks, contributing to better focus, sustained energy, and overall well-being for growing children.
Tips, Variations & Cooking Advice
- Nut Allergy Friendly: Substitute peanut butter with sunflower seed butter (SunButter) or almond butter for a safe alternative.
- Seed Power: Add a tablespoon of chia seeds or ground flaxseeds for an extra omega-3 boost and added fiber.
- Fruity Twist: Incorporate finely chopped dried fruit like cranberries, apricots, or raisins for natural sweetness and chewiness.
- Spice It Up: A pinch of cinnamon or nutmeg can add a warm, comforting flavor.
- Protein Boost: For an added protein punch, mix in a scoop of unflavored or vanilla protein powder designed for kids.
- Texture Control: If you prefer a smoother texture, you can pulse the oats briefly in a food processor before mixing.
Common Mistakes to Avoid
- Over-mixing: While you want all ingredients combined, excessive mixing can make the oats tough. Mix until just combined.
- Not Chilling Enough: Skipping or shortening the chill time will result in soft, crumbly bites that don’t hold their shape well.
- Using Refined Sugars: Stick to natural sweeteners like honey or maple syrup to maintain the healthy profile of the snack.
- Not Adjusting Consistency: If your dough is too dry, add a tiny bit more liquid binder (peanut butter or honey). If too wet, a spoonful of oats will help.
Storage & Meal Prep Tips
These healthy energy bites are perfect for meal prepping! Store them in an airtight container in the refrigerator for up to 1 week. For longer storage, you can freeze them for up to 3 months. To thaw, simply take them out of the freezer and let them sit at room temperature for 15-20 minutes, or pop them straight into a lunchbox to thaw by snack time. This makes your School Snack Prep (Healthy) seamless and ensures you always have wholesome options on hand.
Conclusion
Mastering School Snack Prep (Healthy) doesn’t have to be daunting. With simple, wholesome ingredients and minimal effort, you can consistently provide delicious and nutritious Healthy school snacks that your kids will genuinely love. These energy bites are just one example of the creative freedom you have in the kitchen to nourish your family. Give this recipe a try, experiment with your favorite variations, and witness the positive impact on your children’s energy levels and concentration. Share your creations and feedback below – we’d love to hear how these fuel your little learners!
FAQs
Q1: Can I make these dairy-free?
A1: Yes, this recipe is naturally dairy-free! Just ensure your chocolate chips are dairy-free if you include them.
Q2: How can I make these gluten-free?
A2: Always opt for certified gluten-free rolled oats, as traditional oats can sometimes be cross-contaminated with wheat during processing.
Q3: My mixture is too sticky to roll. What should I do?
A3: If the mixture is too sticky, add a tablespoon or two of extra rolled oats or unsweetened shredded coconut until it’s easier to handle. Chilling the mixture for 10-15 minutes before rolling can also help.
Q4: Can I use quick oats instead of rolled oats?
A4: While quick oats can be used, they tend to be more processed and create a softer, less chewy texture. Rolled oats provide a better, heartier bite.
Q5: How many calories are in each energy bite?
A5: Nutritional content can vary based on specific ingredients and portion sizes. Generally, each bite contains around 80-100 calories, offering a good balance of healthy fats, protein, and carbohydrates for a snack.