Mastering the Perfect Roast Turkey: Your Ultimate Guide to a Flavorful Feast
Ever wondered how to achieve that succulently juicy, perfectly golden-brown Roast Turkey, worthy of any grand celebration, especially a memorable Thanksgiving dinner? The secret lies in a blend of careful preparation, precise technique, and a sprinkle of culinary magic. Forget dry, bland birds – this comprehensive guide will walk you through every step, ensuring your homemade holiday centerpiece is not just cooked, but truly celebrated. Mastering your own Roast Turkey elevates any gathering, transforming a simple meal into an unforgettable experience, particularly when planning for a festive Thanksgiving dinner. Get ready to impress your family and friends with a bird that’s bursting with flavor and unparalleled tenderness.
Ingredients & Kitchen Tools
Here’s what you’ll need to create your masterpiece:
- 1 (12-14 lb) Whole Turkey: Fresh or fully thawed. Choose a high-quality bird for best results.
- 1 stick (8 tbsp) unsalted butter: Softened, for supreme flavor and browning.
- 2 large yellow onions: Roughly chopped, for aromatic base and moisture.
- 4 stalks celery: Roughly chopped, adds savory depth.
- 4 carrots: Roughly chopped, for sweetness and earthiness.
- 6-8 sprigs fresh rosemary: Intensely aromatic, enhances poultry flavor.
- 6-8 sprigs fresh thyme: Earthy and citrusy notes, complements turkey.
- 1 head garlic: Halved horizontally, for a mellow garlic infusion.
- 2 cups chicken or vegetable broth: To keep the bird moist and make gravy.
- 1 lemon: Halved, adds brightness and acidity.
- Salt & freshly cracked black pepper: Essential seasoning.
- Optional brining ingredients: For extra juiciness (see “Tips & Variations”).
- Roasting Pan with Rack: Crucial for even air circulation and crisp skin.
- Meat Thermometer: Instant-read or probe-style, non-negotiable for food safety and perfect doneness.
- Baster: For basting juices over the turkey (optional, some prefer not to baste).
- Kitchen Twine: To tie the legs, promoting even cooking.
- Aluminum Foil: For tenting and resting.
- Large Cutting Board & Carving Knife: For effortless carving.
Prep Time & Cooking Schedule
- Thawing Time: 1-3 days in the refrigerator (allow 24 hours per 4-5 lbs).
- Brining Time (Optional): 8-12 hours or overnight.
- Prep Time: 30-45 minutes (stuffing, buttering, seasoning).
- Cooking Time: Approximately 2.5-3.5 hours for a 12-14 lb turkey (roughly 13-15 minutes per pound). This can vary based on oven calibration and turkey density.
- Resting Time: 30-45 minutes. Absolutely essential for juicy meat.
Planning Ahead: Start thawing your turkey well in advance. Consider brining the day before. On the cooking day, factor in resting time – it’s as important as the cooking itself for a truly magnificent bird.
Step-by-Step Instructions
1. Thaw & Prep: Ensure your turkey is completely thawed. Remove the giblets and neck from the cavities. Pat the turkey thoroughly dry with paper towels – this is key for crispy skin.
2. Brine (Optional): If brining, follow your chosen recipe. After brining, rinse the turkey under cold water and pat dry again.
3. Seasoning & Aromatics: In a small bowl, mix softened butter with salt, pepper, and finely chopped rosemary/thyme. Gently loosen the skin over the breast and rub about half of the butter mixture directly onto the meat under the skin. Spread the remaining butter over the entire exterior of the turkey. Stuff the main cavity loosely with chopped onions, celery, carrots, halved lemon, garlic head, and remaining fresh herbs.
4. Trussing: Tie the turkey legs together with kitchen twine. Tuck the wing tips under the body to prevent them from burning.
5. Roasting: Preheat your oven to 425°F (220°C). Place the turkey on a rack in a shallow roasting pan. Pour 1 cup of chicken broth into the bottom of the pan. Cook at 425°F for 30 minutes to get a good initial browning.
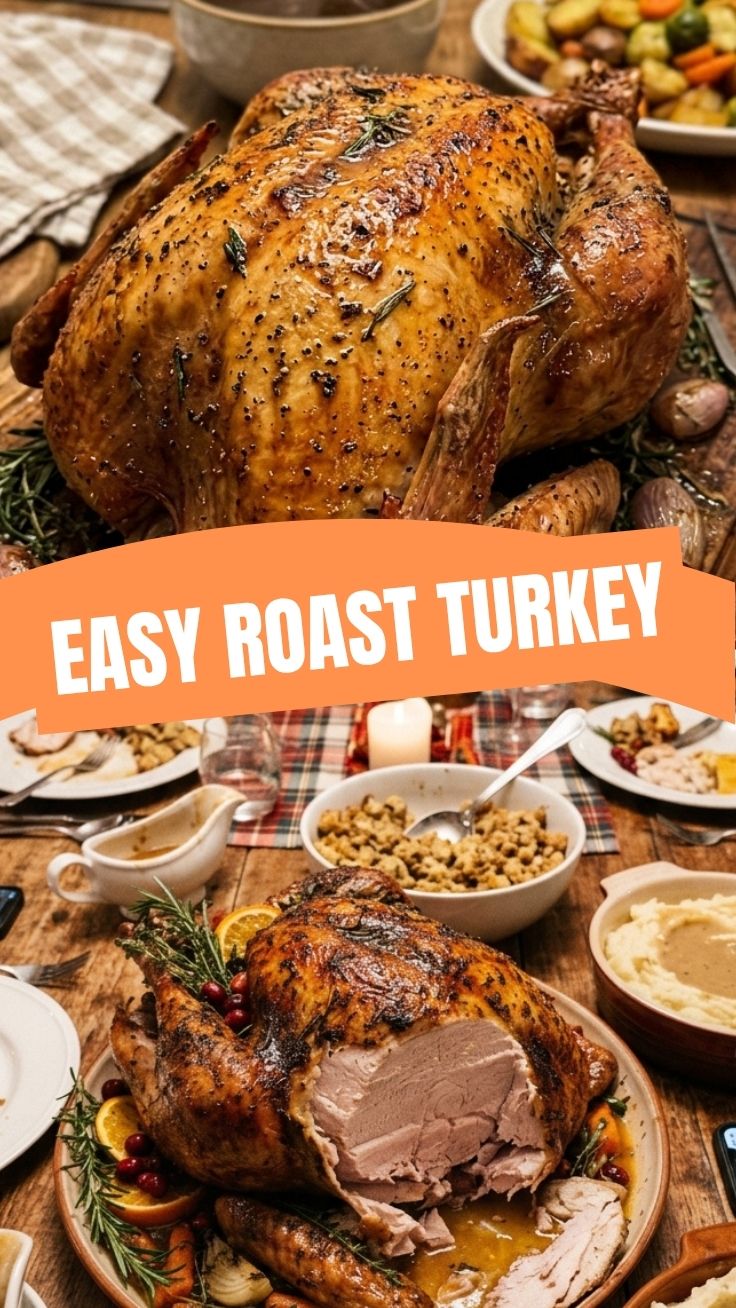
6. Reduce Heat & Continue Cooking: Reduce oven temperature to 350°F (175°C). Tent the breast loosely with foil if it’s browning too quickly. Continue roasting, adding more broth to the pan as needed to prevent drippings from burning. This is where your Roast Turkey truly transforms into the star of your Thanksgiving dinner. Baste periodically with pan juices if desired (some chefs prefer not to, believing it cools the oven and lengthens cooking time).
7. Check Doneness: The turkey is done when an instant-read thermometer inserted into the thickest part of the thigh (without touching bone) registers 165°F (74°C). The breast should also reach 165°F.
8. Resting: Transfer the turkey to a large cutting board. Tent loosely with foil and let it rest for at least 30-45 minutes before carving. This crucial step allows the juices to redistribute, ensuring a tender and moist bird.
Nutritional Benefits & Advantages
Turkey is a lean protein source, rich in B vitamins (especially B6 and B12), selenium, and zinc. It’s an excellent choice for building and repairing muscle tissue, supporting metabolic function, and boosting immunity. Cooking turkey at home allows you to control salt content and avoid processed ingredients, maximizing its health benefits. The inclusion of vegetables and herbs adds important vitamins, minerals, and antioxidants, turning your holiday centerpiece into a nutritious, balanced meal.
Tips, Variations & Cooking Advice
- Brining for Juiciness: A wet or dry brine is highly recommended for incredibly moist turkey. A simple wet brine involves salt, sugar, water, and aromatics. A dry brine uses salt generously rubbed all over the turkey.
- Flavor Variations: Experiment with different herbs like sage or marjoram. Add citrus slices (orange, lime) or apple wedges to the cavity for different flavor profiles.
- Alternative Cooking Methods: While roasting is traditional, you can also deep-fry or spatchcock a turkey for faster, crispier results.
- Gluten-Free/Dairy-Free: This recipe is naturally gluten-free. For dairy-free, substitute the butter with olive oil or a plant-based butter alternative.
- Gravy from Drippings: Don’t discard those pan drippings! They are the base for an incredibly flavorful homemade gravy.
Common Mistakes to Avoid
- Not Thawing Properly: A partially frozen turkey will cook unevenly and risk foodborne illness.
- Overcooking: The number one culprit for dry turkey. Always use a meat thermometer and aim for 165°F.
- Not Resting: Carving too soon leads to dry meat as all the precious juices will escape.
- Over-Stuffing the Cavity: A tightly packed cavity can prevent even cooking and harbor bacteria. Stuff loosely.
- Forgetting to Pat Dry: Moisture on the skin prevents crisping. Pat, pat, pat!
Storage & Meal Prep Tips
Leftover turkey is a gift that keeps on giving!
- Refrigeration: Carve the turkey into manageable pieces. Store in airtight containers in the refrigerator for up to 3-4 days.
- Freezing: For longer storage, freeze carved turkey meat in freezer-safe bags or containers for up to 2-3 months. Label with the date.
- Reheating: Reheat gently in the oven with a splash of broth or in the microwave to maintain moisture. Avoid high heat that can dry it out.
- Meal Prep Ideas: Leftover turkey is fantastic in sandwiches, soups, salads, enchiladas, casseroles, or even turkey chili.
Conclusion
Crafting the perfect Roast Turkey is a rewarding culinary journey, transforming a simple ingredient into the festive centerpiece of any Thanksgiving dinner. By following these detailed steps, embracing the importance of proper technique, and allowing for that crucial resting period, you’re not just cooking a meal – you’re creating cherished memories and a truly delicious experience. This comprehensive guide ensures your Roast Turkey will be the star of your next Thanksgiving dinner. We encourage you to try this recipe and savor the incredible flavors. Share your results in the comments below, or explore our other delightful holiday recipes!
FAQs
Q1: How do I prevent my turkey breast from drying out while the dark meat cooks?
A1: Tent the breast loosely with aluminum foil once it reaches your desired golden-brown color, usually after the first 30-60 minutes of roasting. You can also try basting the breast more frequently.
Q2: Can I stuff the turkey with traditional bread stuffing?
A2: While traditional, stuffing a turkey can increase cooking time and pose food safety risks if the stuffing doesn’t reach 165°F. It’s generally safer and recommended to bake stuffing separately. Our recipe uses aromatics for flavor, not a traditional bread-based stuffing.
Q3: My turkey skin isn’t getting crispy. What went wrong?
A3: The most common reasons are not patting the turkey thoroughly dry, applying too much butter, or basting too frequently (which adds moisture). Ensure high initial oven heat for browning and maintain dry skin.
Q4: How important is the resting period?
A4: Extremely important! It allows the muscle fibers to relax and reabsorb the flavorful juices, resulting in a significantly more tender and moist turkey. Skipping this step is a common mistake that leads to dry meat.
Q5: What’s the best way to get a flavorful gravy from the pan drippings?
A5: After removing the turkey, deglaze the pan with a bit of wine or broth, scraping up all the savory bits. Strain the drippings, separate the fat, and then use the remaining liquid to make your gravy, thickening with a roux or cornstarch slurry.