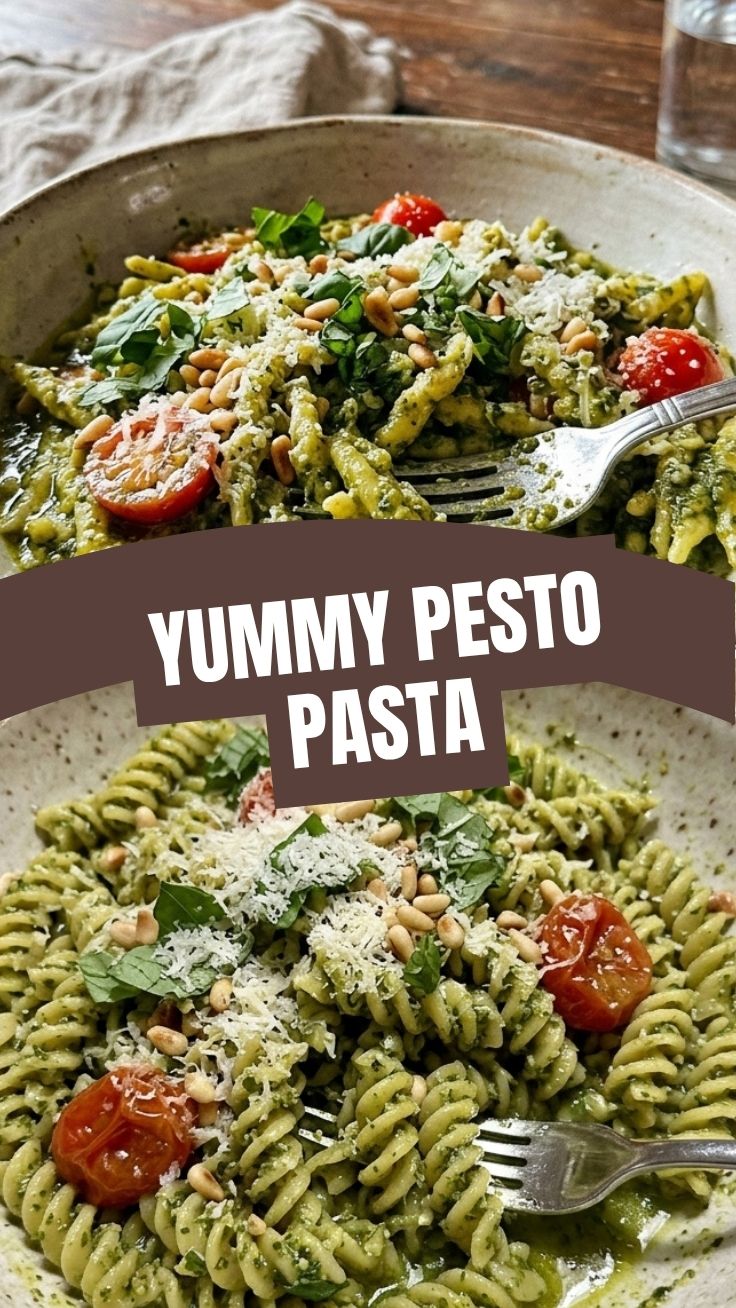
Unlock the Secret to Effortless Elegance: Your Ultimate Guide to Homemade Pesto Pasta
Ever wondered if that vibrant, aromatic Pesto Pasta you crave at your favorite trattoria could be recreated in your own kitchen with minimal fuss? The answer is a resounding “yes!” Preparing this classic dish at home not only guarantees unparalleled freshness and flavor but also offers a rewarding culinary experience that’s surprisingly straightforward. Forget bland, watery imitations; we’re diving deep into mastering the art of homemade pesto, transforming simple ingredients into a gourmet meal. This comprehensive guide will arm you with everything you need to craft perfect Pesto Pasta, along with a treasure trove of tips for exploring an array of delicious pasta recipes.
Ingredients & Kitchen Tools
Crafting the perfect pesto pasta requires a blend of fresh ingredients and a few fundamental kitchen tools.
- Pasta (1 lb): Linguine, fettuccine, or spaghetti work wonderfully. Semolina-based for classic texture.
- Fresh Basil Leaves (2 cups, packed): The heart of your pesto. Opt for bright green, unblemished leaves.
- Parmesan Cheese (1/2 cup, freshly grated): Adds a salty, umami depth. Grate it yourself for best flavor and melt.
- Pine Nuts (1/4 cup): Toasted lightly for an enhanced nutty aroma. They provide essential texture.
- Garlic Cloves (2-3, peeled): Fresh garlic is crucial for that pungent kick. Adjust to your preference.
- Extra Virgin Olive Oil (1/2 cup, plus more for drizzling): High-quality oil is key for flavor and emulsification.
- Lemon Juice (1 tbsp, fresh): Brightens the flavors and helps preserve the pesto’s vibrant color.
- Salt and Freshly Ground Black Pepper (to taste): Essential for seasoning.
- Pasta Pot (large): For boiling pasta.
- Food Processor or Blender: For making the pesto.
- Colander: For draining pasta.
- Large Mixing Bowl: For tossing the pasta with pesto.
- Optional Substitutions: Walnuts or almonds for pine nuts; nutritional yeast for a dairy-free option; Pecorino Romano for Parmesan.
Prep Time & Cooking Schedule

This recipe is designed for efficiency without compromising on flavor.
- Prep Time: 15 minutes (Includes washing basil, toasting nuts, grating cheese).
- Cook Time: 10-12 minutes (For pasta, depending on type). Add 5 minutes for pesto blending.
- Total Time: Approximately 30 minutes.
This streamlined schedule makes it an ideal weeknight dinner. Begin preparing your pesto while the pasta water comes to a boil to maximize efficiency.
Step-by-Step Instructions
1. Toast Pine Nuts: In a dry skillet over medium-low heat, toast the pine nuts for 3-5 minutes, stirring frequently, until lightly golden and fragrant. Watch carefully to prevent burning. Set aside to cool.
2. Prepare Pesto: In a food processor or blender, combine the cooled pine nuts, fresh basil leaves, peeled garlic cloves, and a pinch of salt. Pulse until finely chopped.
3. Add Cheese and Oil: Add the freshly grated Parmesan cheese and gradually stream in the extra virgin olive oil while the processor is running, until the mixture is smooth and emulsified. Stir in the fresh lemon juice and season with additional salt and black pepper to taste. For truly authentic Pesto Pasta, consider the texture – not too runny, not too chunky.
4. Cook Pasta: Bring a large pot of heavily salted water to a rolling boil. Add your chosen pasta and cook according to package directions until al dente (firm to the bite). Before draining, reserve about 1 cup of the starchy pasta water. This liquid is your secret weapon for luscious pasta recipes.
5. Combine and Serve: Drain the pasta and immediately transfer it to a large mixing bowl. Add the prepared pesto to the hot pasta. Toss thoroughly, adding a tablespoon or two of the reserved pasta water as needed to create a smooth, glossy sauce that coats every strand. Serve immediately, garnished with extra Parmesan cheese and a sprig of fresh basil.
Nutritional Benefits & Advantages
Pesto Pasta is more than just a delicious meal; it’s packed with nutritional goodness. Basil is rich in antioxidants and vitamins K and A. Olive oil provides healthy monounsaturated fats, beneficial for heart health. Pine nuts offer essential minerals and protein. When paired with whole wheat pasta, this dish becomes a fantastic source of fiber, complex carbohydrates, and sustained energy, making it a well-balanced and satisfying option.
Tips, Variations & Cooking Advice
- Flavor Boost: For a deeper flavor, lightly roast the garlic cloves before adding them to the pesto.
- Ingredient Swaps: Experiment with other nuts like walnuts or almonds in place of pine nuts. Arugula or spinach can be partially substituted for basil for a different flavor profile.
- Creamier Texture: Incorporate a tablespoon of full-fat Greek yogurt or crème fraîche into the pesto for a richer, creamier sauce.
- Gluten-Free/Dairy-Free: Use gluten-free pasta and nutritional yeast instead of Parmesan for dietary adaptations.
- Add Vegetables: Toss in cherry tomatoes, blanched green beans, or roasted broccoli for added nutrients and color.
Common Mistakes to Avoid
- Overcooking Pasta: Soggy pasta is a no-go. Always cook to al dente for the best texture.
- Over-processing Pesto: Pulsing too long can make your pesto warm and bitter due to friction. Aim for a slightly coarse texture.
- Adding Pesto to Cold Pasta: The warmth of freshly cooked pasta helps the pesto emulsify and coat beautifully.
- Using Too Much Pesto: Start with less and add more to taste. You want a coating, not a drowning.
- Not Salting Pasta Water: This is your only chance to season the pasta itself. Make it taste like the ocean!
Storage & Meal Prep Tips
Leftover Pesto Pasta can be stored in an airtight container in the refrigerator for up to 3-4 days. To prevent the pesto from oxidizing and turning brown, press a layer of plastic wrap directly onto the surface of the pasta before sealing the container. Reheat gently in a pan with a splash of water or broth to loosen the sauce, or enjoy cold as a refreshing pasta salad. Pesto can also be made ahead and frozen in ice cube trays, then transferred to a freezer bag for up to 3 months.
Conclusion
Mastering homemade Pesto Pasta is an incredibly rewarding culinary skill that opens up a world of flavorful possibilities. With this guide, you now possess the knowledge to transform simple, fresh ingredients into a vibrant, satisfying meal that rivals any restaurant. So go ahead, don your apron, and gather your ingredients—you’re just moments away from savoring the rich, aromatic delight of your very own Pesto Pasta. Don’t stop there; use these techniques to elevate all your favorite homemade pasta recipes. Share your creations and let us know how your pesto journey unfolds!
FAQs
Q1: Can I make pesto ahead of time?
A1: Yes, homemade pesto can be stored in an airtight container in the refrigerator for up to a week. Cover the surface with a thin layer of olive oil to prevent oxidation and maintain its vibrant green color.
Q2: What’s the best way to prevent my basil pesto from turning brown?
A2: Blanching the basil briefly in boiling water and then shocking it in ice water before blending can help preserve its color. Also, adding a squeeze of lemon juice acts as a natural antioxidant.
Q3: Can I substitute other nuts for pine nuts in pesto?
A3: Absolutely! Walnuts, almonds, or even cashews can be used as alternatives. Each will impart a slightly different flavor profile, so experiment to find your favorite.
Q4: My pesto is too thick/too thin. How can I fix it?
A4: If your pesto is too thick, gradually add more olive oil or a tablespoon of the reserved pasta water until it reaches your desired consistency. If it’s too thin, try adding a bit more Parmesan cheese or pine nuts to thicken it up.
Q5: What are some other uses for homemade pesto besides pasta?
A5: Pesto is incredibly versatile! Use it as a spread for sandwiches, a base for pizza, a topping for grilled chicken or fish, stirred into soups, or as a vibrant dip for crusty bread.