Master the Art of Homemade Orange Chicken: A Flavorful Journey from Your Kitchen
Tired of takeout that leaves you wanting more, or perhaps a lingering suspicion about hidden ingredients? What if you could recreate the vibrant, sweet, and tangy magic of your favorite Orange Chicken right in your own kitchen? Preparing this beloved dish at home is not just about saving money; it’s about gaining control over the quality of your ingredients, customizing the flavors to your liking, and experiencing the immense satisfaction of a perfectly executed meal. Forget the greasy, overly sweet versions; we’re about to embark on a culinary adventure that will redefine your understanding of this classic, and perhaps even inspire you to tackle other Asian-inspired favorites like General Tso’s Chicken with newfound confidence.
Ingredients & Kitchen Tools
To embark on this delicious journey, gather the following:
For the Chicken:
- 1.5 lbs Boneless, Skinless Chicken Thighs or Breasts: Thighs offer more flavor and juiciness; breasts are leaner. Cut into 1-inch pieces.
- 1/2 cup Cornstarch: For a crispy coating.
- 1/4 cup All-Purpose Flour: Adds to the crispiness.
- 1 tsp Salt: Enhances flavor.
- 1/2 tsp Black Pepper: For a touch of spice.
- 2 Large Eggs: To bind the coating.
- Vegetable Oil (or other neutral oil): For frying, about 2-3 cups.
For the Orange Sauce:
- 1 cup Freshly Squeezed Orange Juice: Crucial for authentic flavor. About 2-3 oranges.
- 2 tbsp Orange Zest: Adds intense orange aroma.
- 1/2 cup Granulated Sugar: Balances the tanginess.
- 1/4 cup Rice Vinegar: Adds a pleasant acidity.
- 2 tbsp Soy Sauce: For umami depth.
- 1 tbsp Ginger, grated: Fresh is best for a pungent kick.
- 2 cloves Garlic, minced: Essential aromatic.
- 1 tbsp Cornstarch (mixed with 2 tbsp cold water): To thicken the sauce into a glaze.
- 1/2 tsp Red Pepper Flakes (optional): For a hint of heat.
Garnish (Optional):
- Sesame Seeds
- Sliced Green Onions
Kitchen Tools:
- Large Mixing Bowls (2): For dredging chicken and mixing sauce.
- Whisk: For combining ingredients.
- Heavy-Bottomed Pot or Dutch Oven: Ideal for deep frying, maintains even temperature.
- Slotted Spoon or Spider Strainer: For safely removing chicken from oil.
- Paper Towels: For draining excess oil.
- Microplane or Fine Grater: For zest and ginger.
- Measuring Cups and Spoons: For accurate ingredient quantities.
- Citrus Juicer: For fresh orange juice.
Prep Time & Cooking Schedule
- Prep Time: 20 minutes (includes cutting chicken, zesting, juicing, and sauce prep)
- Cook Time: 20-25 minutes (frying chicken in batches, then simmering sauce)
- Resting Time: None, best served immediately.
This recipe is designed for efficiency. While the chicken is frying, you can prepare the sauce, allowing for a seamless transition from pan to plate. Plan to serve immediately for the best crispy texture.
Step-by-Step Instructions
1. Prepare the Chicken: In a large bowl, whisk together cornstarch, flour, salt, and pepper. In another bowl, lightly beat the eggs. Dip each piece of chicken first into the egg, then dredge it thoroughly in the flour mixture, ensuring it’s fully coated. Set aside on a plate. This double-coating method is key for a crispy exterior, much like you’d find in a well-made Orange Chicken.
2. Heat the Oil: Pour about 2-3 inches of vegetable oil into a heavy-bottomed pot or Dutch oven. Heat over medium-high heat to 350°F (175°C). Use a cooking thermometer to ensure accuracy.
3. Fry the Chicken: Carefully add chicken pieces to the hot oil, working in batches to avoid overcrowding, which can lower the oil temperature and lead to soggy chicken. Fry for 4-6 minutes, or until golden brown and cooked through. Remove with a slotted spoon and place on a paper towel-lined plate to drain excess oil. Repeat with remaining chicken.
4. Prepare the Orange Sauce: While the chicken fries, whisk together orange juice, orange zest, sugar, rice vinegar, soy sauce, grated ginger, minced garlic, and red pepper flakes (if using) in a medium saucepan. Bring to a gentle simmer over medium heat.
5. Thicken the Sauce: Once simmering, stir in the cornstarch slurry (cornstarch mixed with cold water). Whisk continuously until the sauce thickens to a glossy, syrupy consistency. This step is crucial for achieving that beautiful glaze, a hallmark of both perfect General Tso’s Chicken and this dish.
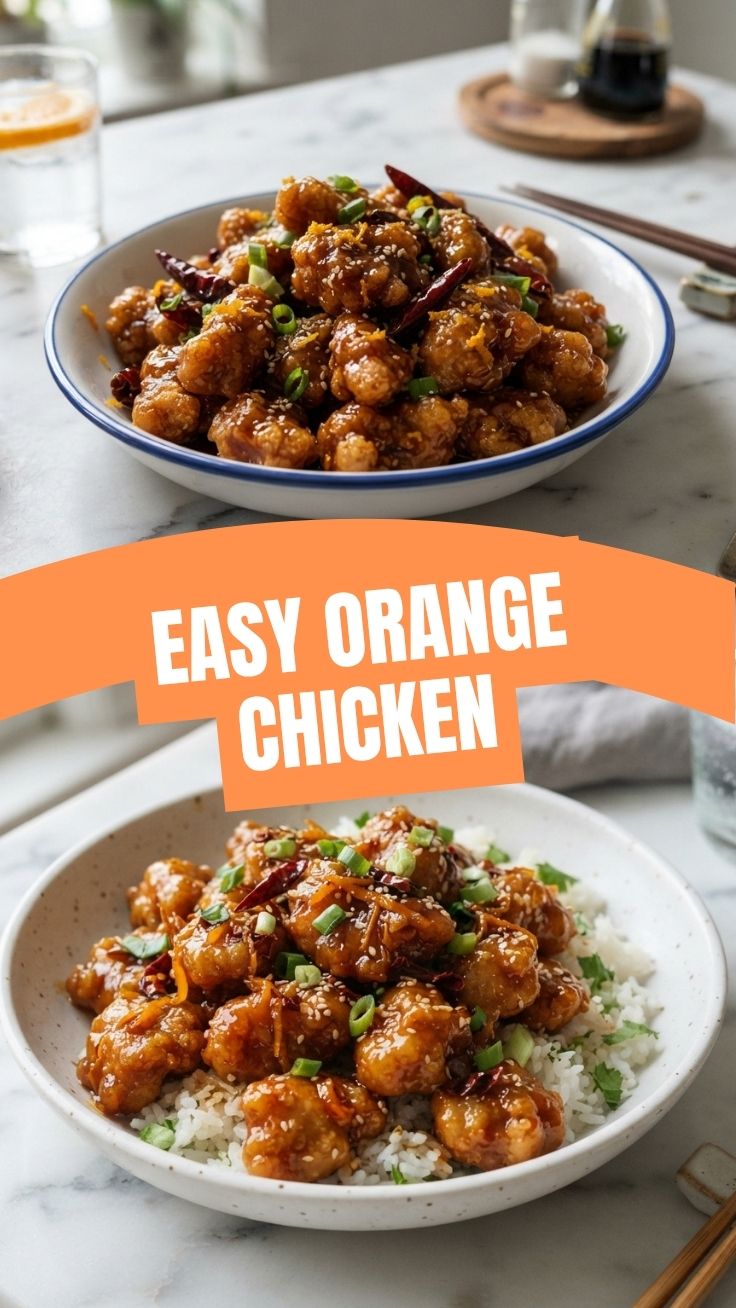
6. Combine and Serve: Add the fried chicken to the saucepan with the orange sauce. Toss gently until all the chicken pieces are evenly coated. Garnish with sesame seeds and sliced green onions, if desired. Serve immediately with steamed rice and your favorite stir-fried vegetables.
Nutritional Benefits & Advantages
Homemade Orange Chicken offers several advantages over its takeout counterpart. By making it yourself, you control the amount of sugar and sodium, often drastically reducing both. Chicken provides a lean source of protein essential for muscle repair and satiety. Fresh oranges are packed with Vitamin C, an antioxidant that boosts immunity. Furthermore, using fresh ginger and garlic not only enhances flavor but also contributes their own anti-inflammatory and immune-boosting properties.
Tips Variations & Cooking Advice
- Spice Level: Adjust red pepper flakes for your preferred heat. For more heat, add a pinch of cayenne pepper.
- Gluten-Free: Substitute tamari for soy sauce and use gluten-free all-purpose flour for dredging. Ensure your cornstarch is certified gluten-free.
- Air Fryer Method: For a healthier, less oily version, air fry the coated chicken pieces at 375°F (190°C) for 15-20 minutes, flipping halfway, until crispy and cooked through. Then toss with the sauce.
- Vegetarian Option: Substitute firm tofu or cauliflower florets for chicken. Press tofu well before coating and frying.
- Extra Crispy: For an extra crispy coating, you can double fry the chicken. Fry once until lightly golden, remove, let cool slightly, then fry again for 1-2 minutes until deeply golden and extra crunchy.
Common Mistakes to Avoid
- Overcrowding the Pan: This lowers oil temperature, resulting in soggy, greasy chicken. Fry in batches!
- Not Draining Excess Oil: Leads to an oily final dish. Always drain fried chicken on paper towels.
- Under-seasoning: Don’t skip the salt and pepper in the flour mixture. It builds layers of flavor.
- Overcooking the Sauce: Once the cornstarch slurry is added, cook until thickened, but don’t boil aggressively for too long, as it can break down the starch and thin the sauce again.
Storage & Meal Prep Tips
Leftover Orange Chicken can be stored in an airtight container in the refrigerator for up to 3-4 days. While the chicken will lose some of its crispiness, the flavors will meld beautifully. Reheat gently in a skillet over medium heat or in the oven at 350°F (175°C) until warmed through. Freezing is possible, but the texture of the chicken may become softer upon thawing. If freezing, separate the sauce and chicken for best results. Thaw overnight in the refrigerator before reheating.
Conclusion
Crafting your own Orange Chicken at home is a rewarding experience that puts you in control of every delicious bite. From the perfectly crispy chicken to the vibrant, balanced orange sauce, this recipe offers a superior flavor and healthier alternative to takeout. The principles learned here can easily be applied to other beloved dishes, perhaps even inspiring you to experiment with your own version of General Tso’s Chicken. We encourage you to try this recipe, customize it to your taste, and share your culinary successes with us!
FAQs
Q1: Can I use bottled orange juice?
A1: While you can, freshly squeezed orange juice provides a much brighter, more authentic flavor and aroma. Bottled juice often contains added sugars and less vibrant notes.
Q2: What if my sauce is too thin or too thick?
A2: If too thin, mix a little more cornstarch with cold water and slowly whisk into the simmering sauce. If too thick, add a splash of water or orange juice to reach the desired consistency.
Q3: Can I bake the chicken instead of frying?
A3: Yes, for a lighter option, you can bake the coated chicken. Place on a wire rack over a baking sheet and bake at 400°F (200°C) for 20-25 minutes, flipping halfway, until golden and cooked through. It won’t be as crispy as fried but will still be delicious.
Q4: How can I make this dish spicier?
A4: Increase the amount of red pepper flakes in the sauce. For a more intense heat, you can also add a pinch of cayenne pepper or a few slices of fresh serrano or jalapeño pepper during the sauce simmering step.