Master the Grill This Labor Day: Your Guide to Fall-Off-The-Bone BBQ Ribs!
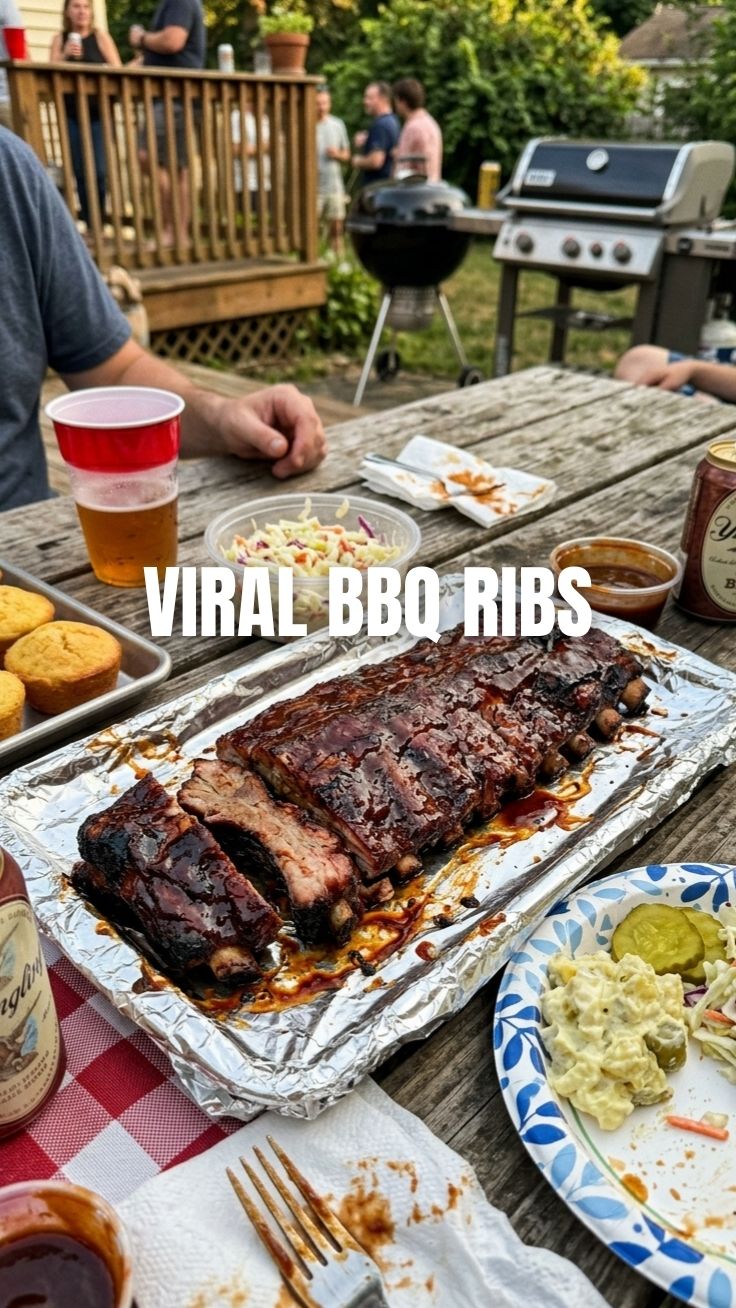
Ever wondered how those tantalizing, perfectly smoky ribs from your favorite BBQ joint achieve that melt-in-your-mouth tenderness? The secret isn’t just in the rub; it’s in a blend of time, technique, and a little culinary magic. This Labor Day, transform your backyard into the ultimate smokehouse with our foolproof guide to preparing Labor Day BBQ Ribs that will have everyone begging for your secret. Preparing these at home isn’t just about saving money; it’s about crafting a personalized flavor profile, controlling every ingredient, and enjoying the immense satisfaction of serving a truly memorable meal. Whether you’re a seasoned grill master or a novice looking to impress, this comprehensive post will walk you through every step, ensuring your ribs are the star of the show.
Ingredients & Kitchen Tools
- Pork Spare Ribs or Baby Back Ribs (2-3 racks): The star of our Labor Day BBQ Ribs. Baby back ribs are leaner and cook faster, while spare ribs are meatier and more flavorful.
- Yellow Mustard (2 tbsp): Acts as a binder for the rub, helping it adhere to the meat.
- Apple Cider Vinegar (1/2 cup): Tenderizes the meat and adds a tangy kick.
- Water (1/2 cup): Used in the braising liquid for moisture.
- Your Favorite BBQ Rub (1/4 cup): A pre-made blend of spices for flavor (e.g., paprika, brown sugar, garlic powder, onion powder, cayenne pepper).
- BBQ Sauce (1 cup): For basting and serving. Choose your preferred style (sweet, tangy, spicy).
- Aluminum Foil (heavy-duty): Essential for wrapping the ribs to create a steaming environment.
- Baking Sheet: To hold the wrapped ribs in the oven or on the indirect side of the grill.
- Sharp Knife: For trimming excess fat and membrane.
- Paper Towels: For patting the ribs dry.
- Meat Thermometer (optional): To ensure optimal doneness. For ribs, fall-off-the-bone tenderness is usually the best indicator.
- Grill or Smoker: For cooking the ribs. Alternatively, an oven (for the initial braise) and a broiler can be used.
- Tongs: For handling hot ribs.
- Basting Brush: For applying BBQ sauce.
Prep Time & Cooking Schedule
- Prep Time: 20 minutes (includes membrane removal and rub application)
- Marinating Time: Minimum 2 hours, ideally overnight (for deeper flavor penetration)
- Cook Time (Grill/Smoker): 3-4 hours (depending on rib type and tenderness desired)
- Cook Time (Oven & Finish): 2.5-3 hours (oven) + 30-45 minutes (grill/broiler finish)
- Resting Time: 15-20 minutes before slicing
This recipe requires a bit of planning, especially if you opt for the overnight marinade. The cook time varies based on your method, so ensure you factor this into your Labor Day festivities. The resting time is crucial for juicy, tender ribs!
Step-by-Step Instructions
1. Prepare the Ribs: Start by removing the membrane from the back of each rib rack. This tough, silvery layer prevents the rub from penetrating and makes the ribs less tender. Use a knife to loosen a corner, then grip it with a paper towel and pull it off. Pat the ribs dry thoroughly with paper towels.
2. Apply the Binder & Rub: Spread a thin layer of yellow mustard evenly over both sides of the ribs. This acts as a binder. Generously rub your chosen BBQ rub all over the ribs, ensuring full coverage. For the most flavorful Labor Day BBQ Ribs, let them marinate in the refrigerator for at least 2 hours, or ideally overnight, allowing the flavors to meld beautifully.
3. The Cooking Process (Grill/Smoker Method): Preheat your grill or smoker to an indirect heat of 250-275°F (120-135°C). Place the ribs meat-side up on the indirect heat side. Cook for 2.5-3 hours, maintaining a consistent temperature.
4. The “Texas Crutch” (Wraps): After the initial cooking, carefully remove the ribs. Lay out a large piece of heavy-duty aluminum foil. Combine apple cider vinegar and water and pour about ¼ cup into the foil. Place the ribs meat-side down, then wrap them tightly. Return the wrapped ribs to the grill/smoker and cook for another 1-1.5 hours, or until they are incredibly tender. This steaming process is key to achieving that desired fall-off-the-bone texture. If you’re using an oven, place the wrapped ribs on a baking sheet and bake at 300°F (150°C). For those who prefer a less hands-on approach, experimenting with a Slow Cooker Ribs recipe beforehand can give you a similar head start on tenderness.
5. Saucing & Finishing: Carefully unwrap the ribs. They should be very tender. Increase the grill temperature to medium-high direct heat (or preheat your oven broiler). Brush a layer of your favorite BBQ sauce on both sides of the ribs. Place them back on the direct heat, meat-side up, for 10-15 minutes, flipping once, until the sauce caramelizes and becomes slightly tacky. Watch them closely to prevent burning.
6. Rest & Serve: Remove the ribs from the grill and let them rest for 15-20 minutes before slicing and serving. This allows the juices to redistribute, ensuring maximum flavor and tenderness.
Nutritional Benefits & Advantages
Pork ribs, while often associated with indulgence, can offer several nutritional benefits when prepared thoughtfully. They are an excellent source of protein, essential for muscle repair and growth, and provide vital B vitamins like B12, crucial for nerve function and energy. Additionally, they contain minerals like phosphorus and selenium. Choosing leaner cuts and opting for homemade rubs and sauces (which allow you to control sugar and sodium content) can further enhance their nutritional profile. Enjoying these ribs in moderation, perhaps alongside a vibrant fresh salad or grilled vegetables, makes for a balanced and delicious meal.
Tips, Variations & Cooking Advice
- Spice it Up: Add a pinch of cayenne pepper or a dash of hot sauce to your rub or BBQ sauce for a fiery kick.
- Smoky Flavor Boost: For oven-cooked ribs, add a few drops of liquid smoke to the braising liquid or rub for an authentic smoky flavor.
- Herbaceous Ribs: Incorporate fresh rosemary or thyme into your rub for an aromatic twist.
- Alternative Cooking Methods: If you don’t have a grill, you can bake the ribs entirely in the oven. For incredibly tender results, consider preparing Slow Cooker Ribs as a preliminary step, then finishing them under a broiler or on a hot grill for that caramelized crust.
- Gluten-Free/Dairy-Free: Ensure your BBQ rub and sauce are certified gluten-free and dairy-free if catering to these dietary needs. Many commercial options are available.
- Apple Juice instead of Water: Substitute apple juice for water in the foil wrap for an added layer of sweetness and acidity.
Common Mistakes to Avoid
- Not Removing the Membrane: This is the most common mistake and leads to tough, chewy ribs. Always remove it!
- Overcooking or Undercooking: Ribs need to be cooked long enough to become tender but not so long they turn mushy. The “bend test” is a good indicator: if the rack bends significantly and the meat almost separates when lifted by one end, they’re ready for saucing.
- Applying Sauce Too Early: If you apply BBQ sauce too early in the cooking process, the sugars in the sauce will burn, leading to a bitter crust. Wait until the last 15-20 minutes.
- Skipping the Rest: Resting allows the meat fibers to relax and reabsorb juices, resulting in more tender and flavorful ribs. Don’t rush this step.
- Under-Seasoning: Ribs are a large cut of meat, so don’t be shy with the rub!
Storage & Meal Prep Tips
Leftover ribs can be a delicious treat! To store them safely, allow them to cool completely. Wrap individual portions tightly in aluminum foil, or place them in an airtight container. They will last 3-4 days in the refrigerator. For longer storage, ribs can be frozen for up to 3 months. When reheating, it’s best to do so slowly to maintain moisture. Wrap them in foil and reheat in the oven at 250-275°F (120-135°C) until warmed through, or gently in a microwave in short bursts. Avoid high heat, which can dry them out.
Conclusion
Mastering Labor Day BBQ Ribs is an achievable feat with the right guidance, transforming your holiday celebration into an unforgettable culinary experience. From selecting the perfect rack to achieving that irresistible smoky bark and tender interior, each step plays a crucial role. Whether you’re dedicated to the low-and-slow grill method or exploring the convenience of a Slow Cooker Ribs approach before finishing, the principles of flavor and tenderness remain paramount. Don’t hesitate to try this recipe, experiment with your favorite rubs and sauces, and share your glorious results with us! Your guests (and your taste buds) will thank you.
FAQs
Q1: How do I know when the ribs are done?
A1: The best indicator is tenderness. When you lift a rack with tongs, it should bend significantly, and the meat should noticeably pull away from the bone. Alternatively, a meat thermometer inserted between the bones should read around 190-203°F (88-95°C) for maximum tenderness.
Q2: Can I make these ribs entirely in the oven?
A2: Yes! Follow the prep steps, then bake tightly wrapped ribs in foil at 300°F (150°C) for 2.5-3 hours. Finish by basting with sauce and broiling for 5-10 minutes until caramelized, watching carefully.
Q3: What if I don’t have a smoker?
A3: A gas or charcoal grill can be set up for indirect cooking by placing charcoal on one side or only lighting burners on one side. You can also use a smoker box with wood chips for added smoky flavor.
Q4: Can I use different types of ribs?
A4: Absolutely! This recipe works well for St. Louis-style ribs (spare ribs trimmed to a rectangular shape) or beef ribs, though cooking times may vary slightly.