Unleash the Crispy Magic: Your Guide to Perfect Homemade Korean Fried Chicken
Ever wondered how restaurants achieve that impossibly crispy, flavor-packed Korean Fried Chicken? The secret might be closer than you think! Learning to make this iconic dish at home isn’t just about saving money; it’s about unlocking a culinary skill that will impress friends, delight family, and satisfy those intense cravings for a truly authentic Korean chicken experience. Forget soggy coatings and bland flavors – we’re diving deep into the techniques for achieving that legendary crunch and delectable sauce right in your own kitchen.
Ingredients & Kitchen Tools
Crafting the perfect homemade Korean Fried Chicken requires a blend of common pantry staples and a few specific items to achieve that signature texture.
- 1 ½ lbs Chicken Wings & Drumettes: Opt for a mix for varied textures.
- ½ cup Cornstarch: Essential for that ultra-crispy coating.
- ¼ cup All-purpose Flour: Adds structure to the batter.
- 1 tsp Baking Powder: Helps achieve an airy, light crispness.
- 1 tsp Salt: Enhances overall flavor.
- ½ tsp Black Pepper: A touch of warmth and spice.
- 1 Egg: Binds the dry ingredients to the chicken.
- ½ cup Cold Water: Creates the perfect batter consistency.
- 4-5 cups Vegetable Oil (or Peanut Oil): For deep frying; ensures even cooking and high smoke point.
For the Gochujang Glaze:
- 2 cloves Garlic (minced): Pungent aromatic base.
- 1 tbsp Ginger (grated): Adds a spicy, citrusy kick.
- ½ cup Gochujang (Korean Chili Paste): The star of the sauce, providing authentic heat and umami.
- ¼ cup Honey or Maple Syrup: Balances the heat with sweetness.
- 2 tbsp Soy Sauce: Adds savory depth.
- 1 tbsp Rice Vinegar: A touch of acidity to brighten the flavors.
- 1 tbsp Sesame Oil: Nutty aroma and richness.
- 1 tsp Toasted Sesame Seeds (for garnish): Adds texture and a final flourish.
- Green Onions (sliced, for garnish): Fresh, zesty counterpoint.
Kitchen Tools:
- Large Mixing Bowls: For batter and chicken.
- Whisk: To combine dry and wet ingredients.
- Heavy-bottomed Pot or Dutch Oven: Ideal for deep frying; maintains consistent temperature.
- Deep-fry Thermometer: Crucial for precise oil temperature control.
- Slotted Spoon or Spider Skimmer: For safe removal of chicken from oil.
- Wire Rack with Baking Sheet: Allows excess oil to drain, keeping chicken crispy.
- Saucepan: For preparing the glaze.
Prep Time & Cooking Schedule
- Prep Time: 20 minutes
- Marinating Time: 30 minutes (optional, but recommended for flavor)
- Cooking Time: 25-30 minutes (per batch)
Plan to start about an hour and a half before you want to serve. The chicken benefits from a brief marinade, which tenderizes the meat. The double-frying process is key to extreme crispiness but requires diligent monitoring of oil temperature. Don’t rush it!
Step-by-Step Instructions
1. Prepare the Chicken: Pat dry the chicken pieces thoroughly with paper towels. This is crucial for a crispy skin. Season with ½ tsp salt and ¼ tsp black pepper. For even more flavor, you can marinate the chicken in a little soy sauce and grated ginger for 30 minutes.
2. Make the Batter: In a large bowl, combine cornstarch, all-purpose flour, baking powder, ½ tsp salt, and ¼ tsp black pepper. In a separate bowl, whisk together the egg and cold water. Gradually add the wet ingredients to the dry ingredients, whisking until just combined. A few lumps are fine; overmixing develops gluten, which can make the coating chewy.
3. Coat the Chicken: Dip each piece of chicken into the batter, ensuring it’s fully coated but not gloopy. Let any excess drip off. Place coated chicken on a wire rack.
4. First Fry: Heat the vegetable oil in a heavy-bottomed pot or Dutch oven to 325°F (160°C). Fry the chicken in batches, ensuring not to overcrowd the pot. Fry for 6-8 minutes until light golden and cooked through. Remove the chicken to a clean wire rack set over a baking sheet. This initial fry cooks the chicken thoroughly.
5. Prepare the Glaze: While the chicken cools slightly, combine minced garlic, grated ginger, gochujang, honey (or maple syrup), soy sauce, rice vinegar, and sesame oil in a saucepan. Bring to a gentle simmer over medium heat, stirring constantly, until the sauce thickens slightly (about 3-5 minutes). Remove from heat.
6. Second Fry for Ultimate Crispness: Increase the oil temperature to 375°F (190°C). Return the chicken to the hot oil in batches and fry for another 2-3 minutes, until deep golden brown and exceptionally crispy. This second fry is the secret to that signature Korean Fried Chicken texture. Remove and drain on a fresh wire rack.
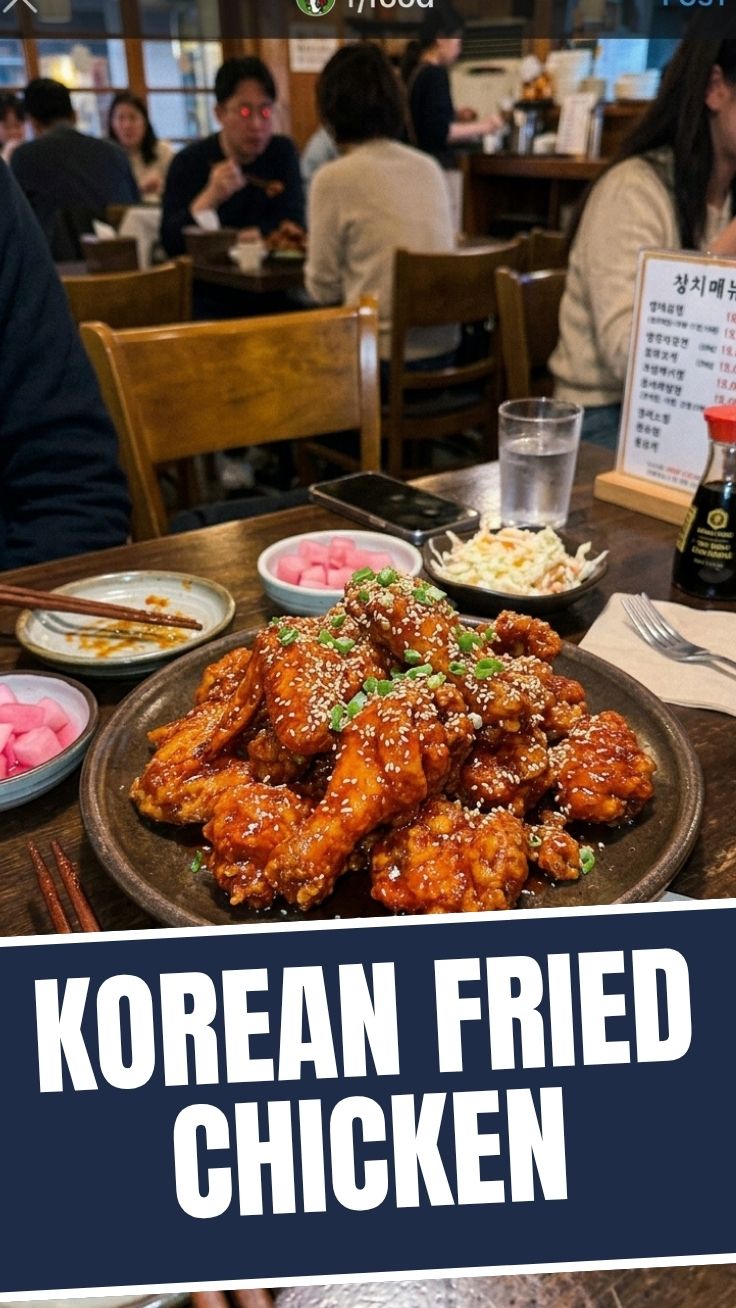
7. Sauce and Serve: In a large bowl, gently toss the re-fried Korean chicken pieces with the warm gochujang glaze until evenly coated. Garnish with toasted sesame seeds and sliced green onions. Serve immediately.
Nutritional Benefits & Advantages
Chicken, especially wings and drumettes, provides a good source of lean protein, essential for muscle repair and growth. The gochujang, a fermented chili paste, is known for its probiotic benefits and rich umami flavor, while ginger and garlic offer anti-inflammatory and immune-boosting properties. While fried, using a neutral oil and draining properly helps manage fat content. This homemade version also allows you to control the quality of ingredients and adjust sugar/salt levels in the glaze.
Tips, Variations & Cooking Advice
- Spice Level: Adjust the amount of gochujang to your preference. For extra heat, add a pinch of gochugaru (Korean chili flakes).
- Honey Garlic Sauce: For a milder, sweeter variation, reduce gochujang and increase honey and soy sauce, adding a touch more garlic.
- Boneless Chicken: This recipe works beautifully with boneless chicken thighs or breast pieces, just adjust frying times. Cut into 1-inch pieces and fry for 4-5 minutes in the first fry, then 1-2 minutes in the second.
- Gluten-Free: Substitute all-purpose flour with a gluten-free all-purpose blend and ensure soy sauce is gluten-free (tamari).
- Air Fryer: For a healthier twist, air fry the chicken. Coat as directed, spray generously with oil, and air fry at 375°F (190°C) for 15-20 minutes, flipping halfway, until golden and crisp. Then toss in sauce.
Common Mistakes to Avoid
- Overcrowding the Pot: Leads to a drop in oil temperature, resulting in soggy, greasy chicken. Fry in small batches.
- Not Drying Chicken: Excess moisture creates steam, preventing crispness. Always pat dry thoroughly.
- Skipping the Second Fry: This is the non-negotiable step for achieving that signature ultra-crispy coating.
- Cold Oil: Ensure oil reaches the correct temperature before frying. Use a thermometer!
- Over-saucing: Drenching the chicken can make it soggy. Lightly toss to coat.
Storage & Meal Prep Tips
Korean Fried Chicken is best enjoyed fresh for maximum crispness. However, if you have leftovers, store them in an airtight container in the refrigerator for up to 2-3 days. To reheat, the best method is to use an air fryer or oven. Place chicken on a baking sheet and reheat at 350°F (175°C) for 10-15 minutes until crispy and heated through. Avoid microwaving, as it will make the coating soft.
Conclusion
Mastering homemade Korean Fried Chicken is a truly rewarding culinary adventure. With careful attention to temperature, the double-fry technique, and the balanced flavors of the gochujang glaze, you can achieve that restaurant-quality crunch and taste right in your own kitchen. We hope this guide inspires you to create your own unforgettable Korean chicken feast. Share your creations and let us know your favorite sauce variations in the comments below!
FAQs
Q1: Can I make the sauce ahead of time?
A1: Yes, the gochujang glaze can be made up to 2-3 days in advance and stored in an airtight container in the refrigerator. Gently reheat before tossing with the fried chicken.
Q2: What if I don’t have a deep-fry thermometer?
A2: While a thermometer is highly recommended for best results, you can test the oil by dropping a small pinch of batter. If it sizzles vigorously and floats to the surface, the oil is ready. However, temperature consistency will be harder to maintain.
Q3: Can I use different parts of the chicken?
A3: Absolutely! Boneless chicken thighs or even small drumsticks work well. Just adjust the frying times accordingly; larger pieces will need longer.
Q4: How do I prevent the chicken from becoming soggy after saucing?
A4: The key is to toss the chicken with the sauce just before serving and doing so lightly. The double-fried crunch is delicate, and over-saucing or letting it sit too long will inevitably soften it.