The Ultimate Indulgence: Crafting Perfect Homemade Ice Cream Sandwiches
Have you ever bitten into a store-bought ice cream sandwich and thought, “This could be so much better”? We’ve all been there. While convenient, those mass-produced treats often lack the rich flavor and delightful texture that a genuinely homemade dessert delivers. Today, we’re diving into the delightful world of crafting your very own Ice Cream Sandwiches (Homemade) – a culinary endeavor that promises unparalleled satisfaction and a truly customizable experience. Forget bland, crumbly cookies and icy fillings; with our guidance, you’ll unlock a world of creamy indulgence and chewy perfection. And for those who love to experiment, imagine elevating your creation with a delectable Cookie Dough Recipe integrated right into the sandwich itself! Let’s transform your dessert cravings into a masterpiece.
Ingredients & Kitchen Tools
Crafting the perfect Ice Cream Sandwiches (Homemade) requires a few key components. Here’s what you’ll need:
- Unsalted Butter (1 cup, softened): Provides richness and tenderness to the cookies. Using unsalted butter allows you to control the salt content.
- Granulated Sugar (1 cup): Adds sweetness and aids in browning.
- Light Brown Sugar (1 cup, packed): Contributes to chewiness and a deeper molasses-like flavor.
- Large Eggs (2): Act as a binder and add moisture.
- Vanilla Extract (2 teaspoons): Enhances the overall flavor profile. Pure vanilla extract is always best.
- All-Purpose Flour (2 ¾ cups): The structural base of our cookies.
- Cocoa Powder (½ cup, unsweetened): Gives the cookies their classic chocolatey color and flavor.
- Baking Soda (1 teaspoon): A leavening agent that helps the cookies rise and become tender.
- Salt (½ teaspoon): Balances sweetness and enhances other flavors.
- Your Favorite Ice Cream (1.5 quarts, slightly softened): The heart of your sandwich! Choose a high-quality ice cream for the best results.
- Optional: Chocolate Chips or Sprinkles: For decoration or added texture.
- Stand Mixer or Hand Mixer: For creaming butter and sugars efficiently.
- Rubber Spatula: For scraping bowls and folding.
- Baking Sheets: For baking your perfect cookies.
- Parchment Paper or Silicone Baking Mats: Prevents sticking and ensures even baking.
- Large Spoon or Ice Cream Scoop: For portioning cookie dough and ice cream.
- Offset Spatula or Knife: For spreading ice cream smoothly.
- Freezer-safe Container or Plastic Wrap: For storage.
Prep Time & Cooking Schedule
This recipe requires a bit of planning, primarily due to chilling times, but the hands-on work is minimal.
- Prep Time: 20-25 minutes (for cookie dough)
- Chilling Time: 30 minutes (cookie dough)
- Baking Time: 10-12 minutes per batch (cookies)
- Assembly Time: 15-20 minutes
- Freezing Time: At least 2-4 hours (for sandwiches to set)
Plan to make the cookies a day in advance, or at least a few hours before assembly, to allow them to cool completely. The total setting time for the completed ice cream sandwiches means this isn’t an “instant gratification” dessert, but the wait is undeniably worth it.
Step-by-Step Instructions
Let’s get started on creating your perfect Ice Cream Sandwiches (Homemade)!
1. Cream Butter and Sugars: In a large bowl or stand mixer, cream together the softened butter, granulated sugar, and light brown sugar on medium speed until light and fluffy, about 2-3 minutes. This aeration is crucial for tender cookies.
2. Add Wet Ingredients: Beat in the eggs one at a time, mixing well after each addition. Stir in the vanilla extract.
3. Combine Dry Ingredients: In a separate medium bowl, whisk together the all-purpose flour, cocoa powder, baking soda, and salt.
4. Gradually Add Dry to Wet: With the mixer on low speed, gradually add the dry ingredients to the wet ingredients, mixing until just combined. Do not overmix, as this can lead to tough cookies.
5. Chill Dough (Optional but Recommended): Cover the dough and refrigerate for at least 30 minutes. This helps prevent spreading and deepens the flavor.
6. Preheat Oven & Prep Sheets: Preheat your oven to 350°F (175°C). Line baking sheets with parchment paper.
7. Portion and Bake Cookies: Scoop tablespoon-sized portions of dough onto the prepared baking sheets, leaving about 2 inches between each cookie. Bake for 10-12 minutes, or until the edges are set but the centers are still slightly soft. They will firm up as they cool.
8. Cool Cookies Completely: Remove cookies from the oven and let them cool on the baking sheet for 5 minutes before transferring them to a wire rack to cool completely. This is critical for preventing your ice cream from melting prematurely during assembly.
9. Prepare Ice Cream: While cookies cool, take your ice cream out of the freezer to soften slightly for easier spreading, but don’t let it melt completely.
10. Assemble Sandwiches: Take one cooled cookie, scoop a generous amount of softened ice cream onto the flat side, and gently top with another cookie, pressing slightly to distribute the ice cream evenly. For an extra layer of flavor, consider integrating a decadent Cookie Dough Recipe into your ice cream layer by crumbling small pieces of edible cookie dough (ensuring it’s egg-free or heat-treated flour) directly into the softened ice cream before scooping, or as a thin layer between the ice cream and the top cookie.
11. Freeze to Set: Place the assembled sandwiches on a parchment-lined baking sheet and freeze for at least 2-4 hours, or until thoroughly firm.
Nutritional Benefits & Advantages
While Ice Cream Sandwiches (Homemade) are undeniably an indulgent treat, making them yourself offers several advantages. You have complete control over the quality of ingredients, allowing you to choose organic, locally sourced, or allergen-friendly options. The cookies provide carbohydrates for energy, and if you opt for ice cream made with real dairy, you’ll get some calcium and protein. Plus, the sheer joy and satisfaction of creating something delicious from scratch can be a powerful mood booster!
Tips, Variations & Cooking Advice
- Cookie Variations: Instead of classic chocolate, try oatmeal cookies, peanut butter cookies, or even a spiced ginger cookie for a unique twist.
- Ice Cream Flavors: The possibilities are endless! Vanilla, chocolate, strawberry, mint chip, coffee – choose your personal favorite or mix and match.
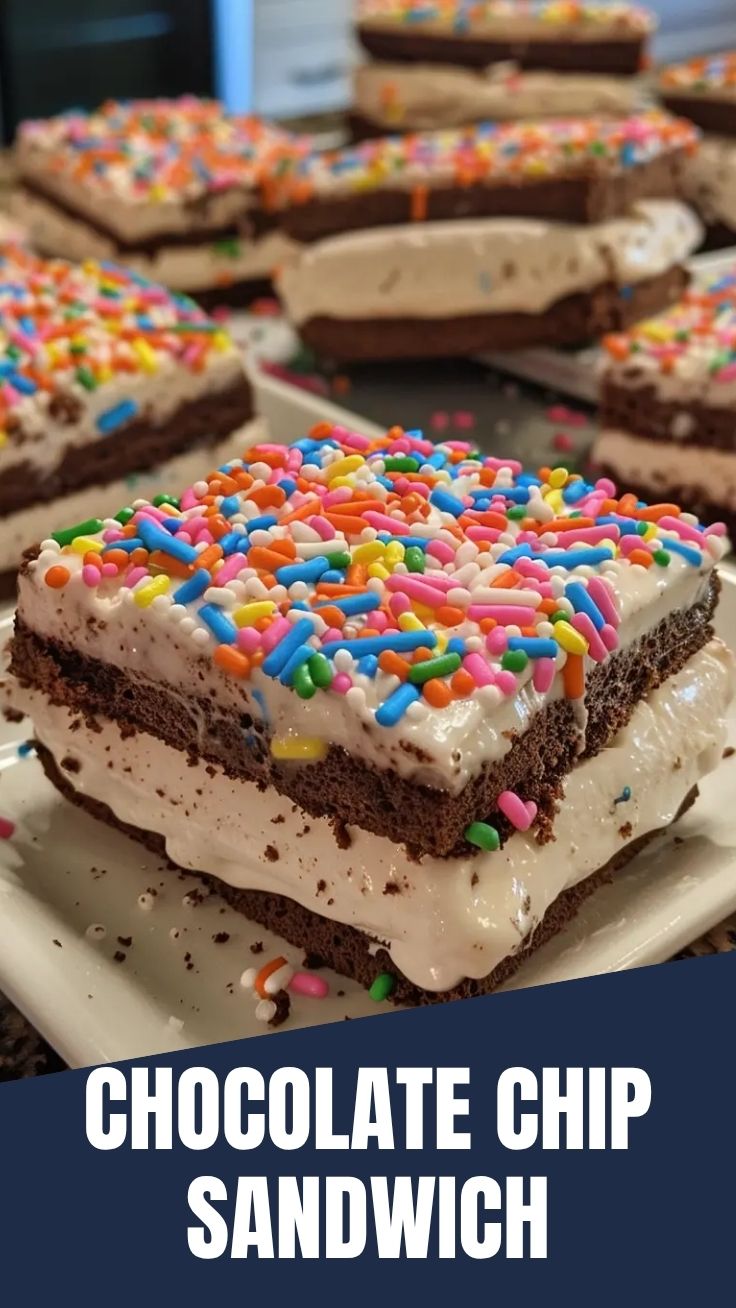
- Add-ins: Roll the edges of your finished sandwiches in chocolate chips, sprinkles, chopped nuts, or even shredded coconut for extra texture and flavor.
- Portion Control: Use a smaller cookie cutter for mini ice cream sandwiches, perfect for parties or portion control.
- Gluten-Free/Dairy-Free: Substitute gluten-free flour blend for all-purpose flour and use a high-quality dairy-free ice cream for alternative dietary needs. Ensure your chosen Cookie Dough Recipe is also adaptable.
- Perfectly Shaped Sandwiches: After assembly, you can use a large round cookie cutter or a sharp knife to trim the edges of the ice cream layer for a perfectly uniform shape.
Common Mistakes to Avoid
- Warm Cookies: Never assemble with warm cookies! The ice cream will melt instantly, creating a soggy mess. Ensure cookies are completely cooled.
- Overmixing Dough: Overmixing develops gluten, leading to tough, less tender cookies. Mix until just combined.
- Not Chilling Dough: While optional, chilling the dough prevents spreading and results in thicker, chewier cookies, ideal for holding ice cream.
- Too Much Softened Ice Cream: If the ice cream is too soft, it will be messy and difficult to work with. Work quickly with slightly softened ice cream, then freeze to firm up.
- Inadequate Freezing Time: Don’t rush the final freezing step. The sandwiches need ample time to firm up completely, or they’ll be hard to eat and fall apart.
Storage & Meal Prep Tips
Store your homemade Ice Cream Sandwiches (Homemade) individually wrapped in plastic wrap, then place them in an airtight freezer-safe container or freezer bag. This prevents freezer burn and keeps them fresh. They will stay perfectly delicious in the freezer for up to 1-2 months. When you’re ready to enjoy, simply remove one from the freezer and let it sit at room temperature for a minute or two to slightly soften before indulging.
Conclusion
There’s truly nothing quite like the indulgent satisfaction of biting into a perfectly crafted, homemade Ice Cream Sandwiches (Homemade). From the chewy, decadent cookie to the creamy, rich ice cream, every element is under your control, allowing for a personalized dessert experience far superior to any store-bought alternative. Whether you stick to the classic combination or venture into adding exciting layers with a delightful Cookie Dough Recipe, this project is a rewarding one. So, roll up your sleeves, gather your ingredients, and prepare to impress yourself and your loved ones. We encourage you to try this recipe and share your delicious creations! What unique flavor combinations will you invent?
FAQs
Q: Can I use store-bought cookie dough?
A: Yes, you can! While homemade dough is ideal, using quality store-bought cookie dough is a convenient shortcut. Just ensure it’s a sturdy, chewy cookie dough that will hold up to the ice cream.
Q: How do I prevent the cookies from getting soggy?
A: The most crucial step is ensuring your cookies are completely cooled before assembly. Also, work quickly when spreading the ice cream and then freeze immediately to set.
Q: Can I make these ahead of time for a party?
A: Absolutely! In fact, we recommend it. Assemble and freeze them a day or two in advance. Store them individually wrapped in an airtight container for easy serving.
Q: What if my ice cream melts too much during assembly?
A: If your ice cream becomes too soft, simply put it back in the freezer for 15-20 minutes to firm up slightly before continuing. Work in small batches if necessary.
Q: What’s the best way to cut the ice cream for perfect circles?
A: For perfectly round ice cream layers, you can slightly soften your ice cream, then spread it evenly into a shallow, parchment-lined baking dish. Freeze it until solid, then use a cookie cutter the same size as your cookies to cut out perfect ice cream discs for assembly.