Master the Art of Homemade Creamy Hummus: Your Guide to a Healthier Dip
Are you tired of store-bought dips that lack the creamy texture and authentic flavor you crave? Imagine dipping into a velvety smooth, homemade Hummus, bursting with fresh ingredients and an irresistible tang. Preparing this classic Middle Eastern delight from scratch isn’t just about saving money; it’s about unlocking a world of unparalleled flavor, customizability when crafting your unique Hummus recipe, and the immense satisfaction of creating something truly delicious in your own kitchen. This comprehensive guide will transform you into a hummus-making maestro, delivering a dip that’s not only incredibly tasty but also remarkably healthy and easy to prepare.
Ingredients & Kitchen Tools
Gathering the right components and equipment is the first step to hummus perfection.
- Canned Chickpeas (15-ounce can, garbanzo beans): The star of our show. Choose low-sodium varieties for better control over seasoning.
- Tahini (1/4 cup): Toasted sesame paste, essential for the signature nutty flavor and creamy texture. Don’t skip this!
- Lemon Juice (1/4 cup, freshly squeezed): Provides brightness and acidity; always use fresh for the best taste.
- Garlic Cloves (2-3, peeled): Adds a pungent, aromatic kick. Adjust to your preference.
- Ice Water (1/4 cup, or more as needed): The secret to achieving that ultra-smooth, light texture.
- Cumin Powder (1/2 teaspoon): Enhances the earthy notes of the chickpeas.
- Salt (1/2 teaspoon, or to taste): Balances flavors.
- Olive Oil (2 tablespoons, plus extra for garnish): Adds richness and a beautiful sheen. Use good quality extra virgin olive oil.
- Optional Garnishes: Paprika, chopped parsley, a drizzle of chili oil.
Kitchen Tools:
- Food Processor or High-Speed Blender: Crucial for achieving that perfectly smooth consistency.
- Can Opener: To open your chickpeas.
- Colander: For rinsing and draining chickpeas.
- Measuring Cups and Spoons: For accurate ingredient proportions.
- Spatula: For scraping down the sides of the food processor.
Prep Time & Cooking Schedule
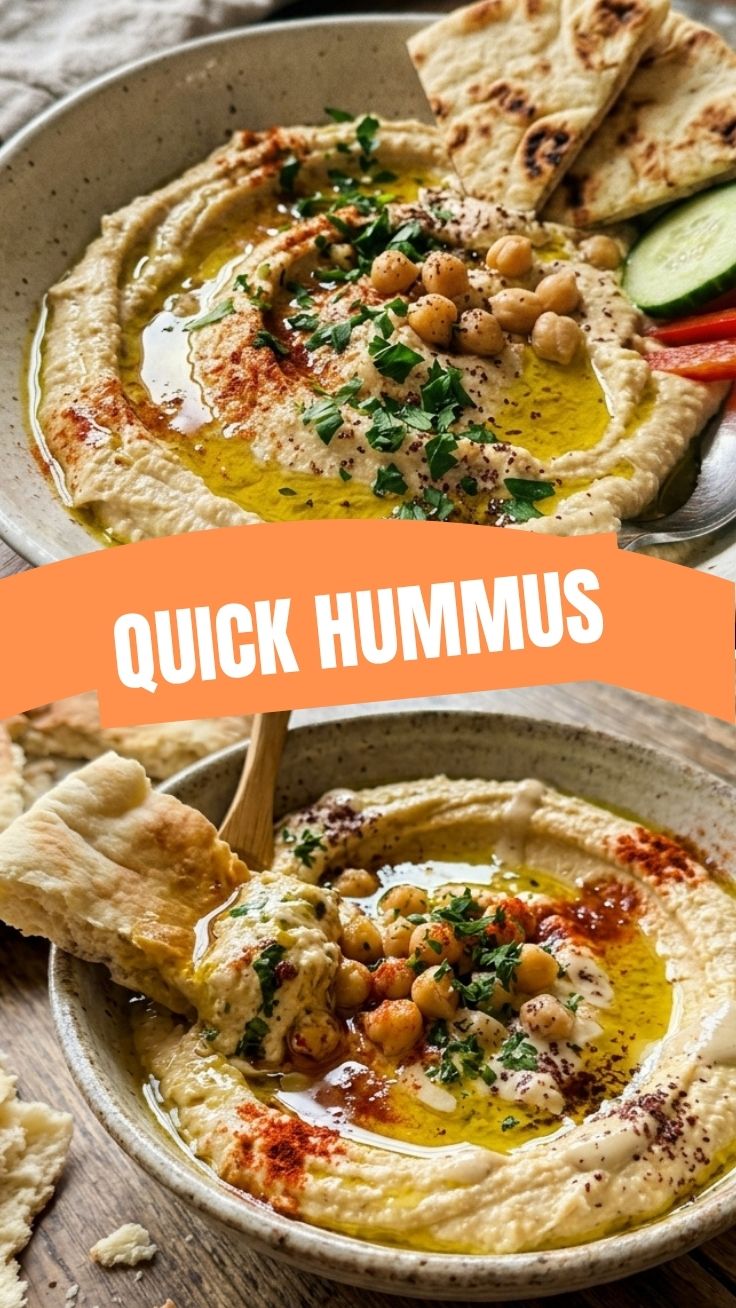
Making homemade hummus is surprisingly quick! The longest part is often gathering your ingredients.
- Prep Time: 10 minutes (draining, rinsing, peeling garlic, juicing lemon).
- Processing Time: 5-7 minutes.
- Total Time: Approximately 15-20 minutes.
This recipe is perfect for a last-minute gathering or as a healthy snack prep for the week. The longer it rests in the fridge, the more the flavors meld, making it an excellent make-ahead option.
Step-by-Step Instructions
Follow these steps for a guaranteed creamy, dreamy homemade hummus.
1. Prepare Chickpeas: Drain and rinse the canned chickpeas thoroughly under cold water. For extra creaminess, you can gently rub them between your hands to remove some of the skins, though this step is optional.
2. Combine Ingredients (Initial Blend): In your food processor or high-speed blender, combine the drained chickpeas, tahini, freshly squeezed lemon juice, peeled garlic cloves, cumin powder, and salt.
3. Process to a Rough Paste: Process the mixture for 1-2 minutes until it forms a rough, crumbly paste. Scrape down the sides of the bowl with a spatula.
4. Achieve Creaminess with Ice Water: With the food processor running, slowly drizzle in the ice water, one tablespoon at a time. Continue processing for 3-5 minutes, scraping down the sides occasionally, until the mixture transforms into an incredibly smooth and creamy Hummus. The ice water helps emulsify the tahini and creates that light, airy texture.
5. Add Olive Oil & Final Seasoning: Add the 2 tablespoons of olive oil and process for another 30 seconds to fully incorporate. Taste the hummus and adjust seasonings as needed. You might want more lemon juice for tang, more salt to enhance flavors, or a pinch more cumin.
6. Serve & Garnish: Transfer the hummus to a serving bowl. Create a shallow well in the center with the back of a spoon and drizzle generously with extra virgin olive oil. Garnish with paprika, chopped parsley, or a dash of sumac if desired. Serve immediately with pita bread, fresh vegetables, or as part of a Mediterranean-inspired meal. This homemade Hummus recipe is sure to impress!
Nutritional Benefits & Advantages
Hummus is a nutritional powerhouse! Chickpeas are an excellent source of plant-based protein and dietary fiber, promoting satiety and aiding digestion. Tahini provides healthy fats, including monounsaturated and polyunsaturated fats, along with essential minerals like calcium and magnesium. Lemon juice adds a burst of Vitamin C. This combination makes hummus a heart-healthy, gluten-free, and vegan dip that can contribute to stable blood sugar levels and provide sustained energy.
Tips, Variations & Cooking Advice
- Roasted Garlic Hummus: Roast whole garlic cloves (tossed with olive oil) until soft and golden before adding to the food processor for a sweeter, mellower garlic flavor.
- Spicy Hummus: Add a pinch of cayenne pepper, a dash of hot sauce, or a roasted jalapeño to the mixture.
- Herbaceous Hummus: Incorporate fresh herbs like cilantro, basil, or dill for a vibrant twist.
- Beet Hummus: Roast a small beet and blend it with the other ingredients for a beautiful pink hue and earthy sweetness.
- Texture Control: If your hummus is too thick, add a touch more ice water (one tablespoon at a time) until it reaches your desired consistency. If it’s too thin, you might need to add a few more chickpeas, but this is rare with our recipe.
Common Mistakes to Avoid
- Not Rinsing Chickpeas: This can leave a starchy, sometimes metallic taste. Always rinse thoroughly.
- Skimping on Tahini: Tahini is crucial for both flavor and texture. Don’t reduce the amount unless you prefer a less rich dip.
- Using Bottled Lemon Juice: Freshly squeezed lemon juice makes a significant difference in brightness and flavor.
- Not Enough Processing Time: Patience is key! Process until it’s genuinely smooth, not just chunky. The extra few minutes make all the difference.
- Forgetting Ice Water: Warm water makes the hummus thicker and less airy. Ice water helps create the perfect emulsion and texture.
Storage & Meal Prep Tips
Store homemade hummus in an airtight container in the refrigerator for up to 5-7 days. A thin layer of olive oil on top can help prevent it from drying out and oxidizing. Hummus generally does not freeze well, as its texture can become grainy and separate upon thawing. For meal prep, portion it into small containers for quick, healthy snacks throughout the week with veggie sticks, crackers, or as a spread in sandwiches and wraps.
Conclusion
There’s truly nothing quite like the creamy, zesty flavor of homemade Hummus. By following this comprehensive guide, you’ve not only learned a delicious recipe but also gained the confidence to customize your own perfect batch. We encourage you to try this amazing Hummus recipe; the satisfaction of creating such a versatile and healthy dip from scratch is incredibly rewarding. Share your hummus creations with us in the comments below, or tell us your favorite way to enjoy this delightful spread!
FAQs
Q1: Do I have to remove the chickpea skins for truly creamy hummus?
A1: While optional, removing the skins will result in an even smoother, silkier texture. It’s a bit time-consuming, but worth it for a gourmet touch.
Q2: Can I make hummus without a food processor?
A2: A food processor or high-speed blender is highly recommended for the best texture. You could try using a powerful immersion blender or even a mortar and pestle for a rustic texture, but it will be much harder to achieve true creaminess.
Q3: My hummus is too runny. What went wrong?
A3: This usually happens if too much liquid (lemon juice or ice water) was added too quickly. Try adding a few more cooked chickpeas (or a tablespoon of chickpea flour) and processing again to thicken it.
Q4: How can I make my hummus taste more authentic?
A4: Use fresh, good-quality ingredients – especially fresh lemon juice and a high-quality tahini. Don’t skimp on the processing time, and taste as you go to adjust seasonings perfectly. A generous drizzle of good extra virgin olive oil at the end makes a big difference.
Q5: Is it possible to use dried chickpeas instead of canned ones?
A5: Absolutely! Soaking dried chickpeas overnight and then cooking them until very soft (even slightly overcooked) will give you an unparalleled depth of flavor and creaminess, though it adds significant preparation time.