Unlock Flavor Perfection: Your Ultimate Guide to Homemade Honey Garlic Chicken
Ever found yourself craving that perfect balance of sweet and savory, a dish that’s both comforting and exciting? That’s exactly what you get with Honey Garlic Chicken. There’s a certain magic in preparing this classic at home, not just for the incredible taste but for the satisfaction of knowing exactly what goes into your meal. Forget those questionable takeout options; crafting your own Honey Garlic Sauce from scratch elevates the experience, allowing for personalized culinary perfection. This guide will walk you through every step, ensuring your homemade version is nothing short of spectacular. Get ready to impress your taste buds and your dinner guests!
Ingredients & Kitchen Tools
To embark on this delicious journey, gather these essentials:
- 1.5 lbs Boneless, Skinless Chicken Thighs or Breasts: Thighs offer juicier results; breasts are leaner. Cut into 1-inch pieces.
- ½ cup Honey: The star sweetener, providing that signature glaze.
- ¼ cup Soy Sauce (low sodium preferred): Adds umami and salinity without overpowering.
- 2 tablespoons Rice Vinegar: Contributes a subtle tang, balancing the sweetness.
- 1 tablespoon Sriracha or Chili Garlic Sauce (optional): For a touch of heat, adjust to your preference.
- 4-5 cloves Garlic, minced: The other star flavor, don’t skimp!
- 1 tablespoon Fresh Ginger, grated: Adds a zesty, aromatic kick.
- 1 tablespoon Cornstarch: Essential for thickening the sauce.
- 2 tablespoons Water: To create a cornstarch slurry.
- 1 tablespoon Olive Oil or Vegetable Oil: For browning the chicken.
- Garnish: Sesame seeds, chopped green onions (scallions), or cilantro for a fresh finish.
Kitchen Tools:
- Large Skillet or Wok: For searing chicken and simmering the sauce.
- Small Bowl: For mixing the sauce ingredients.
- Whisk: To combine sauce ingredients smoothly.
- Tongs or Spatula: For turning chicken.
- Measuring Cups and Spoons: Precision is key in cooking!
Prep Time & Cooking Schedule
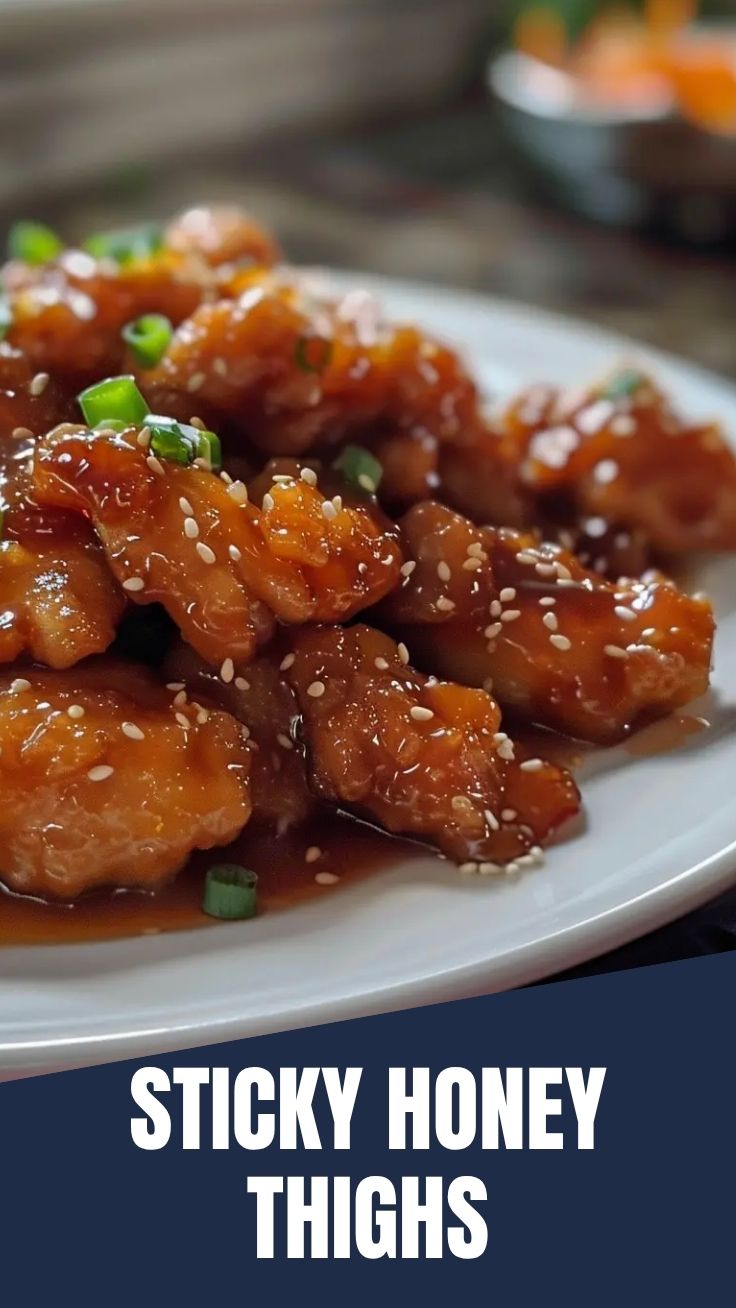
Planning is everything for a stress-free meal. Here’s a breakdown:
- Prep Time: 15 minutes (Includes chopping chicken, mincing garlic, grating ginger, and mixing the sauce).
- Cook Time: 20-25 minutes (Searing chicken, simmering sauce, and coating).
- Resting Time: 5 minutes (Allowing the chicken to rest briefly before serving helps retain juices).
Context for Planning: This recipe is perfect for a weeknight dinner, as it comes together quickly. You can prep the chicken and whisk together the sauce ingredients ahead of time to save minutes during crunch time. The total active time is under 40 minutes, making it a fantastic option for a flavorful meal without a long commitment.
Step-by-Step Instructions
1. Prepare the Chicken: Pat your chicken pieces dry with paper towels. This helps achieve a better sear. Season lightly with salt and pepper.
2. Make the Honey Garlic Sauce: In a small bowl, whisk together the honey, soy sauce, rice vinegar, Sriracha (if using), minced garlic, and grated ginger until well combined. In a separate tiny bowl, mix the cornstarch with water to create a slurry.
3. Brown the Chicken: Heat olive oil in a large skillet over medium-high heat. Add the chicken in a single layer, being careful not to overcrowd the pan. Cook for 3-4 minutes per side, until golden brown and almost cooked through. Remove the chicken from the pan and set aside.
4. Simmer the Sauce: Reduce the heat to medium. Pour the prepared honey garlic sauce into the skillet. Bring to a gentle simmer, stirring occasionally.
5. Thicken the Sauce: While the sauce is simmering, slowly whisk in the cornstarch slurry. Continue to whisk gently until the sauce thickens to your desired consistency – it should coat the back of a spoon. This usually takes 1-2 minutes.
6. Combine and Coat: Return the cooked Honey Garlic Chicken to the skillet. Toss gently to ensure every piece is thoroughly coated in the luscious sauce. Cook for another 1-2 minutes, allowing the flavors to meld and the chicken to heat through.
7. Serve: Garnish with sesame seeds, green onions, or cilantro. Serve immediately with your favorite sides like rice or steamed vegetables.
Nutritional Benefits & Advantages
This homemade Honey Garlic Chicken offers more than just incredible taste. Chicken, especially boneless, skinless cuts, is a fantastic source of lean protein, essential for muscle repair and growth. Garlic and ginger, beyond their flavor contributions, are revered for their anti-inflammatory and immune-boosting properties. By making it yourself, you control the amount of sugar and sodium, opting for healthier alternatives like low-sodium soy sauce and natural honey, avoiding the excessive additives found in many pre-made sauces. It’s a balanced meal that fuels your body with quality ingredients.
Tips, Variations & Cooking Advice
- Spicy Kick: Amp up the Sriracha or add a pinch of red pepper flakes for extra heat.
- Vegetarian Version: Substitute chicken with extra-firm tofu or tempeh, pressed and cubed, then pan-fried until golden before adding to the sauce.
- Broccoli Boost: Add steamed broccoli florets to the pan in the last few minutes for a complete meal.
- Flavor Depth: A splash of toasted sesame oil at the very end can add another layer of nutty aroma.
- Marinade Magic: For deeper flavor, marinate the chicken in a portion of the sauce for 30 minutes before cooking (omit cornstarch from marinade if doing this).
Common Mistakes to Avoid
- Overcrowding the Pan: This leads to steaming instead of searing, preventing that lovely golden crust on the chicken. Cook in batches if necessary.
- Overcooking the Chicken: Chicken breasts dry out quickly. Remove them as soon as they are no longer pink to retain juiciness.
- Not Creating a Cornstarch Slurry: Adding cornstarch directly to hot sauce will cause lumps. Always mix it with a cold liquid first.
- Too High Heat: Cooking the sauce at too high a temperature can burn the honey, making it bitter. Keep it at a gentle simmer.
Storage & Meal Prep Tips
- Refrigeration: Leftovers can be stored in an airtight container in the refrigerator for up to 3-4 days.
- Freezing: For longer storage, freeze cooled Honey Garlic Chicken in a freezer-safe bag or container for up to 2-3 months. Thaw overnight in the refrigerator before reheating.
- Reheating: Gently reheat on the stovetop over low heat or in the microwave until warmed through. Add a splash of water or broth if the sauce seems too thick.
Conclusion
Mastering the art of homemade Honey Garlic Chicken is a culinary triumph that rewards you with incredible flavor and the satisfaction of a healthy, delicious meal. With this detailed guide, you’re now equipped to create a dish that’s superior to any takeout, elevating your weeknight dinners or special occasions. The nuanced flavors of the sweet and savory chicken, perfectly complemented by the homemade Honey Garlic Sauce, are truly a delight. Don’t just read about it – try it! Share your culinary creations and let us know how your homemade honey garlic chicken adventure turns out!
FAQs
Q1: Can I use different cuts of chicken?
A1: Yes, chicken wings or drumsticks work wonderfully, though cooking times will vary. Adjust accordingly until cooked through.
Q2: How can I make the sauce spicier?
A2: Increase the amount of Sriracha or chili garlic sauce, or add a pinch of red pepper flakes during the sauce-making step.
Q3: What if my sauce is too thick or too thin?
A3: If too thick, add a tablespoon of water or chicken broth until desired consistency. If too thin, mix another small cornstarch slurry (1 tsp cornstarch with 1 tbsp water) and whisk into the simmering sauce.
Q4: Can I prepare the sauce in advance?
A4: Absolutely! You can whisk the sauce ingredients together (excluding the cornstarch slurry) and store it in the refrigerator for up to 3 days. Prepare the slurry fresh when you’re ready to cook.
Q5: What are good side dishes for this chicken?
A5: Steamed jasmine rice, brown rice, quinoa, cauliflower rice, or simple stir-fried vegetables like broccoli, snap peas, or bell peppers are excellent choices.