Unleash the Flavor: Your Ultimate Guide to Crafting Authentic Hatch Green Chile dishes
Ever wondered how to bring that irresistible New Mexican zest right into your kitchen? There’s an undeniable magic that happens when you combine robust flavors with wholesome ingredients, creating a meal that’s both comforting and exciting. Today, we’re diving deep into the heart of Southwestern cuisine, focusing on the star ingredient that elevates countless dishes: the magnificent Hatch Green Chile. This isn’t just about cooking; it’s about experiencing a culinary journey that rewards your senses and nourishes your body. Forget store-bought shortcuts; making authentic Green Chile Recipes at home allows for unparalleled freshness, customization, and a profound connection to the ingredients. Get ready to transform your meals and impress your taste buds.
Ingredients & Kitchen Tools
To embark on this flavorful adventure, gather these essentials:
- Fresh Hatch Green Chile: About 2-3 pounds. Look for firm, vibrant green chiles with smooth skins. (Important for roasting!)
- Onion: 1 large, yellow or white. Provides a sweet aromatic base.
- Garlic: 4-6 cloves, minced. The backbone of most savory dishes.
- Tomatillos: 1 pound, husked and rinsed. Adds a tangy brightness that complements the chile.
- Chicken or Vegetable Broth: 4 cups. Essential for creating a rich sauce or stew base.
- Cumin Powder: 1 teaspoon. Earthy and warm, a cornerstone spice in Southwestern cooking.
- Oregano (Mexican): 1/2 teaspoon. Distinctive, more pungent than Mediterranean oregano.
- Salt & Black Pepper: To taste. Seasoning is key!
- Olive Oil or Avocado Oil: 2 tablespoons. For sautéing and roasting.
- Cilantro: 1/2 cup, chopped. Fresh finish and herbaceous notes.
- Lime: 1, juiced. Brightens and balances flavors.
Kitchen Tools:
- Baking Sheet: For roasting chiles and tomatillos.
- Tongs: Essential for turning chiles during roasting.
- Large Bowl with Lid or Plastic Wrap: For steaming roasted chiles, making them easier to peel.
- Food Processor or Blender: For puréeing the roasted vegetables into a smooth sauce.
- Large Pot or Dutch Oven: For simmering your glorious Green Chile Recipes creation.
- Sharp Knife & Cutting Board: For all your chopping needs.
Prep Time & Cooking Schedule
- Prep Time: 30 minutes (includes chopping, peeling, and initial roasting of chiles).
- Cooking Time: 1 hour 30 minutes (roasting, peeling, puréeing, and simmering).
- Resting Time: 10-15 minutes (after roasting chiles for easier peeling).
- Marinating Time: N/A for this core recipe, but if you’re adding meat, factor in additional time.
This timing allows for a relaxed and enjoyable cooking experience. Roast your chiles and tomatillos while you prep other ingredients, then move onto peeling and puréeing. The simmering stage is largely hands-off, giving you time to prepare accompaniments or simply savor the enticing aromas filling your kitchen.
Step-by-Step Instructions
1. Roast the Chiles and Tomatillos: Preheat your oven to 425°F (220°C). Arrange the Hatch Green Chile and husked tomatillos on a baking sheet. Drizzle lightly with oil. Roast for 20-25 minutes, flipping halfway, until the chile skins are blistered and charred, and tomatillos are soft and slightly darkened. This charring is crucial for developing that deep, smoky flavor.
2. Steam and Peel Chiles: Immediately transfer the roasted chiles to a large bowl, cover tightly with a lid or plastic wrap, and let them steam for 10-15 minutes. This step loosens the skin, making peeling much easier. Once cooled enough to handle, gently peel the skins, remove the stems, and deseed them (wear gloves if you’re sensitive to capsaicin!).
3. Sauté Aromatics: In your large pot or Dutch oven, heat olive oil over medium heat. Add chopped onions and cook until softened, about 5-7 minutes. Add minced garlic and cook for another minute until fragrant, being careful not to burn it.
4. Blend the Base: Add the peeled Hatch Green Chile, roasted tomatillos, sautéed onions and garlic, and 1 cup of broth to a food processor or blender. Process until smooth. If you prefer a chunkier texture for your Green Chile Recipes, pulse briefly.
5. Simmer and Season: Pour the blended mixture back into the pot over medium heat. Stir in the remaining broth, cumin, and Mexican oregano. Bring to a simmer, then reduce heat to low, cover, and cook for at least 45 minutes to 1 hour, allowing the flavors to meld beautifully. Taste and adjust seasoning with salt, pepper, and lime juice.
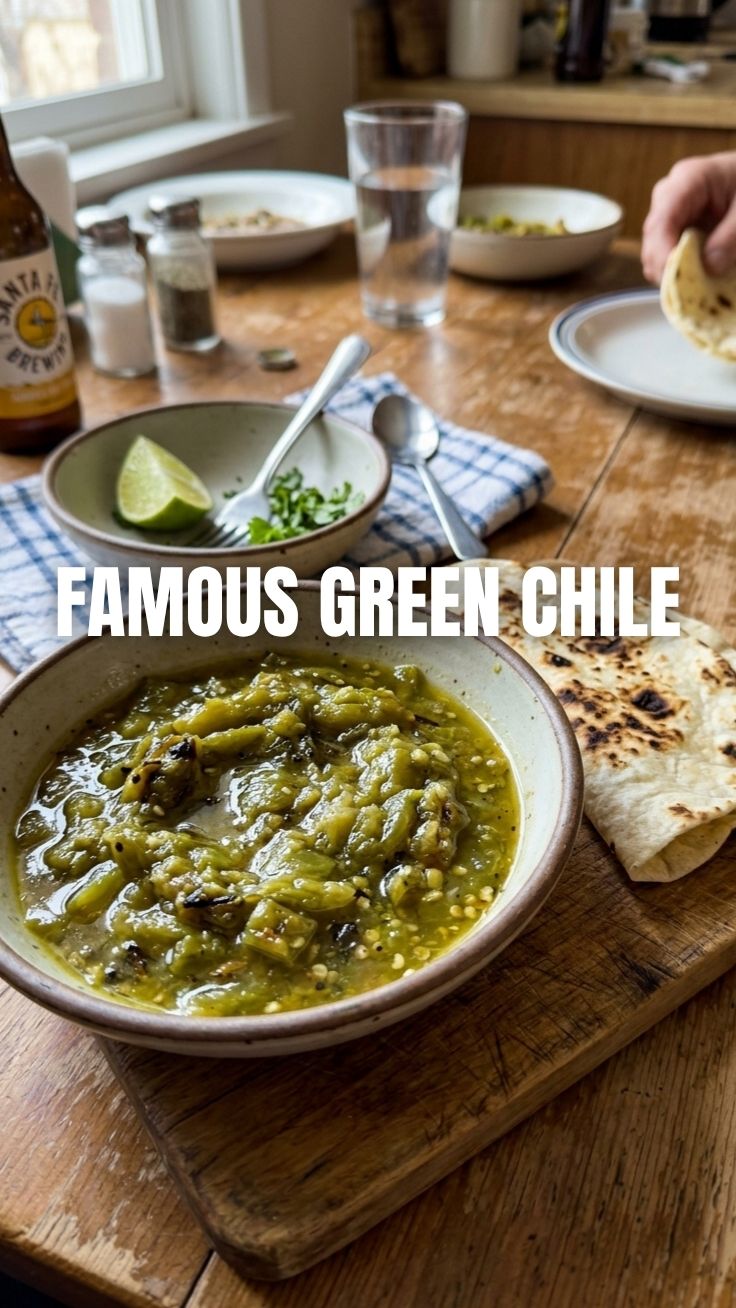
6. Garnish and Serve: Ladle into bowls and garnish with fresh cilantro. Serve hot with warm tortillas, rice, or as a base for stews and enchiladas.
Nutritional Benefits & Advantages
The Hatch Green Chile is more than just a flavor powerhouse; it’s packed with nutritional benefits. Rich in Vitamin C, it acts as a powerful antioxidant, boosting your immune system. It also contains capsaicin, the compound responsible for its mild heat, which has been linked to pain relief and metabolic benefits. Tomatillos offer dietary fiber and vitamins A and K, contributing to digestive health and bone strength. This recipe, being vegetable-forward, is naturally low in saturated fat and cholesterol, making it a heart-healthy and vibrant addition to any diet.
Tips Variations & Cooking Advice
- Heat Level: Hatch Green Chile comes in mild, medium, and hot varieties. Choose according to your preference. For extra heat, leave some seeds in; for less, remove all seeds and membranes.
- Protein Boost: Add shredded chicken, pork, or even plant-based protein like black beans or crumbled tempeh during the last 20 minutes of simmering for a heartier meal.
- Creamy Texture: Stir in a dollop of sour cream or a splash of heavy cream at the end for a richer, creamier consistency.
- Smoky Depth: If you have access to an outdoor grill, roasting the chiles and tomatillos over an open flame will impart an even deeper smoky flavor.
- Vegan Option: Ensure you use vegetable broth, and consider adding roasted corn or sweet potato chunks for extra dimension.
Common Mistakes to Avoid
- Under-roasting Chiles: If the skins aren’t sufficiently charred, they will be very difficult to peel, leading to a frustrating experience. Err on the side of slightly more char.
- Skipping the Steaming: Without steaming, peeling becomes a tedious chore and you risk losing precious chile flesh.
- Over-processing the Sauce: If you blend too long, especially with high-powered blenders, the sauce can become a bit gummy. Pulse until desired consistency is reached.
- Rushing the Simmer: The long, slow simmer is critical for the flavors to fully meld and deepen. Don’t cut this time short.
- Ignoring Seasoning: Taste and adjust! Chiles vary in heat and sweetness, so constant seasoning checks are important.
Storage & Meal Prep Tips
Your freshly made Green Chile Recipes creation stores beautifully.
- Refrigeration: Store in an airtight container in the refrigerator for up to 5-7 days.
- Freezing: This recipe freezes exceptionally well! Portion it into freezer-safe containers or bags and freeze for up to 3 months. Thaw overnight in the refrigerator before reheating.
- Reheating: Gently reheat on the stovetop over medium-low heat, stirring occasionally. Add a splash of broth or water if it’s too thick. Avoid high heat, which can dull the fresh flavors.
- Meal Prep Uses: Make a large batch and use it throughout the week for enchiladas, burritos, over eggs, or as a base for a quick soup.
Conclusion
Mastering the art of preparing authentic Hatch Green Chile at home is a rewarding culinary achievement. By following these steps, you’ve not only created a mouthwatering dish but also unlocked a world of flavor potential that elevates simple ingredients into extraordinary meals. Embrace the vibrant essence of Southwestern cuisine and let your kitchen become a haven of delicious aromas and bold tastes. We encourage you to try this recipe, experiment with your own twists, and share your delightful Green Chile Recipes with your loved ones. Happy cooking!
FAQs
Q1: Can I use canned green chiles instead of fresh Hatch chiles?
A1: While fresh Hatch Green Chile provides the best flavor and texture, you can substitute 2 (4-ounce) cans of diced mild green chiles for convenience. Just be aware the flavor profile will be less complex and smoky.
Q2: My green chile sauce is too thin/thick. How can I fix it?
A2: If it’s too thin, simmer uncovered for a bit longer to reduce. If it’s too thick, add a bit more broth or water until you reach your desired consistency.
Q3: Is it necessary to wear gloves when handling chiles?
A3: Absolutely. The capsaicin in chiles can irritate your skin and especially your eyes. Wearing gloves (latex or nitrile) is highly recommended, especially when deseeding.
Q4: Can I make this ahead for a party?
A4: Yes, this recipe is perfect for making ahead! The flavors actually deepen and improve overnight, making it an excellent choice for entertaining. Just reheat gently before serving.
Q5: What are some good dishes to serve with this green chile?
A5: This versatile sauce is fantastic with huevos rancheros, smothered burritos, enchiladas, alongside grilled meats, or as a vibrant base for a hearty green chile stew.