Sizzle, Sear, and Savor: Unlocking the Magic of Garlic Butter Shrimp at Home
Are you tired of bland, uninspired weeknight dinners? Do you dream of restaurant-quality meals that are both quick to prepare and burst with flavor? Look no further! This comprehensive guide will empower you to master the art of making a sensational Garlic Butter Shrimp right in your own kitchen. Preparing this dish at home isn’t just about saving money; it’s about control over fresh ingredients, customizing to your taste, and the sheer satisfaction of creating something truly delicious. Get ready to elevate your culinary game and discover why this simple yet elegant dish is a favorite among Seafood Recipes enthusiasts.
Ingredients & Kitchen Tools
To embark on this flavorful journey, gather the following essentials:
- Shrimp (1 lb, medium-large, peeled and deveined, tail-on or off): Fresh or frozen (thawed) work equally well. Tail-on adds visual appeal, while tail-off is easier to eat.
- Unsalted Butter (4 tablespoons): Divides into rich, nutty goodness. Unsalted allows you to control the sodium.
- Garlic (6-8 cloves, minced): The star of the show. Adjust to your desired garlic intensity.
- Lemon Juice (2 tablespoons, fresh): Brightens the flavors and adds a zesty finish.
- Fresh Parsley (2 tablespoons, chopped): For a pop of color and herbaceous freshness.
- Red Pepper Flakes (1/2 teaspoon, optional): Adds a subtle kick for those who enjoy a little heat.
- Salt & Black Pepper (to taste): Essential for seasoning.
- Olive Oil (1 tablespoon): For searing the shrimp.
- Large Skillet (preferably cast iron or heavy-bottomed): Ensures even heat distribution for perfect searing.
- Tongs or Spatula: For flipping and turning the shrimp.
- Small Bowl: For mixing the seasonings.
Prep Time & Cooking Schedule
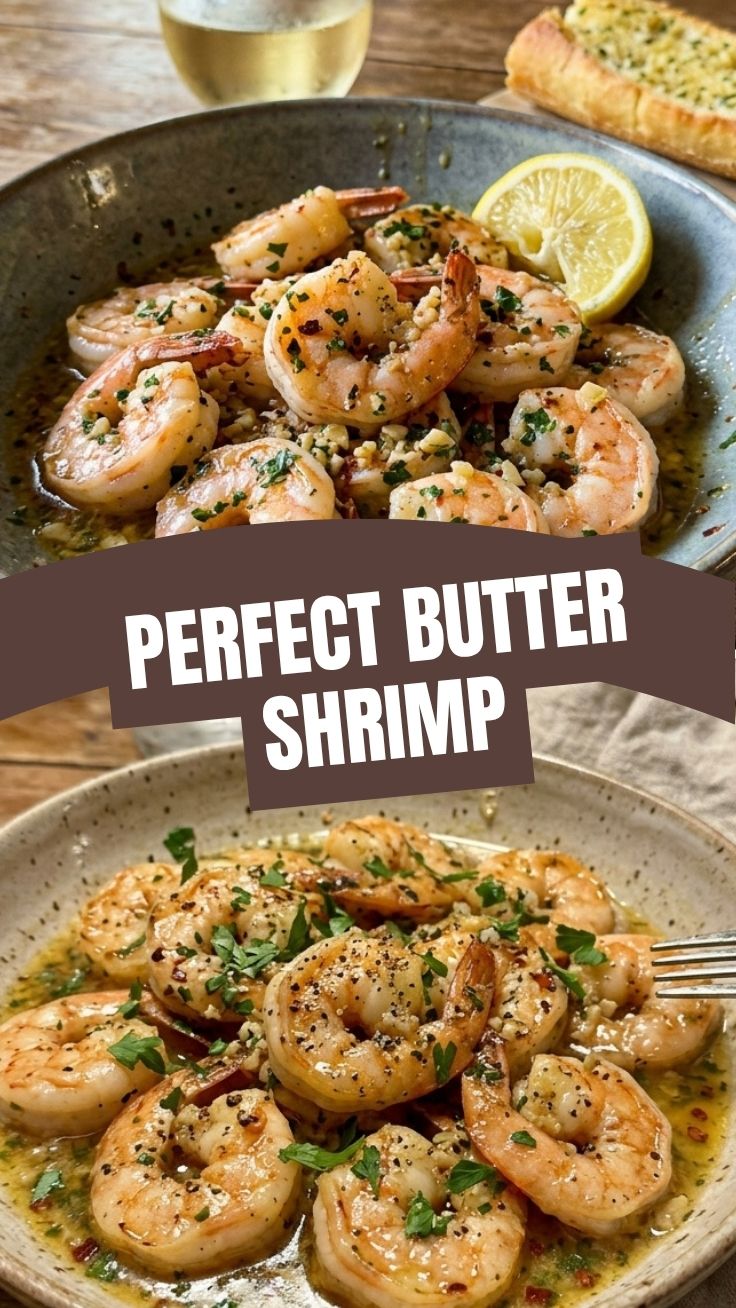
This recipe is a weeknight warrior’s dream, requiring minimal effort for maximum reward!
- Prep Time: 10 minutes (Thawing shrimp, mincing garlic, chopping parsley).
- Cook Time: 5-7 minutes (Shrimp cooks very quickly!).
- Total Time: Approximately 15-20 minutes.
This quick turnaround means you can have a gourmet meal on the table in under 30 minutes, making it perfect for busy evenings. Plan to serve immediately after cooking to enjoy the optimal texture and flavor.
Step-by-Step Instructions
Let’s dive into creating your perfect Garlic Butter Shrimp. For a truly unforgettable experience, and one of the finest Seafood Recipes you’ll ever master, precision and attention to detail are key.
1. Prepare the Shrimp: If using frozen shrimp, thaw them thoroughly under cold running water or overnight in the refrigerator. Pat them completely dry with paper towels. Excess moisture will steam the shrimp instead of searing, preventing that beautiful golden crust. Season the dried shrimp with salt and pepper.
2. Mise en Place: Have all your ingredients prepped and ready to go before heating the pan. Mince your garlic, chop your parsley, and measure out your lemon juice and butter.
3. Heat the Skillet: Place your large skillet over medium-high heat. Add the olive oil and swirl to coat the bottom. You want the pan to be hot enough to sear the shrimp quickly.
4. Sear the Shrimp: Once the pan is hot and the oil is shimmering (but not smoking), add the seasoned shrimp in a single layer. Avoid overcrowding the pan; cook in batches if necessary. Sear for about 1-2 minutes per side, until pink and opaque. The shrimp curls into a C-shape when cooked; overcooked shrimp forms an O-shape. Remove the cooked shrimp from the pan and set aside.
5. Create the Garlic Butter Sauce: Reduce the heat to medium. Add the butter to the same skillet. Once melted, add the minced garlic and red pepper flakes (if using). Sauté for about 30-60 seconds, or until fragrant. Be careful not to burn the garlic, as this will make it bitter.
6. Finish the Dish: Return the cooked shrimp to the skillet. Pour in the lemon juice and sprinkle with fresh parsley. Toss gently to coat the shrimp evenly with the glorious garlic butter sauce.
7. Serve Immediately: Transfer to a serving platter and enjoy your succulent shrimp.
Nutritional Benefits & Advantages
Shrimp is a nutritional powerhouse! It’s an excellent source of lean protein, essential for muscle repair and growth. It’s also low in calories and saturated fat, making it a heart-healthy choice. Beyond protein, shrimp provides a wealth of micronutrients, including iodine (crucial for thyroid function), selenium (an antioxidant), vitamin B12, and phosphorus. The garlic in this dish also offers immune-boosting properties, while lemon juice adds a dose of vitamin C.
Tips, Variations & Cooking Advice
- Spice it Up: Add a pinch more red pepper flakes, or incorporate a dash of cayenne pepper for extra heat.
- Herbaceous Alternatives: Experiment with other fresh herbs like dill, chives, or oregano to alter the flavor profile.
- Creamy Twist: Stir in a tablespoon or two of heavy cream or a splash of white wine at the end when you add the lemon juice for a richer sauce.
- Dietary Adaptations: This recipe is naturally gluten-free. For a dairy-free version, use a high-quality plant-based butter substitute.
- Serving Suggestions: Serve over pasta, rice, quinoa, cauliflower rice, with crusty bread for dipping in the sauce, or simply with a fresh green salad.
Common Mistakes to Avoid
1. Overcooking the Shrimp: This is the most common mistake. Overcooked shrimp becomes rubbery and tough. Watch them closely; they cook very quickly!
2. Not Drying the Shrimp: Wet shrimp will steam instead of sear, resulting in a bland, mushy texture with no appealing golden crust.
3. Burning the Garlic: Garlic cooks quickly and can turn bitter if burnt. Keep the heat moderate once the butter is added and sauté just until fragrant.
4. Overcrowding the Pan: Too many shrimp in the pan will lower the temperature and cause them to steam rather than sear properly. Cook in batches if necessary.
Storage & Meal Prep Tips
Leftover Garlic Butter Shrimp can be stored in an airtight container in the refrigerator for up to 2-3 days. Reheat gently in a skillet over low heat, or in the microwave in short bursts, to prevent overcooking. Be aware that the shrimp may lose some of its tender texture upon reheating. This dish is best enjoyed fresh. Freezing cooked shrimp is generally not recommended as it significantly degrades the texture.
Conclusion
By following this guide, you’ve unlocked the secrets to preparing a truly exceptional Garlic Butter Shrimp. This recipe isn’t just about cooking; it’s about creating a moment of culinary delight. We hope you feel inspired to dive into the wonderful world of Seafood Recipes with newfound confidence. Try it tonight, share your creations with us in the comments, and get ready for rave reviews!
FAQs
Q1: Can I use frozen shrimp directly without thawing?
A1: While technically possible, it’s highly recommended to thaw shrimp completely and pat them dry. Cooking frozen shrimp directly will release too much water, leading to steaming rather than searing, and a less desirable texture.
Q2: What if I don’t have fresh lemon juice?
A2: Fresh lemon juice provides the best flavor, but bottled lemon juice can be used as a substitute in a pinch. Adjust the quantity to taste.
Q3: My garlic butter sauce seized up. What happened?
A3: If your sauce seized, it might be due to overheating the butter after adding the garlic, causing the milk solids to separate. Keep the heat moderate and stir continuously. Adding a tiny splash of water or broth can sometimes help emulsify it back.
Q4: How do I know when the shrimp is perfectly cooked?
A4: Shrimp will turn pink and opaque, and curl into a C-shape. If it tightens into an O-shape, it’s overcooked and will be rubbery. This usually takes only 1-2 minutes per side depending on the size.
Q5: Can I prepare this dish ahead of time for meal prep?
A5: While the flavors are delicious reheated, the optimal texture of shrimp is experienced immediately after cooking. If meal prepping, cook the shrimp just before serving or prepare all ingredients beforehand and cook at the last minute.