Unlock the Secret to the Perfect Golden Crusted Cornbread: A Homestyle Culinary Journey
Ever wondered how to achieve that elusive, perfectly golden crust and moist, tender interior in your homemade Cornbread? Forget dry, crumbly imposters! Today, we’re diving deep into the art and science of crafting truly exceptional cornbread – a staple that brings warmth and comfort to any table. Whether you’re a seasoned baker or a kitchen novice, this guide will unlock the secrets to creating a masterpiece that will have everyone asking for your cornbread recipes. Preparing this classic at home isn’t just about food; it’s about tradition, taste, and the unparalleled satisfaction of serving a dish made with love. Get ready to elevate your culinary skills and bring a truly delicious cornbread to life in your own kitchen!
Ingredients & Kitchen Tools
Crafting the perfect cornbread requires a few essential ingredients and tools, each playing a crucial role in the final texture and flavor.
Ingredients:
- 1 ½ cups yellow cornmeal: Medium grind is ideal for a good texture, providing a slight bite without being gritty.
- 1 ½ cups all-purpose flour: Balances the cornmeal, giving structure and tenderness. (For gluten-free, substitute with a 1:1 gluten-free flour blend).
- ¼ cup granulated sugar: Enhances browning and provides a subtle sweetness. Adjust to taste for sweeter or more savory versions.
- 1 tbsp baking powder: The primary leavening agent, ensuring a light, fluffy crumb.
- ½ tsp baking soda: Reacts with buttermilk for added lift and tenderness.
- ½ tsp salt: Crucial for balancing flavors.
- 1 ½ cups buttermilk: Adds a tangy flavor and moisture, reacting with baking soda for a tender crumb. (Substitute with 1 ½ cups milk + 1 tbsp lemon juice or vinegar, let sit 5 min).
- 2 large eggs: Binds ingredients, adds richness and moisture.
- ½ cup unsalted butter, melted: Infuses rich flavor and keeps the cornbread moist. (Can substitute with vegetable oil for a slightly different texture).
- Optional: ½ cup shredded cheddar cheese or cooked bacon bits: For savory variations.
Kitchen Tools:
- 10-inch cast iron skillet: The secret to that legendary crispy crust! Ensures even heat distribution and superior browning.
- Large mixing bowl: For combining dry and wet ingredients.
- Whisk: For aerating dry ingredients and blending wet ones.
- Rubber spatula: For scraping bowls and folding ingredients gently.
- Measuring cups and spoons: For accurate ingredient measurement.
- Oven mitts: For safety when handling hot skillet.
Prep Time & Cooking Schedule
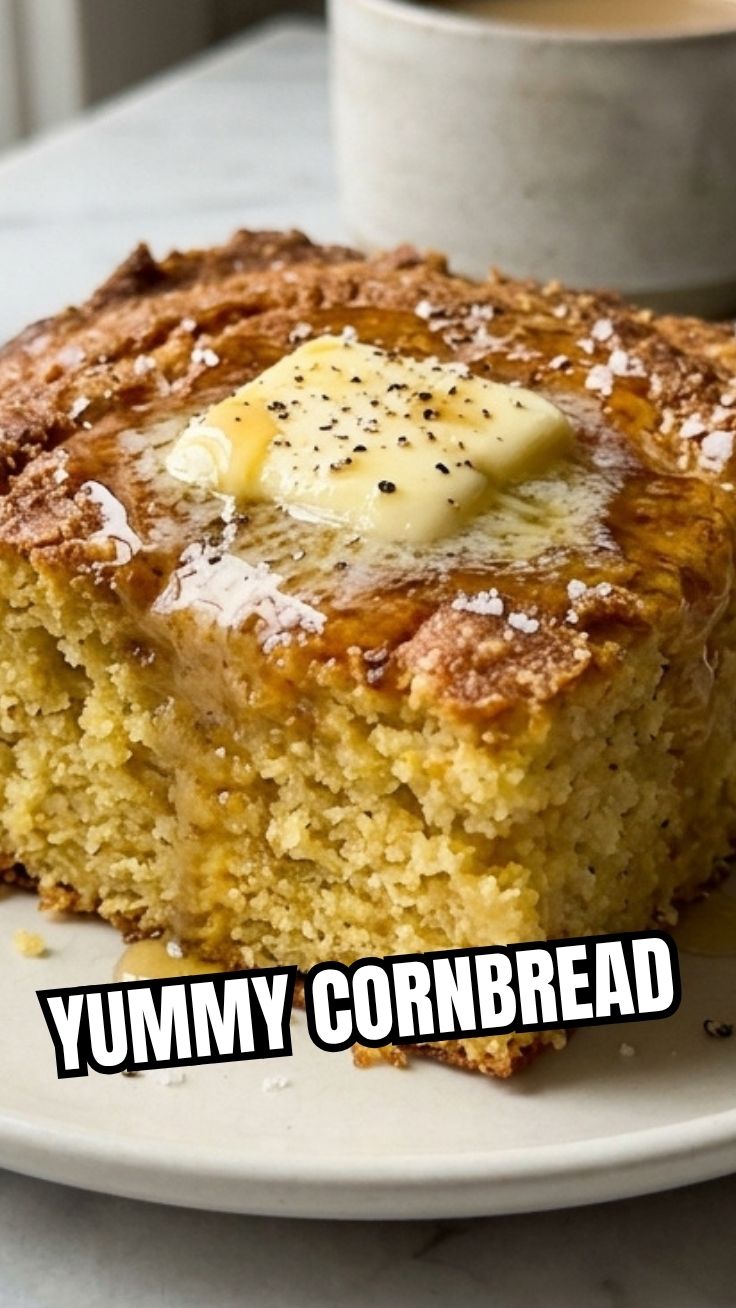
Planning your bake time is key to enjoying freshly baked cornbread. This recipe is relatively quick, making it perfect for a weeknight side dish or a last-minute gathering.
- Prep Time: 15 minutes
- Cook Time: 20-25 minutes
- Resting Time: 10 minutes (essential for stability and easier slicing)
Preheat your oven and the cast iron skillet simultaneously while you mix the batter. This ensures the skillet is piping hot, creating that incredible crispy bottom crust the moment the batter hits it.
Step-by-Step Instructions
Follow these steps for a perfectly baked Cornbread, and soon you’ll have mastered one of the most beloved cornbread recipes!
1. Preheat & Prepare Skillet: Place your 10-inch cast iron skillet in the oven and preheat to 400°F (200°C). This crucial step ensures a wonderfully crispy crust.
2. Combine Dry Ingredients: In a large bowl, whisk together the cornmeal, flour, sugar, baking powder, baking soda, and salt. Make sure there are no lumps.
3. Combine Wet Ingredients: In a separate medium bowl, whisk together the buttermilk, eggs, and melted butter until well combined.
4. Marry the Mixtures: Pour the wet ingredients into the dry ingredients. Stir just until moistened. A few lumps are fine; overmixing will develop gluten and make the cornbread tough. If adding cheese or bacon, fold them in now.
5. Pour into Hot Skillet: Carefully remove the hot skillet from the oven (use oven mitts!). Add about 1 tablespoon of butter or oil to the skillet and swirl to coat the bottom and sides. Immediately pour the batter into the hot skillet. You should hear a sizzle!
6. Bake: Return the skillet to the oven and bake for 20-25 minutes, or until the top is golden brown and a wooden skewer inserted into the center comes out clean.
7. Cool & Serve: Let the cornbread cool in the skillet for 10 minutes before inverting it onto a wire rack or cutting board. This allows it to set and makes for easier slicing. Serve warm with butter, honey, or your favorite stew.
Nutritional Benefits & Advantages
Cornbread, while a comforting classic, also offers notable nutritional benefits. Yellow cornmeal is a good source of dietary fiber, which aids digestion and can help regulate blood sugar levels. It also provides essential minerals like iron, phosphorus, and magnesium, vital for energy production and bone health. Whole grain cornmeal contains antioxidants such as carotenoids (beta-carotene), which support eye health and may reduce the risk of chronic diseases. The protein from eggs and dairy contributes to muscle repair and satiety, making cornbread a more substantial side dish than typical refined grain breads.
Tips, Variations & Cooking Advice
- Sweet vs. Savory: Adjust the sugar content from 1/4 cup for a more savory cornbread (excellent with chili) to ½ cup for a sweeter, dessert-like version.
- Butter vs. Bacon Grease: For an extra layer of savory depth, substitute the melted butter for rendered bacon grease.
- Spice It Up: Add a pinch of cayenne pepper or a chopped jalapeño for a spicy kick.
- Herbaceous Notes: Fresh chives or finely chopped rosemary can add a lovely aromatic touch.
- Gluten-Free: As mentioned, a 1:1 gluten-free flour blend works well. Ensure your cornmeal is also certified gluten-free.
- Muffin Pan: For individual portions, divide batter into a greased muffin tin. Bake for 15-20 minutes.
Common Mistakes to Avoid
- Overmixing: This is the most common sin! Overmixing develops gluten, leading to a tough, dense cornbread. Mix just until ingredients are combined.
- Cold Skillet: Pouring batter into a cold skillet results in a pale, soggy bottom crust. Always preheat the skillet.
- Incorrect Oven Temperature: Too low, and it won’t brown; too high, and it might burn on the outside before cooking through.
- Not Resting: Slicing immediately can cause it to crumble. Give it a few minutes to set.
Storage & Meal Prep Tips
Leftover Cornbread is a rare treat! Store cooled cornbread in an airtight container at room temperature for up to 2-3 days. For longer storage, wrap individual slices tightly in plastic wrap and then foil, and freeze for up to 3 months. To reheat, thaw overnight in the refrigerator (if frozen), then warm in a preheated oven at 350°F (175°C) for 10-15 minutes, or until heated through. Alternatively, a quick reheat in a toaster oven can re-crisp the edges. Cornbread is also excellent crumbled into soups, stews, or used as a base for cornbread dressing.
Conclusion
Mastering the art of perfect Cornbread is a truly rewarding culinary journey. With the right ingredients, a hot cast iron skillet, and these step-by-step instructions, you can consistently achieve that coveted golden crust and irresistible moist crumb. We hope these detailed cornbread recipes inspire you to bake this classic comfort food at home and share its warmth with your loved ones. Don’t be shy – try out the recipe, experiment with our tips, and let us know your favorite variations in the comments below! Happy baking!
FAQs
Q1: Can I make cornbread in a regular baking pan instead of cast iron?
A1: Yes, you can. Use an 8×8 or 9×9 inch baking pan, greased and floured. However, you won’t achieve the same crispy bottom crust that a preheated cast iron skillet provides.
Q2: My cornbread turned out dry. What went wrong?
A2: Dry cornbread is often a result of overbaking or overmixing. Ensure you only bake until a skewer comes out clean, and mix the batter just until the ingredients are combined. Using buttermilk and melted butter helps keep it moist.
Q3: Can I add corn kernels to this recipe?
A3: Absolutely! Frozen or canned corn (drained well) can be folded into the batter in step 4 for added texture and sweetness. About ½ to 1 cup is a good amount.
Q4: What’s the best way to store leftover cornbread?
A4: Store cooled cornbread in an airtight container at room temperature for up to 2-3 days to prevent it from drying out. For longer storage, it freezes exceptionally well when wrapped properly.
Q5: How can I make this recipe dairy-free?
A5: Substitute buttermilk with a dairy-free milk alternative (like almond or soy milk) mixed with 1 tablespoon of apple cider vinegar or lemon juice. Use a plant-based butter alternative for melting.