Elevate Your Dessert Game: The Ultimate Guide to Homemade Chocolate Brownies
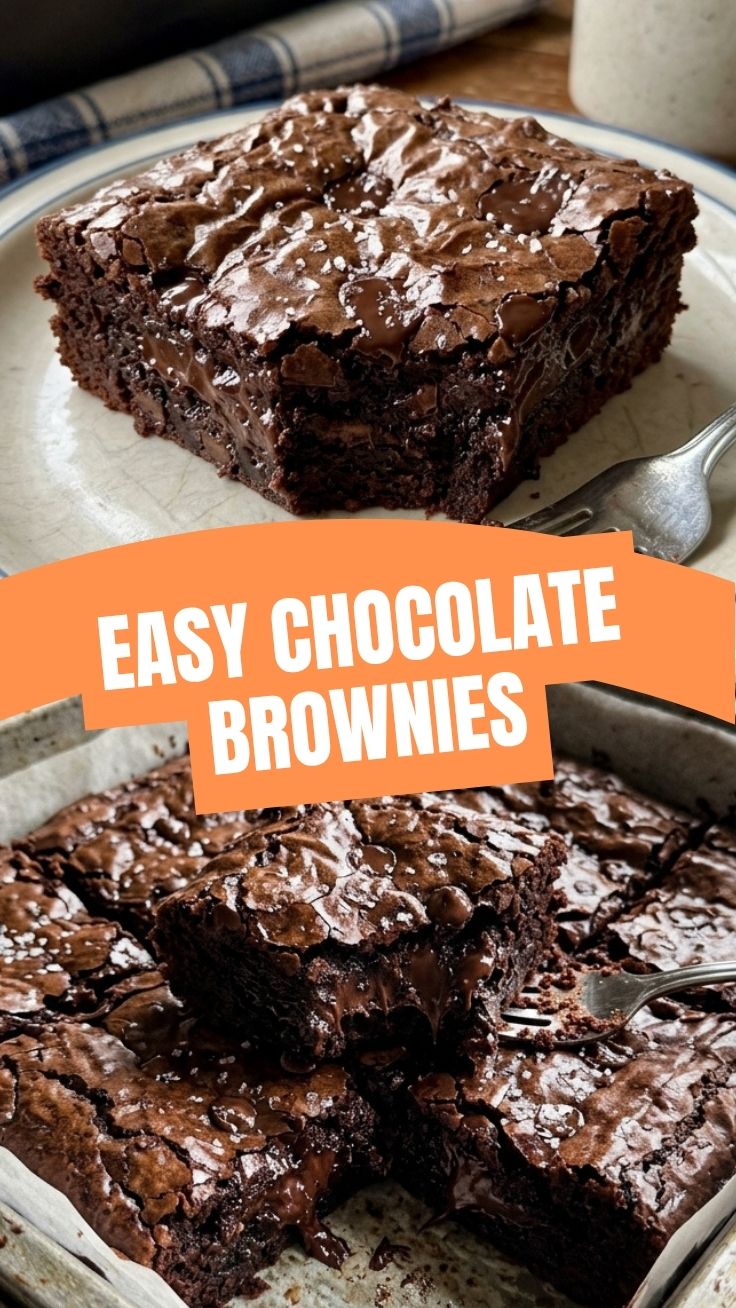
Ever wondered if you could replicate that perfect, melt-in-your-mouth brownie experience right in your own kitchen? The answer is a resounding YES! Forget store-bought mixes; crafting Chocolate Brownies from scratch isn’t just about baking – it’s about creating an unforgettable sensory experience. This comprehensive guide will walk you through every step, ensuring you achieve that coveted texture of fudgy chocolate brownies that will have everyone asking for your secret recipe. Beyond the sheer delight of a warm, homemade treat, understanding the nuances of baking allows for personalized adjustments, healthier alternatives, and the profound satisfaction of culinary creation.
Ingredients & Kitchen Tools
Gathering your mise en place before you begin is crucial for a smooth baking process.
- Unsalted Butter (1 cup / 226g): Essential for richness and flavor. Unsalted allows you to control the salt content.
- Granulated Sugar (2 cups / 400g): Provides sweetness and contributes to the fudgy texture.
- Large Eggs (4): Acts as a binder and helps create a moist, chewy consistency.
- Vanilla Extract (2 teaspoons): Enhances the chocolate flavor. Use pure vanilla for the best results.
- All-Purpose Flour (1 cup / 125g): The structural base. Avoid overmixing to prevent tough brownies.
- Unsweetened Cocoa Powder (¾ cup / 75g): The primary source of chocolate flavor. Dutch-processed offers a darker color and milder taste.
- Salt (½ teaspoon): Balances sweetness and deepens chocolate notes.
- Chocolate Chips or Chunks (1 cup / 170g): For extra pockets of melted chocolate. bittersweet or semi-sweet work best.
- Baking Pan (9×13 inch / 23×33 cm): Metal pans typically conduct heat better for even baking.
- Parchment Paper: Prevents sticking and makes lifting the brownies out effortless.
- Large Mixing Bowls (2): For wet and dry ingredients.
- Whisk: For combining dry ingredients and whisking eggs.
- Rubber Spatula: For folding and scraping bowls.
- Saucepan (small): For melting butter.
- Oven: Preheat to the specified temperature.
Prep Time & Cooking Schedule
- Prep time: 15 minutes
- Cook time: 25-30 minutes
- Cooling time: 2-3 hours (essential for perfect slicing and texture!)
Planning ahead ensures optimal results. The cooling time is often overlooked but crucial for the brownies to set, allowing for clean cuts and preventing a crumbly mess. Resist the urge to cut into them while warm – patience is a virtue in brownie making!
Step-by-Step Instructions
1. Preheat & Prepare: Preheat your oven to 350°F (175°C). Line a 9×13 inch baking pan with parchment paper, leaving an overhang on the sides for easy lifting. Lightly grease the parchment paper.
2. Melt Butter: In a small saucepan over low heat, or in a microwave-safe bowl, melt the unsalted butter until just melted. Remove from heat.
3. Combine Wet Ingredients: In a large mixing bowl, whisk together the melted butter and granulated sugar until well combined. This is a key step to achieving a rich, dense texture.
4. Add Eggs & Vanilla: Beat in the eggs one at a time, incorporating each fully before adding the next. Stir in the vanilla extract. The mixture should be smooth and glossy.
5. Sift Dry Ingredients: In a separate medium bowl, whisk together the all-purpose flour, unsweetened cocoa powder, and salt. Sifting helps prevent lumps and ensures even distribution.
6. Combine Wet and Dry: Gradually add the dry ingredient mixture to the wet ingredients, mixing only until just combined. Be careful not to overmix, as this can develop the gluten in the flour and lead to tough brownies.
7. Fold in Chocolate Chips: Gently fold in the chocolate chips or chunks.
8. Bake: Pour the batter evenly into the prepared baking pan. Bake for 25-30 minutes. The brownies are done when a toothpick inserted into the center comes out with moist crumbs, but not wet batter. Overbaking leads to dry brownies, so keep a close eye on them! You’re aiming for that perfect balance that defines Chocolate Brownies.
9. Cool Completely: Remove the pan from the oven and let the brownies cool completely in the pan on a wire rack for at least 2-3 hours. This allows them to set, firm up, and develop the ultimate fudgy chocolate brownies texture that we all desire.
Nutritional Benefits & Advantages
While brownies are often seen as an indulgence, they can offer some surprising benefits. Dark chocolate, a key component, is rich in antioxidants and flavonoids, which are known to improve heart health and cognitive function. Eggs provide protein and essential vitamins, and moderate consumption within a balanced diet can certainly fit into a healthy lifestyle. Making them at home also allows you to control the quality of ingredients, opting for organic, ethically sourced chocolate or reducing sugar content to your preference.
Tips, Variations & Cooking Advice
- Amp up the chocolate: Add a layer of chocolate ganache or a sprinkle of sea salt flakes on top for a sophisticated touch.
- Nutty indulgence: Fold in chopped walnuts, pecans, or almonds for added crunch and flavor.
- Coffee kick: A teaspoon of instant espresso powder added to the dry ingredients significantly enhances the chocolate flavor without making the brownies taste like coffee.
- Spice it up: A pinch of cayenne pepper can add a subtle, warming heat that complements the chocolate beautifully.
- Dietary adaptations: For gluten-free brownies, substitute all-purpose flour with a 1:1 gluten-free baking blend. For dairy-free, use a plant-based butter alternative and dairy-free chocolate chips.
Common Mistakes to Avoid
- Overmixing the batter: This develops gluten, leading to cakey, tough brownies instead of the desired fudgy texture.
- Overbaking: The most common mistake! Brownies continue to cook slightly after being removed from the oven.
- Cutting warm brownies: Resist the urge! This will result in messy, crumbly pieces.
- Using cold ingredients: Ensure eggs are at room temperature for better emulsion and a smoother batter.
Storage & Meal Prep Tips
Store leftover brownies in an airtight container at room temperature for up to 3-4 days. For longer storage, they can be refrigerated for up to a week. To freeze, wrap individual brownies tightly in plastic wrap, then place them in a freezer-safe bag or container for up to 3 months. Thaw at room temperature or gently warm in the microwave for a few seconds for that fresh-baked feel.
Conclusion
Crafting your own Chocolate Brownies is a rewarding experience that yields a truly indulgent treat. By following these detailed steps and paying attention to the small nuances, you can consistently achieve the perfect batch of fudgy chocolate brownies. So, preheat your oven, gather your ingredients, and prepare to impress your taste buds (and everyone else’s!). Don’t be shy – share your baking successes and any creative twists you try in the comments below! Happy baking!
FAQs
Q1: My brownies are dry and cakey. What went wrong?
A1: This usually indicates overbaking or overmixing the batter. Ensure you’re only mixing until the dry ingredients are just incorporated and remove them from the oven when a toothpick comes out with moist crumbs, not liquid batter.
Q2: Can I substitute granulated sugar with brown sugar?
A2: Yes, you can! Brown sugar will add a deeper caramel note and slightly chewier texture to your brownies.
Q3: How do I get those shiny, crackly tops on my brownies?
A3: The secret often lies in whisking the eggs and sugar well, and ensuring the butter is fully melted and incorporated. Some recipes also suggest adding melted butter to hot melted chocolate to create an emulsion that promotes the crackly crust.
Q4: Can I add nuts or other mix-ins to the batter?
A4: Absolutely! Chopped nuts, chocolate chunks, shredded coconut, or even a swirl of peanut butter can be folded into the batter before baking for delicious variations.
Q5: What’s the best way to cut brownies cleanly?
A5: Ensure the brownies are completely cooled. For super clean cuts, place the cooled brownies in the refrigerator for 30 minutes to an hour. Use a large, sharp knife, wiping it clean with a damp cloth after each cut.