Master the Art of Homemade Chicken Parmesan: A Culinary Journey
Tired of restaurant-quality meals without the restaurant price tag? Imagine sinking your teeth into a perfectly crispy, juicy cutlet, smothered in rich tomato sauce and melted cheese. Today, we’re diving deep into crafting the ultimate homemade Chicken Parmesan – a dish that not only tantalizes your taste buds but also brings a sense of accomplishment to your kitchen. Forget bland takeout; preparing this classic Italian-American staple at home offers unparalleled freshness, customizable flavors, and an opportunity to truly savor every bite, especially when paired with your favorite pasta. Let’s embark on this delicious journey together!
Ingredients & Kitchen Tools
Crafting the perfect dish starts with the right components. Here’s what you’ll need:
- Boneless, Skinless Chicken Breasts (4 large, about 1.5-2 lbs total): Choose fresh, high-quality chicken for the best flavor and texture.
- All-Purpose Flour (1/2 cup): For dredging, creating a light coating that helps the egg wash adhere.
- Eggs (2 large): Beaten, forming the glue for the breading.
- Panko Breadcrumbs (1.5 cups): Japanese-style breadcrumbs, known for their superior crispiness.
- Grated Parmesan Cheese (1/2 cup, plus more for topping): Adds a savory, umami punch to the breading and the final dish.
- Garlic Powder (1 tsp): Enhances the savory profile of the breading.
- Dried Italian Herbs (1 tsp): A blend of oregano, basil, thyme, etc., for classic Italian flavor.
- Salt & Freshly Ground Black Pepper (to taste): Essential for seasoning at every stage.
- Marinara Sauce (24-32 oz jar or homemade): Your preferred tomato sauce; good quality makes a huge difference.
- Fresh Mozzarella Cheese (8 oz, sliced or shredded): Melts beautifully, providing that iconic cheesy pull.
- Fresh Basil (1/4 cup, chopped): For garnish, adding a fresh, aromatic finish.
- Olive Oil (1/2 cup, or as needed for frying): For pan-frying the chicken cutlets to golden perfection.
Kitchen Tools:
- Meat Mallet or Rolling Pin: For pounding chicken breasts to an even thickness.
- Shallow Bowls (3): For your breading station (flour, egg, breadcrumbs).
- Large Skillet or Cast Iron Pan: For pan-frying the chicken.
- Baking Dish (9×13 inch): For assembling and baking the Chicken Parmesan.
- Tongs: For handling chicken safely while frying.
- Instant-Read Thermometer (optional but recommended): To ensure chicken is cooked through.
- Grater (if using block Parmesan and mozzarella): For freshly grated cheese.
Prep Time & Cooking Schedule
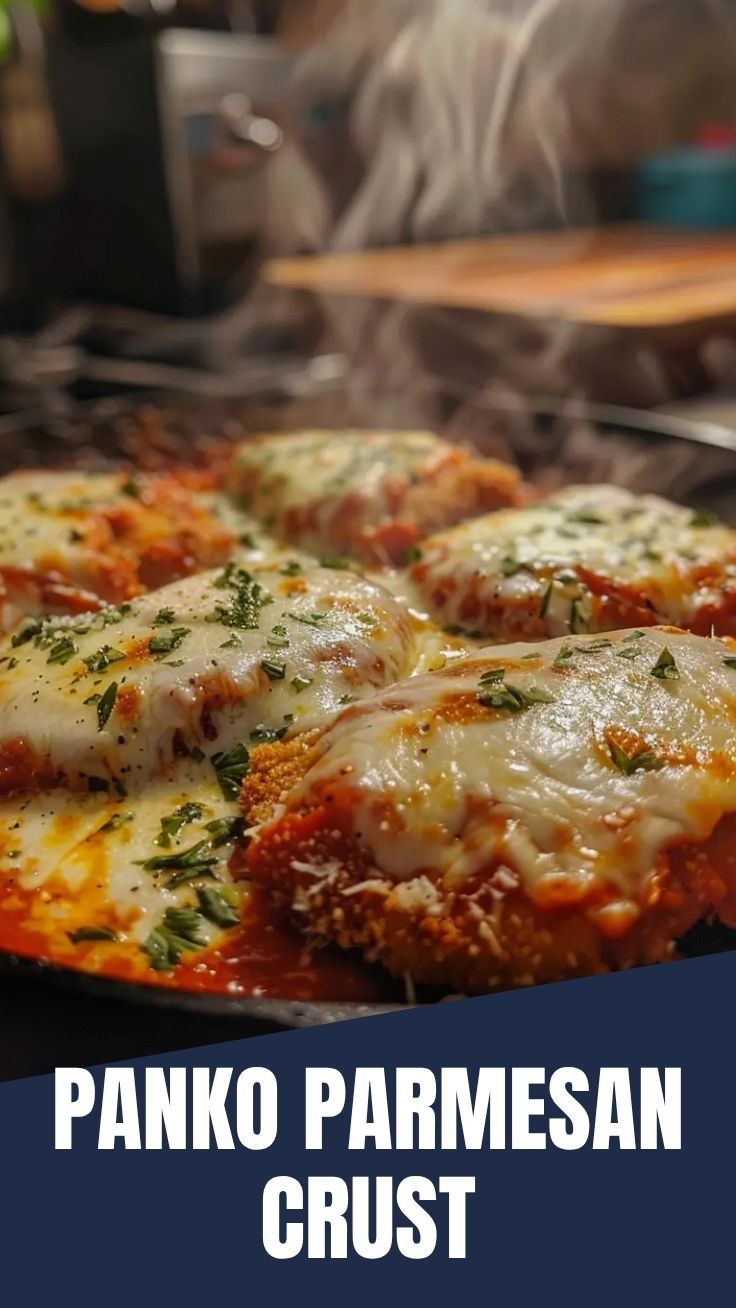
Planning makes perfect! Here’s a breakdown to ensure a smooth cooking experience:
- Prep Time: 25 minutes (Pounding chicken, setting up dredging station, slicing cheese).
- Cook Time: 35-40 minutes (Pan-frying chicken, baking assembly).
- Resting Time: 5-10 minutes (After baking, allows cheese to set and flavors to meld).
Schedule Snapshot:
1. 30 minutes before: Pound chicken, set up dredging, preheat oven.
2. Minutes 1-15: Dredge and pan-fry chicken in batches.
3. Minutes 15-20: Assemble Chicken Parmesan in baking dish.
4. Minutes 20-35: Bake until golden and bubbly.
5. Minutes 35-40: Rest, garnish, and serve!
Step-by-Step Instructions
1. Prepare the Chicken: Place each chicken breast between two pieces of plastic wrap. Using a meat mallet or rolling pin, pound them to an even 1/2-inch thickness. This ensures even cooking and tender results. Season lightly with salt and pepper.
2. Set Up Breading Station: In three shallow bowls, set up your dredging station. Bowl 1: Flour. Bowl 2: Beaten eggs. Bowl 3: Panko breadcrumbs mixed with 1/2 cup grated Parmesan, garlic powder, dried Italian herbs, salt, and pepper.
3. Bread the Chicken: Dredge each chicken cutlet first in flour (shaking off excess), then dip into the egg wash, allowing excess to drip off, and finally coat thoroughly in the seasoned panko mixture, pressing gently to adhere.
4. Pan-Fry the Cutlets: Heat about 1/2 inch of olive oil in a large skillet over medium-high heat. Once shimmering, carefully add 1-2 chicken cutlets, ensuring not to overcrowd the pan. Fry for 3-4 minutes per side, until golden brown and cooked through (internal temperature of 165°F/74°C). Transfer to a plate lined with paper towels to drain excess oil.
5. Assemble and Bake: Preheat your oven to 375°F (190°C). Spread a thin layer of marinara sauce on the bottom of your baking dish. Arrange the pan-fried chicken cutlets over the sauce. Top each cutlet with more marinara sauce, followed by slices or shredded fresh mozzarella.
6. Final Bake: Bake for 15-20 minutes, or until the cheese is melted, bubbly, and lightly golden.
7. Serve: Remove from oven, let rest for 5-10 minutes, then garnish generously with fresh basil. Serve immediately with your favorite pasta.
Nutritional Benefits & Advantages
Chicken Parmesan, when made at home, offers several nutritional upsides. Chicken breasts are an excellent source of lean protein, essential for muscle repair and satiety. Opting for fresh mozzarella provides calcium and beneficial bacteria. By pan-frying rather than deep-frying, you control the amount and type of fat used. Incorporating a rich tomato sauce boosts your intake of lycopene, a powerful antioxidant. Homemade versions also allow you to reduce sodium and artificial additives often found in store-bought prepared meals, embracing a healthier, more flavorful option.
Tips, Variations, & Cooking Advice
- Spice It Up: Add a pinch of red pepper flakes to your marinara sauce for a subtle kick.
- Herb Garden Freshness: Substitute dried herbs in the breading with finely chopped fresh parsley, oregano, or thyme for a brighter flavor.
- Cheese Please: Experiment with other cheeses! A blend of mozzarella, provolone, and a touch of Fontina can elevate the flavor profile.
- Grill It (Healthier Option): For a lighter version, grill or bake the chicken cutlets instead of pan-frying. Ensure they are cooked through before assembling with sauce and cheese.
- Portion Control: Cut larger chicken breasts in half before pounding to create smaller, more manageable portions.
- Gluten-Free: Use gluten-free flour and gluten-free breadcrumbs for a dietary-friendly alternative.
- Dairy-Free: Substitute dairy cheese with your favorite dairy-free mozzarella shreds.
Common Mistakes to Avoid
- Overcrowding the Pan: Frying too many cutlets at once lowers the oil temperature, leading to soggy chicken instead of crispy. Fry in batches!
- Uneven Chicken Thickness: If not pounded evenly, parts of the chicken will cook faster, resulting in dry spots. Take the time to pound them uniformly.
- Skipping the Seasoning: Seasoning at each step (chicken, breading, sauce) is crucial for a well-rounded flavor. Don’t rely solely on the cheese for taste.
- Too Much Sauce: Drowning the chicken in sauce before baking can make the breading soggy. Use a moderate amount, allowing the crispiness to shine through.
- Cutting Too Soon: Rushing to cut into the baked dish can cause the cheese and sauce to run everywhere. A short resting period allows everything to set.
Storage & Meal Prep Tips
Storage: Leftover Chicken Parmesan can be stored in an airtight container in the refrigerator for up to 3-4 days.
Freezing: For longer storage, allow the baked dish to cool completely. You can freeze individual portions by wrapping them tightly in foil and then placing them in a freezer-safe bag or container for up to 2-3 months.
Reheating:
- From Refrigerator: Reheat in a preheated oven at 350°F (175°C) for 15-20 minutes, or in a microwave until heated through. For best crispiness, briefly reheat in an air fryer or under the broiler after microwaving.
- From Freezer: Thaw overnight in the refrigerator, then reheat as above. Alternatively, bake from frozen at 350°F (175°C) for 30-40 minutes, or until hot and bubbly.
Conclusion
Mastering homemade Chicken Parmesan is a rewarding culinary achievement that delivers incredible flavor and satisfaction. By following these detailed steps and incorporating our expert tips, you’re well on your way to creating a dish that rivals any restaurant offering, perfectly complemented by a side of savory pasta. Don’t be afraid to experiment with variations and personalize this classic to your taste! Try this recipe this week, share your delicious creations in the comments below, and let us know your favorite ways to enjoy this beloved meal. Happy cooking!
FAQs
Q1: Can I use store-bought breaded chicken?
A1: While possible, fresh breading provides superior flavor and texture. If using pre-breaded, check cooking instructions and adjust timing accordingly.
Q2: What’s the best type of marinara sauce to use?
A2: A good quality jarred marinara with simple ingredients works well. For an extra special dish, consider making your own fresh marinara for an unparalleled flavor.
Q3: My chicken isn’t getting crispy. What am I doing wrong?
A3: Ensure your oil is hot enough before frying, and avoid overcrowding the pan. Also, an adequate oil depth (about 1/2 inch) is crucial for proper crisping. Panko breadcrumbs also contribute significantly to crispiness.
Q4: Can I prepare the chicken ahead of time?
A4: You can pound and bread the chicken cutlets up to a few hours in advance. Store them uncovered on a wire rack in the refrigerator to prevent sogginess from moisture. Fry and bake just before serving for best results.