Master the Art of Homemade Chicken Enchiladas: A Journey to Culinary Delight
Ever wondered how to bring that beloved, restaurant-quality Chicken Enchiladas experience right to your own kitchen? Preparing this classic at home isn’t just about saving money; it’s about crafting a dish tailored to your exact preferences, using fresh ingredients, and infusing it with that irreplaceable homemade touch. Forget generic takeout; today, we’re diving deep into creating incredible Mexican enchiladas that will utterly impress your taste buds and those of your loved ones. This guide will empower you to become an enchilada master, transforming simple ingredients into a comforting and profoundly satisfying meal.
Ingredients & Kitchen Tools
Crafting the perfect enchiladas requires a blend of staple ingredients and a few key tools. Here’s what you’ll need:
- For the Filling:
* 2 cups cooked, shredded chicken breast: Leftover rotisserie chicken works beautifully here for speed.
* 1 cup shredded Monterey Jack cheese: Or a Mexican blend for gooey deliciousness.
* 1/2 cup sour cream: Adds richness and tang to the filling.
* 1/4 cup chopped green chilies (canned): For a mild, earthy spice.
* 1/4 cup finely chopped onion: White or yellow onion for aromatic flavor.
* Salt and black pepper to taste: Essential seasoning.
* 1 tsp chili powder: Enhances the Mexican flavor profile.
* 1/2 tsp cumin: A quintessential enchilada spice.
- For Assembly:
* 12 corn tortillas (6-inch): Essential for authentic texture and flavor; choose fresh if possible.
* 1 tbsp olive oil: For softening tortillas and sautéing.
- For the Sauce & Topping:
* 19 oz can red enchilada sauce: Mild or medium, depending on your preference.
* 1 cup shredded cheddar cheese: For a golden, bubbly topping.
* Optional toppings: Fresh cilantro, diced avocado, extra sour cream, jalapeños.
Kitchen Tools:
- 9×13 inch baking dish: The perfect size for a family-sized batch.
- Large mixing bowl: For combining the filling ingredients.
- Small skillet or microwave-safe plate: For softening tortillas.
- Measuring cups and spoons: For precise ingredient amounts.
- Cutting board and knife: For chopping ingredients.
Prep Time & Cooking Schedule
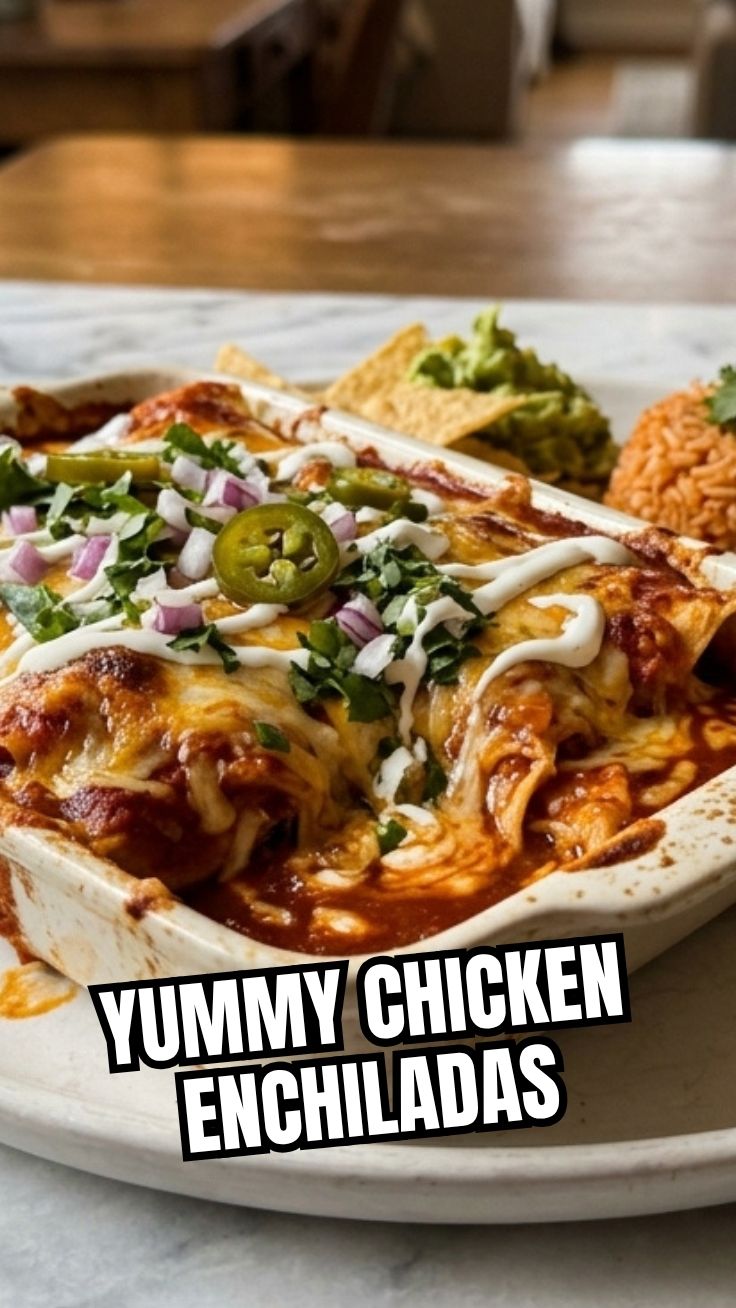
This recipe is surprisingly quick for such a flavorful dish!
- Prep Time: 25 minutes (This includes shredding chicken if not pre-cooked and chopping vegetables).
- Cook Time: 20-25 minutes (Baking time in the oven).
- Resting Time: 5-10 minutes (Crucial for allowing cheese to set and flavors to meld before serving).
Plan to start about an hour before you want to serve dinner. The beauty of enchiladas is that much of the prep can be done in advance, making it a fantastic weeknight meal option.
Step-by-Step Instructions
Let’s break down the process of creating these delectable enchiladas. Follow these steps for perfect results every time.
1. Preheat Oven & Prep Dish: Preheat your oven to 375°F (190°C). Lightly grease your 9×13 inch baking dish with cooking spray or a little oil. Pour about 1/2 cup of the enchilada sauce into the bottom of the prepared dish, spreading it evenly. This prevents sticking and adds flavor from the start.
2. Prepare the Filling: In a large mixing bowl, combine the cooked, shredded chicken, Monterey Jack cheese, sour cream, green chilies, chopped onion, chili powder, cumin, salt, and pepper. Mix well until all ingredients are thoroughly combined. The mixture should be moist but not runny.
3. Soften Tortillas: This step is crucial for preventing tears while rolling. Either heat the olive oil in a small skillet over medium heat and quickly dip each tortilla for 10-15 seconds per side until pliable, or wrap a stack of 4-5 tortillas in a damp paper towel and microwave for 30-45 seconds until soft. Ensure they are warm and flexible.
4. Assemble the Chicken Enchiladas: Dip one softened tortilla into the remaining enchilada sauce, coating both sides lightly. This adds flavor and prevents the tortilla from drying out. Lay the tortilla flat on a clean surface. Spoon about 1/4 to 1/3 cup of the chicken mixture in a line down the center of the tortilla. Roll it up tightly and place it seam-side down in the prepared baking dish. Repeat with the remaining tortillas and filling. Aim for 10-12 enchiladas, depending on how much filling you use.
5. Sauce & Bake: Once all the glorious Mexican enchiladas are nestled in the dish, pour the remaining enchilada sauce generously over the top, ensuring all tortillas are covered. Sprinkle with the shredded cheddar cheese layer.
6. Bake to Perfection: Bake for 20-25 minutes, or until the cheese is melted, bubbly, and lightly golden, and the enchiladas are heated through. If you prefer a darker, crispier cheese topping, you can briefly broil them for the last minute or two, watching carefully to prevent burning.
7. Rest & Serve: Remove from the oven and let them rest for 5-10 minutes. This allows the cheese and sauce to set, making serving much easier. Garnish with optional toppings like fresh cilantro, diced avocado, or a dollop of sour cream.
Nutritional Benefits & Advantages
These Chicken Enchiladas are more than just delicious; they offer significant nutritional value. Chicken breast provides a lean source of protein essential for muscle repair and satiety. Corn tortillas are a good source of whole grains and fiber, offering sustained energy and aiding digestion. The inclusion of dairy products like cheese and sour cream contributes calcium for bone health. By making them at home, you control the amount of sodium and fat, allowing for a healthier rendition compared to many restaurant versions. You can also boost vegetable content by adding chopped bell peppers or spinach to the filling.
Tips, Variations & Cooking Advice
- Spice It Up: Add a pinch of cayenne pepper or a chopped jalapeño to the filling for extra heat.
- Vegetarian Option: Swap chicken for black beans, corn, and sautéed bell peppers for a fantastic vegetarian version.
- Creamy Sauce: For an even richer experience, stir a few tablespoons of cream cheese into the chicken filling.
- Green Enchiladas: Use green enchilada sauce for a different flavor profile; a “Suizas” style.
- Gluten-Free: Since corn tortillas are naturally gluten-free, this dish is already suitable for those avoiding gluten (just double-check your enchilada sauce ingredients).
- Dairy-Free: Substitute dairy cheese with a dairy-free shredded alternative and dairy-free sour cream, or omit sour cream and use a cashew cream for richness.
Common Mistakes to Avoid
- Not Softening Tortillas: This is the most common error, leading to cracked, dry tortillas. Always soften them before rolling.
- Overfilling: Don’t stuff the tortillas too much, or they’ll burst when rolled and baked.
- Skipping the Bottom Sauce Layer: This prevents sticking and ensures your enchiladas are moist from top to bottom.
- Not Resting: Rushing to serve can result in a messy plate. A short rest allows the flavors to meld and the structure to firm up.
- Dry Chicken: If using leftover chicken, ensure it’s not overly dry. Adding a touch more sour cream or even a spoonful of broth to the filling can help.
Storage & Meal Prep Tips
Leftover Chicken Enchiladas store wonderfully!
- Refrigeration: Store cooled enchiladas in an airtight container in the refrigerator for up to 3-4 days.
- Freezing: For longer storage, freeze individual portions in freezer-safe containers or wrap the entire baking dish tightly with plastic wrap and then foil. They can be frozen for up to 2-3 months. Thaw overnight in the refrigerator before reheating.
- Reheating: Reheat in the microwave until warm, or for best results, cover with foil and reheat in a preheated oven (350°F/175°C) until thoroughly heated through (about 20-30 minutes). Adding a splash of water or broth before reheating can prevent drying out.
Conclusion
There you have it—your definitive guide to crafting truly exceptional homemade Chicken Enchiladas. This recipe isn’t just about combining ingredients; it’s about mastering techniques that deliver flavor, texture, and pure culinary satisfaction. By following these steps, you’ll consistently create Mexican enchiladas that rival any restaurant, making weeknight dinners or special occasions effortlessly delicious. We encourage you to try this recipe, experiment with the variations, and share your delightful results with us! What’s your favorite enchilada topping? Let us know in the comments!
FAQs
Q1: Can I make the filling ahead of time?
A1: Absolutely! You can prepare the chicken filling up to 2 days in advance and store it in an airtight container in the refrigerator. This significantly cuts down on prep time on the day of cooking.
Q2: What’s the best way to shred chicken?
A2: For easy shredding, use a stand mixer with the paddle attachment on low speed for cooked chicken breast, or simply use two forks to pull it apart.
Q3: My tortillas keep breaking when I roll them. What am I doing wrong?
A3: This almost always means your tortillas aren’t warm and pliable enough. Ensure they are heated sufficiently in oil or the microwave until they are very flexible. Don’t skip that step!
Q4: Can I use flour tortillas instead of corn?
A4: While corn tortillas are traditional for authentic Chicken Enchiladas, you can certainly use small flour tortillas if you prefer. They have a different texture and may not require as much softening.