The Ultimate Guide to Crafting Irresistible Homemade Cheesy Garlic Breadsticks
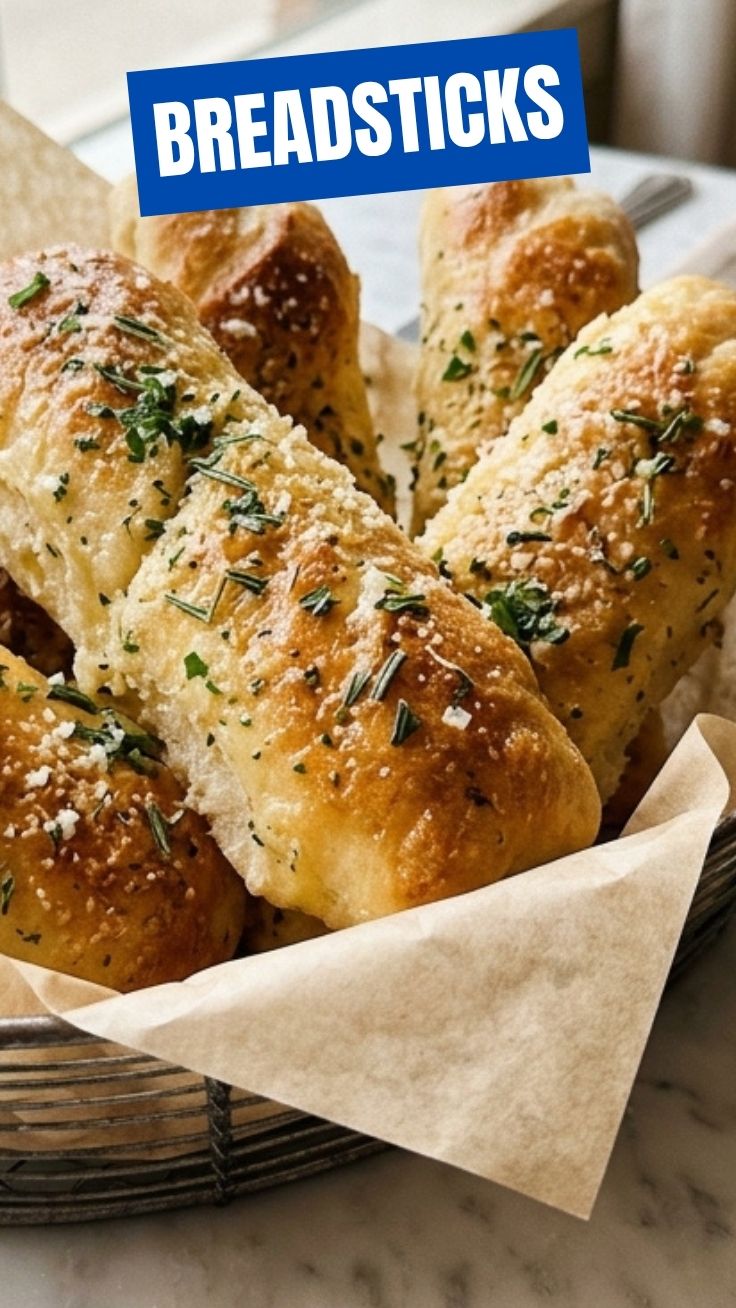
Ever found yourself craving that perfect, crispy-on-the-outside, soft-on-the-inside breadstick, slathered in cheesy, garlicky goodness, but settling for a frozen, mediocre version? What if we told you that making truly exceptional Cheesy Garlic Breadsticks at home is not only achievable but wildly rewarding? Preparing these savory delights from scratch elevates your culinary game, allowing you to control every ingredient for a fresher, more flavorful experience than any store-bought alternative. Forget bland, forget dry – get ready for a homemade treat that will have everyone reaching for more, especially when you master the art of making delicious Garlic breadsticks.
Ingredients & Kitchen Tools
- All-Purpose Flour (3 cups): The foundation of our dough.
- Active Dry Yeast (2 ¼ teaspoons or 1 packet): The magic behind the rise. Make sure it’s fresh!
- Warm Water (1 cup, ~105-115°F / 40-46°C): Activates the yeast; too hot will kill it, too cold won’t activate it.
- Granulated Sugar (1 teaspoon): Feeds the yeast, aiding in a quicker rise.
- Salt (1 teaspoon): Enhances flavor and regulates yeast activity.
- Olive Oil (2 tablespoons + extra for brushing): Adds richness to the dough and helps with a golden crust.
- Unsalted Butter (¼ cup, melted): For that irresistible garlic-herb topping.
- Minced Garlic (3-4 cloves, or 1 tablespoon pre-minced): The star flavor! Adjust to your garlic preference.
Shredded Mozzarella Cheese (1 ½ cups): Melts beautifully and adds a gooey texture. Substitution: A blend of mozzarella and provolone for extra flavor.*
- Parmesan Cheese (¼ cup, grated): Adds a sharp, salty kick.
Dried Italian Herbs (1 teaspoon): A classic blend of oregano, basil, thyme, and rosemary. Substitution: Fresh finely chopped parsley or chives for garnish.*
- Baking Sheet: Essential for even baking.
- Parchment Paper or Silicone Baking Mat: Prevents sticking and makes cleanup a breeze.
- Large Mixing Bowl: For kneading the dough.
- Whisk: To combine dry ingredients.
- Measuring Cups & Spoons: For accurate ingredient portions.
- Pastry Brush: For applying the butter mixture.
Prep Time & Cooking Schedule
- Prep Time: 20 minutes
- Dough Resting/Rising Time: 60-90 minutes (depending on room temperature)
- Cook Time: 15-20 minutes
- Total Time: Approximately 1 hour 55 minutes – 2 hours 10 minutes
Plan your cooking schedule by factoring in the dough rising time. It’s the longest part of the process, so you can prepare other elements of your meal while the dough rests. For best results, allow the dough to rise in a warm, draft-free environment.
Step-by-Step Instructions
1. Activate the Yeast: In your large mixing bowl, combine the warm water, sugar, and yeast. Stir gently and let it sit for 5-10 minutes until foamy. This indicates the yeast is active.
2. Form the Dough: Add the olive oil and salt to the yeast mixture. Gradually add the flour, one cup at a time, mixing with a wooden spoon or your hands until a shaggy dough forms.
3. Knead the Dough: Turn the dough out onto a lightly floured surface. Knead for 7-10 minutes, until it becomes smooth and elastic. If using a stand mixer, use the dough hook attachment and knead on medium speed for 5-7 minutes.
4. First Rise: Lightly grease the mixing bowl with a little olive oil. Place the dough in the bowl, turning once to coat. Cover the bowl with plastic wrap or a clean kitchen towel and let it rise in a warm place for 60-90 minutes, or until doubled in size.
5. Prepare for Baking: Preheat your oven to 400°F (200°C). Line a large baking sheet with parchment paper.
6. Shape the Breadsticks: Gently punch down the risen dough to deflate it. Roll the dough out onto a lightly floured surface into a rectangle, approximately 12×15 inches.
7. Garlic Butter Infusion: In a small bowl, combine the melted butter, minced garlic, and dried Italian herbs. Brush half of this mixture evenly over the rolled-out dough.
8. Cheese Layer: Sprinkle the mozzarella and parmesan cheeses generously over the buttered dough.
9. Cut and Twist: Using a pizza cutter or sharp knife, cut the dough lengthwise into 1-inch wide strips. Carefully pick up each strip, gently twist it a few times, and place it on the prepared baking sheet, leaving a little space between each breadstick.
10. Second Rise (Optional but Recommended): For extra fluffiness, cover the shaped Garlic breadsticks loosely with plastic wrap and let them rest for another 15-20 minutes while the oven finishes preheating.
11. Bake: Bake for 15-20 minutes, or until golden brown and the cheese is bubbly and slightly browned.
12. Finishing Touch: Once out of the oven, immediately brush the remaining garlic butter mixture over the hot breadsticks. Serve warm!
Nutritional Benefits & Advantages
These homemade Cheesy Garlic Breadsticks, while indulgent, offer some surprising advantages. The primary ingredient, flour, provides carbohydrates for energy. Using real butter and quality cheeses ensures you’re getting natural fats and proteins, contributing to satiety. Furthermore, fresh garlic is a powerhouse of beneficial compounds, known for its immune-boosting and anti-inflammatory properties. By making them at home, you avoid the artificial preservatives and excessive sodium often found in store-bought versions, giving you control over the freshness and quality of ingredients.
Tips, Variations & Cooking Advice
- Spice It Up: Add a pinch of red pepper flakes to the garlic butter for a spicy kick.
- Herb Power: Experiment with fresh herbs like finely chopped rosemary or chives sprinkled over the top before baking.
- Cheesy Variations: Substitute some of the mozzarella with provolone, cheddar, or a smoky gouda for different flavor profiles.
- Gluten-Free Option: While the texture will differ slightly, you can try using a 1:1 gluten-free all-purpose flour blend. Increase resting time as gluten-free doughs often need more time to hydrate.
- Dipping Sauces: Serve with marinara sauce, ranch dressing, or a spicy aioli.
- Crispier Texture: For extra crispy breadsticks, reduce the oven temperature to 375°F (190°C) and bake for a longer time, around 20-25 minutes, keeping a close eye on them to prevent burning.
- Thicker Breadsticks: If you prefer thicker, chewier breadsticks, roll the dough slightly less thin before cutting.
Common Mistakes to Avoid
- Overheating the Water: Water that’s too hot will kill the yeast, preventing your dough from rising. Always check with a thermometer.
- Under-Kneading: Insufficient kneading results in dense, tough breadsticks instead of light and airy ones. Aim for a smooth, elastic dough.
- Over-Flouring the Surface: Too much flour during kneading can make the dough dry and stiff. Use just enough to prevent sticking.
- Not Letting Dough Rise Enough: Patience is key! A proper rise develops flavor and texture. If your kitchen is cool, place the bowl in a slightly warm (but off) oven with the door ajar, or near a warm appliance.
- Over-Baking: While golden brown is good, baking too long can lead to dry, hard breadsticks. Keep an eye on them, especially after 15 minutes.
Storage & Meal Prep Tips
Leftover Cheesy Garlic Breadsticks can be stored in an airtight container at room temperature for up to 2 days, or in the refrigerator for up to 4 days. For longer storage, freeze them after they’ve completely cooled. To reheat, place them on a baking sheet and warm in a preheated oven at 350°F (175°C) for 5-8 minutes, or until heated through and crisp again. Avoid microwaving, as it can make them soft and chewy. These also make fantastic meal prep additions, ready to be quickly reheated alongside pasta dishes or salads.
Conclusion
Mastering homemade Breadsticks, especially our irresistible Cheesy Garlic Breadsticks, is a culinary triumph that will elevate any meal. From the fluffy dough to the gooey cheese and pungent garlic, every bite is a testament to the joy of home cooking. We encourage you to try this recipe, experiment with the variations, and share your delicious creations with family and friends. Get ready to impress with your baking prowess – your kitchen is about to become the go-to spot for the most amazing Garlic breadsticks!
FAQs
Q1: Can I make the dough ahead of time?
A1: Yes, you can prepare the dough up to the end of the first rise, then punch it down, cover it tightly, and refrigerate for up to 24 hours. Let it come to room temperature for about 30 minutes before shaping.
Q2: What if my yeast doesn’t foam?
A2: If your yeast doesn’t foam after 10 minutes, it’s likely dead or expired. Discard the mixture and start again with fresh yeast and properly warm water.
Q3: Can I use pre-shredded cheese?
A3: While convenient, pre-shredded cheese often contains anti-caking agents that can affect its melt and texture. For the best gooey results, we recommend shredding your own cheese from a block.
Q4: How do I get extra crispy breadsticks?
A4: For an extra crisp exterior, bake them at a slightly lower temperature (375°F / 190°C) for a longer duration (20-25 minutes). You can also brush them with a little extra olive oil before baking.
Q5: What’s the best way to serve these?
A5: These are best served warm, fresh from the oven, as a side with pasta dishes, soups, salads, or as a standalone snack with your favorite dipping sauce like marinara or ranch.