Unlock Flavor: Your Guide to Perfect Blackened Chicken at Home
Ever wondered how restaurants achieve that incredibly flavorful, perfectly crusted Blackened Chicken without leaving your kitchen smelling like a campfire? You’re in the right place! Mastering the art of blackened chicken at home isn’t just about recreating a restaurant favorite; it’s about elevating your weeknight meals, impressing guests, and bringing a burst of bold, savory flavor to your table. Forget bland poultry – with the right techniques and a carefully crafted Blackened Seasoning, you can achieve culinary greatness. This guide will walk you through every step, ensuring your blackened chicken is a resounding success, delivering a delightful texture and an explosion of taste.
Ingredients & Kitchen Tools
Crafting the perfect blackened chicken requires a few key ingredients and the right culinary arsenal.
- Boneless, Skinless Chicken Breasts (2 large): Opt for thicker cuts (around 1-inch) for best results, as they won’t dry out as quickly. Could substitute with chicken thighs for a juicier outcome.
- Butter (4 tablespoons, unsalted): Provides richness and helps the seasoning adhere. Clarified butter (ghee) is even better as it has a higher smoke point.
- Olive Oil (2 tablespoons): To combine with butter for a higher smoke point during searing.
- Blackened Seasoning (2-3 tablespoons): Store-bought or homemade blend of paprika, cayenne pepper, garlic powder, onion powder, thyme, oregano, and black pepper.
- Salt (to taste): Always adjust to your preference.
- Cast Iron Skillet (10-12 inch): Essential for achieving the authentic blackening crust due to its ability to retain and distribute high heat.
- Tongs: For safely flipping the chicken.
- Instant-Read Meat Thermometer: Crucial for ensuring the chicken is cooked through to 165°F (74°C).
- Cutting Board & Sharp Knife: For preparing the chicken.
- Shallow Dish/Plate: For dredging the chicken in seasoning.
- Ventilation Fan: Strongly recommended to manage smoke.
Prep Time & Cooking Schedule
- Prep Time: 15 minutes
- Marinating Time: (Optional) 30 minutes to 1 hour for deeper flavor, though not strictly necessary for blackening.
- Cook Time: 6-8 minutes per side
- Resting Time: 5 minutes
This recipe is designed for efficiency. The prep involves minimal chopping, primarily focusing on seasoning the chicken. The cooking itself is remarkably quick, making this an ideal weeknight dinner. Allowing the chicken to rest is paramount; it allows the juices to redistribute, ensuring a tender and moist final product.
Step-by-Step Instructions
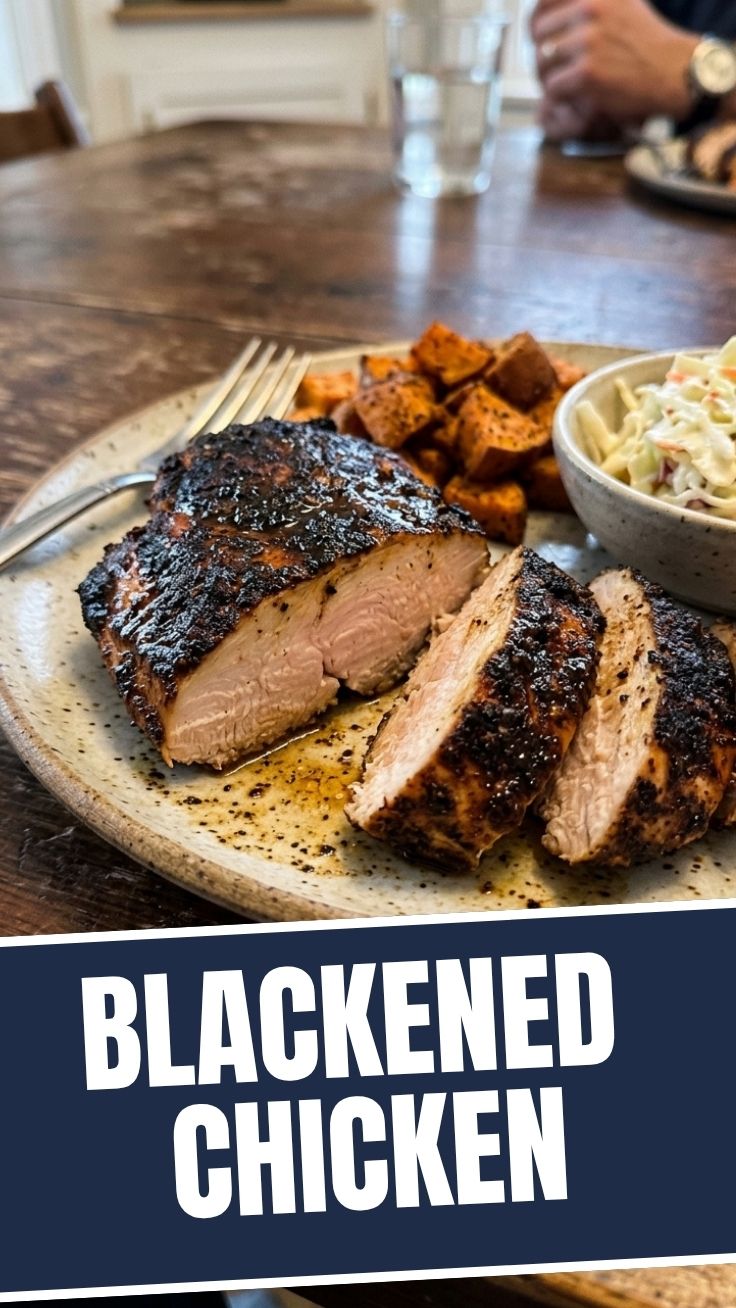
1. Prepare the Chicken: Pat the chicken breasts thoroughly dry with paper towels. This is a critical step for achieving a proper crust. If your chicken breasts are very thick, you can butterfly them or pound them to an even 3/4 to 1-inch thickness for quicker, more even cooking. Season both sides generously with the Blackened Seasoning, pressing gently to ensure adherence. This forms the flavorful crust of our Blackened Chicken.
2. Heat the Skillet: Place your cast iron skillet over high heat. Add the olive oil and butter (or clarified butter). Allow the skillet to heat until the butter is melted and just beginning to smoke. This extremely high heat is what creates the “blackened” crust. Ensure good ventilation.
3. Sear the Chicken: Carefully place the seasoned chicken breasts in the hot skillet. Do not overcrowd the pan; cook in batches if necessary. Allow the chicken to cook undisturbed for 3-4 minutes per side, or until a dark, crusty “blackened” layer forms. The intense heat will swiftly cook the exterior.
4. Finish Cooking: Reduce the heat to medium and continue cooking, flipping once, until the internal temperature reaches 165°F (74°C) with an instant-read thermometer. This usually takes another 2-3 minutes per side depending on thickness.
5. Rest and Serve: Remove the chicken from the skillet and let it rest on a cutting board for at least 5 minutes before slicing or serving. This resting period is essential for juice redistribution, ensuring moist and tender chicken.
Nutritional Benefits & Advantages
Blackened Chicken is a fantastic source of lean protein, essential for muscle repair and growth. The chicken itself is low in carbohydrates and rich in B vitamins like niacin and B6, important for energy metabolism. While the blackening process uses a modest amount of butter, the primary fat source, it’s still a relatively healthy cooking method compared to deep frying. The spices in Blackened Seasoning, such as paprika and cayenne, are rich in antioxidants and may offer anti-inflammatory benefits. This dish is naturally gluten-free and can be a great option for various dietary preferences.
Tips, Variations & Cooking Advice
- Spice Level Control: Adjust the amount of cayenne pepper in your Blackened Seasoning to control the heat. For a milder flavor, reduce or omit the cayenne.
- Homemade Blackened Seasoning: For the freshest flavor, make your own! Combine 1 tbsp paprika, 1 tsp cayenne, 1 tsp garlic powder, 1 tsp onion powder, 1 tsp dried thyme, 1 tsp dried oregano, and 1/2 tsp black pepper.
- Other Proteins: This blackening method isn’t just for chicken! It works wonderfully with fish (salmon, snapper, catfish) or even shrimp.
- Serve With: Pair your Blackened Chicken with a fresh green salad, rice and beans, steamed vegetables, or a creamy potato side dish.
- Smokiness: If you don’t have a strong ventilation system, consider cooking outside on a side burner or tabletop grill if comfortable, to avoid setting off smoke alarms.
Common Mistakes to Avoid
- Not Drying the Chicken: Wet chicken will steam instead of blacken, resulting in a soggy crust. Pat it very dry!
- Underheating the Skillet: The skillet MUST be screaming hot to achieve the characteristic crust. Don’t rush this step.
- Overcrowding the Pan: Too much chicken at once will drop the skillet temperature, leading to steaming instead of searing. Cook in batches.
- Flipping Too Soon: Resist the urge to flip until a dark crust has formed, usually 3-4 minutes.
- Skipping the Rest: Resting allows the juices to redistribute, preventing dry chicken. It’s only 5 minutes – don’t skip it!
Storage & Meal Prep Tips
Leftover Blackened Chicken can be stored in an airtight container in the refrigerator for up to 3-4 days. It’s excellent for meal prep; slice it up and add it to salads, wraps, or bowls for quick lunches throughout the week. To reheat, gently warm in a skillet over medium-low heat or in the microwave until just heated through to avoid drying it out. Freezing pre-cooked blackened chicken is also an option; wrap tightly and store for up to 2-3 months. Thaw overnight in the refrigerator before reheating.
Conclusion
You’ve now unlocked the secrets to crafting exceptional Blackened Chicken right in your own kitchen! From preparing the perfect chicken to mastering the high-heat sear with the ideal Blackened Seasoning, this detailed guide empowers you to create a dish that’s bursting with flavor and boasts that coveted crispy, savory crust. Don’t let restaurant menus intimidate you—this culinary adventure is well within your grasp. Give this recipe a try, experiment with your spice levels, and share your delicious creations in the comments below! What are your favorite ways to enjoy this vibrant dish?
FAQs
Q1: Can I use chicken with skin and bones?
A1: Yes, but the cooking time will be longer, and achieving an even blackened crust on the skin can be challenging without overcooking the meat. Boneless, skinless chicken is generally preferred for this method.
Q2: What’s the difference between blackening and charring?
A2: Blackening uses a specific spice blend and very high heat to create a dark, flavorful crust without actually burning the food. Charring typically refers to burning the food’s surface, which can lead to bitter flavors.
Q3: Can I blacken chicken in an oven?
A3: While you can bake seasoned chicken, you won’t achieve the authentic “blackened” crust that comes from direct, high-heat contact with a cast-iron skillet. The intense sear is key to blackening.
Q4: My kitchen got very smoky. What can I do?
A4: Ensure your ventilation fan is on high, consider opening windows, and if possible, use less butter or switch entirely to clarified butter (ghee) which has a higher smoke point. Cooking outdoors on a side burner is also an option for very smoky recipes.
Q5: What are some good side dishes for Blackened Chicken?
A5: Classic choices include dirty rice, collard greens, corn on the cob, a fresh coleslaw, or a simple green salad with a vinaigrette to balance the richness.