Unlock the Secret to the Perfect Homemade Apple Pie: A Journey from Orchard to Oven
Have you ever craved the comforting aroma of warm, spiced apples nestled beneath a golden, flaky crust, a quintessential symbol of home and hearth? There’s an undeniable magic in a homemade Apple Pie that store-bought versions simply can’t replicate. Beyond the captivating scent and delicious taste, preparing this beloved classic at home offers a rewarding experience, allowing you to control the quality of ingredients and infuse each slice with your personal touch. Plus, mastering this culinary art opens up a world of delightful dessert recipes, proving that with a little effort, extraordinary indulgences are within reach. This comprehensive guide will equip you with everything you need to bake an Apple Pie that will become a cherished family favorite, cementing your reputation as a baking virtuoso.
Ingredients & Kitchen Tools
- For the Pie Crust (our favorite flaky recipe!):
* 2 ½ cups all-purpose flour (for structure and tenderness)
* 1 teaspoon salt (enhances flavor)
* 1 cup (2 sticks) unsalted butter, very cold and cubed (for flaky layers)
* ½ cup ice water, plus more if needed (binds the dough without overworking the gluten)
- For the Apple Filling:
6-8 medium Granny Smith apples, peeled, cored, and sliced (their tartness balances the sweetness) – Optional Substitution: Half Granny Smith, half Honeycrisp for a sweeter, firmer filling.*
* ½ cup granulated sugar (for sweetness)
* ¼ cup packed light brown sugar (adds depth of flavor and moisture)
* 1 tablespoon lemon juice (prevents browning and brightens the flavor)
* 1 teaspoon ground cinnamon (classic apple pie spice)
* ¼ teaspoon freshly grated nutmeg (adds warmth and complexity)
* Pinch of ground cloves (a tiny hint goes a long way)
* 2 tablespoons all-purpose flour or cornstarch (thickens the filling)
* 2 tablespoons unsalted butter, cut into small pieces (for richness and gloss)
- For the Egg Wash:
* 1 large egg, whisked with 1 tablespoon water (for a golden, shiny crust)
- Kitchen Tools & Utensils:
* Large mixing bowls
* Pastry blender or food processor (for the crust)
* Rolling pin
* 9-inch pie dish
* Paring knife and apple corer
* Measuring cups and spoons
* Whisk
* Pastry brush
Prep Time & Cooking Schedule
Achieving pie perfection requires a well-planned schedule. Allow ample time for each stage to ensure optimal results.
- Prep Time: 45 minutes (includes making the crust and preparing the filling)
- Chilling Time for Crust: 1 hour (essential for a flaky crust)
- Baking Time: 45-60 minutes (until golden brown and bubbly)
- Resting Time: At least 2-3 hours (allows the filling to set, crucial for neat slices)
This schedule ensures that you can enjoy a perfectly set and cooled Apple Pie, ideal for serving with a scoop of vanilla ice cream.
Step-by-Step Instructions
1. Prepare the Pie Crust: In a large bowl, whisk together the flour and salt. Cut in the very cold butter using a pastry blender or your fingertips until the mixture resembles coarse crumbs with some pea-sized butter pieces. Gradually add the ice water, 1 tablespoon at a time, mixing gently until the dough just comes together. Do not overmix. Divide the dough in half, flatten each half into a disk, wrap in plastic wrap, and refrigerate for at least 1 hour.
2. Prepare the Apple Filling: In a large bowl, combine the sliced apples, granulated sugar, brown sugar, lemon juice, cinnamon, nutmeg, cloves, and flour (or cornstarch). Toss gently until the apples are evenly coated.
3. Assemble the Pie: On a lightly floured surface, roll out one disk of dough into a 12-inch circle. Carefully transfer it to a 9-inch pie dish. Trim the edges, leaving a ½-inch overhang. Pour the apple filling into the crust, mounding it slightly in the center. Dot the top of the filling with the small pieces of butter.
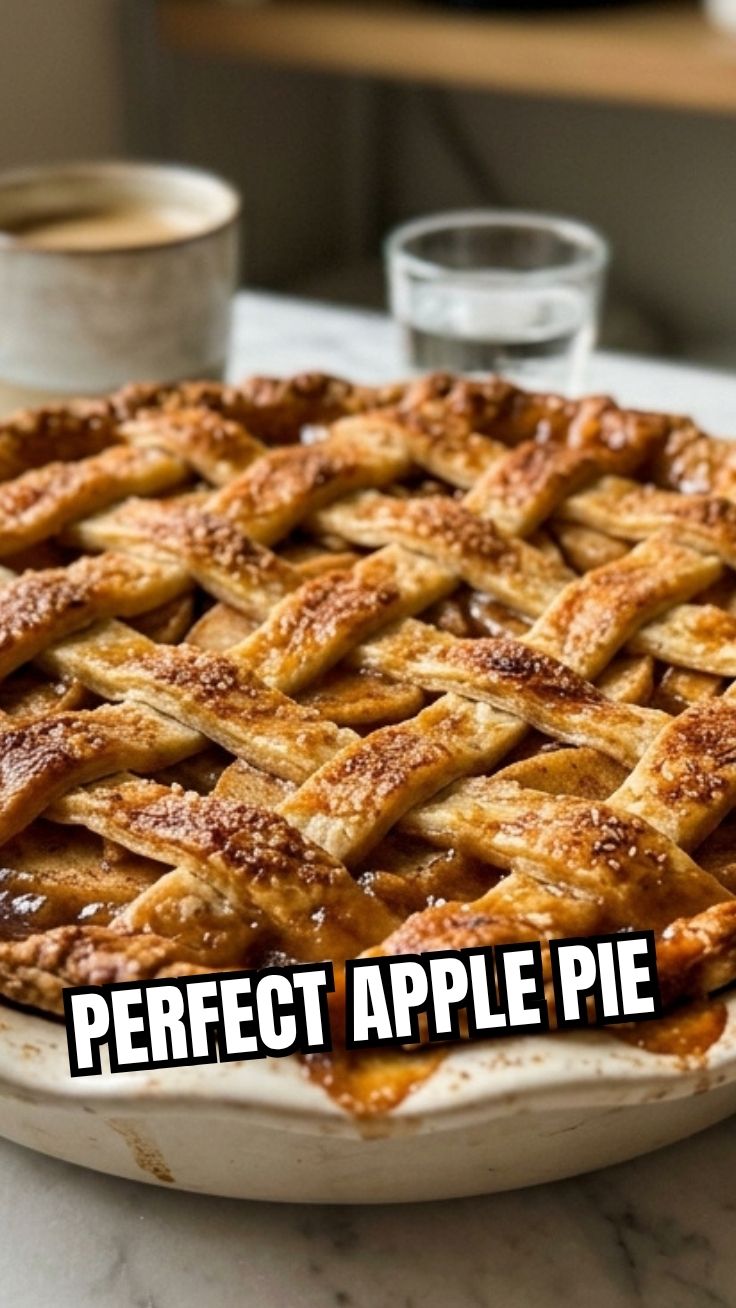
4. Top the Pie: Roll out the second disk of dough. You can either place it directly over the filling, cut vents for steam, or create a lattice top for a more decorative finish. Seal the edges by crimping them with your fingers or a fork. For a beautiful golden finish on your Apple Pie, brush the top crust with the egg wash. This meticulous process ensures not just a delicious pie but also creates a stunning visual appeal, a hallmark of all great dessert recipes.
5. Bake the Pie: Preheat your oven to 425°F (220°C). Place the pie on a baking sheet to catch any drips. Bake for 15 minutes, then reduce the oven temperature to 375°F (190°C) and continue baking for another 30-45 minutes, or until the crust is golden brown and the filling is bubbly. If the crust starts to brown too quickly, loosely tent with aluminum foil.
6. Cool Completely: Allow the pie to cool on a wire rack for at least 2-3 hours before slicing and serving. This resting period is crucial for the filling to set properly.
Nutritional Benefits & Advantages
While Apple Pie is undeniably a treat, it does offer some surprising nutritional advantages. Apples are packed with dietary fiber, which aids digestion and promotes satiety. They also contain essential vitamins like Vitamin C and various antioxidants, contributing to overall well-being. By making your own, you control sugar levels and can opt for whole-wheat flour in the crust for added fiber. Choosing organic apples also minimizes pesticide exposure, making your homemade pie a more wholesome indulgence.
Tips, Variations & Cooking Advice
- Flavor Variations: Experiment with different apple varieties (e.g., Braeburn, Fuji, Golden Delicious) for varied sweetness and texture. Add a pinch of ginger or allspice for a more complex spice profile.
- Ingredient Swaps: For a gluten-free pie, use a high-quality gluten-free all-purpose flour blend for the crust. For a dairy-free option, substitute butter with a plant-based baking stick.
- Alternative Cooking Methods: While baking is traditional, some prefer deep-dish or slab apple pies. Adjust baking times accordingly.
- Crust Perfection: Keep all crust ingredients, especially butter and water, as cold as possible. Avoid overworking the dough, which can lead to a tough crust.
- Golden Crust: Sprinkle a teaspoon of sugar over the egg-washed crust before baking for added sparkle and caramelization.
Common Mistakes to Avoid
- Overworking the Dough: This develops too much gluten, resulting in a tough, un-flaky crust. Handle the dough minimally.
- Not Chilling the Dough: Cold butter is key to flakiness. Skipping the chilling step melts the butter too quickly, leading to a greasy, less desirable crust.
- Under-baking the Pie: An under-baked crust is soggy, and the filling won’t set. Ensure the bottom crust is golden brown and the filling is bubbly before removing from the oven.
- Slicing Too Soon: Impatience is the enemy of a perfect slice! The filling needs time to cool and set, otherwise, it will be watery and fall apart.
Storage & Meal Prep Tips
Leftover Apple Pie should be covered loosely with foil or plastic wrap and stored at room temperature for up to 2 days, or refrigerated for up to 4 days. For longer storage, freeze individual slices (or the whole pie, unbaked) tightly wrapped for up to 3 months. To reheat, warm slices in a preheated oven at 350°F (175°C) for 15-20 minutes, or until heated through. Freezing unbaked pies is a fantastic meal prep strategy, allowing you to have a homemade treat ready for any occasion with minimal fuss.
Conclusion
There you have it – a comprehensive guide to baking an Apple Pie that will delight your senses and impress your loved ones. From understanding the nuanced balance of ingredients to mastering the techniques for a perfectly flaky crust and a luscious filling, you’re now equipped to create a culinary masterpiece. This recipe isn’t just about baking a pie; it’s about crafting an experience, a memory, and a tradition. So, gather your ingredients, preheat your oven, and embark on this delicious journey. Share your homemade Apple Pie with pride, and don’t hesitate to explore the vast world of dessert recipes – your culinary adventure has just begun! We’d love to see your creations, so be sure to share your results in the comments below!
FAQs
Q1: My pie crust sometimes turns out soggy. What am I doing wrong?
A1: A soggy bottom crust is often due to an under-baked pie or a very wet filling. Ensure your oven is fully preheated, bake on the lowest rack for even heat distribution, and consider a glass pie dish to monitor browning. A sprinkle of breadcrumbs or crushed cereal on the bottom crust before adding the filling can also absorb excess moisture.
Q2: Can I use different types of apples in the filling?
A2: Absolutely! A mix of sweet and tart apples (e.g., Granny Smith with Honeycrisp or Fuji) creates a more complex and balanced flavor profile and often helps maintain texture. Avoid overly soft or mealy apples, as they can turn to mush.
Q3: How do I prevent the crust from browning too quickly?
A3: If your pie crust is browning too rapidly, especially around the edges, loosely tent the entire pie with aluminum foil. You can also purchase silicone pie crust shields or create your own with foil to protect just the edges.
Q4: Can I make the pie dough in advance?
A4: Yes, pie dough can be made up to 2-3 days in advance and stored in the refrigerator, tightly wrapped. You can also freeze pie dough for up to 3 months; thaw overnight in the refrigerator before rolling.
Q5: My pie filling is too runny. How can I fix this next time?
A5: A runny filling often means there wasn’t enough thickener or the pie wasn’t allowed to cool long enough. Ensure you’re using the recommended amount of flour or cornstarch, and always let the pie cool for at least 2-3 hours for the filling to set properly.