Oh, the crisp air of autumn, the vibrant tapestry of fall foliage, and the intoxicating scent of warm spices! What if you could capture that quintessential fall feeling in a single, irresistible bite? Today, we’re diving into the delightful world of Apple Cider Donuts, a seasonal treat that embodies comfort and nostalgia. There’s something uniquely satisfying about creating these culinary masterpieces in your own kitchen. Forget the sometimes-dry, mass-produced versions; making them at home allows for unparalleled freshness, customizable flavors, and that incredible aroma that will fill your home. Preparing your own Homemade Apple Cider Donuts isn’t just about baking; it’s about crafting an experience, a moment of pure, unadulterated pleasure that you can share with loved ones.
Ingredients & Kitchen Tools
Crafting the perfect batch of these autumnal delights requires a few key items. Many of these you likely already have in your pantry!
- 2 cups all-purpose flour: The structural backbone of your donuts.
- 1 ½ teaspoons baking powder: Gives the donuts their characteristic airy lift.
- ½ teaspoon baking soda: Aids in leavening and browning.
- ½ teaspoon ground cinnamon: The quintessential fall spice, infusing warmth.
- ¼ teaspoon ground nutmeg: Adds depth and a hint of traditional donut flavor.
- ¼ teaspoon salt: Balances the sweetness and enhances other flavors.
- ¾ cup granulated sugar: Provides sweetness and contributes to tenderness.
- ¼ cup unsalted butter, melted: Adds richness and moisture.
- 2 large eggs: Binds the ingredients and adds structure.
¾ cup unsweetened apple cider, reduced to ½ cup: The star ingredient, bringing that signature tangy-sweet apple flavor. Reduction concentrates the flavor significantly.*
- 1 teaspoon vanilla extract: Enhances overall flavor.
- For the Cinnamon Sugar Coating:
* ½ cup granulated sugar
* 1 tablespoon ground cinnamon
* Optional: A pinch of nutmeg for extra warmth.
- For Frying:
* 6-8 cups vegetable oil, canola oil, or peanut oil: Choose a neutral-flavored oil with a high smoke point.
Kitchen Tools:
- Large mixing bowls (2): For dry and wet ingredients.
- Whisk: For combining dry ingredients and wet ingredients separately.
- Spatula or wooden spoon: For mixing dough.
- Small saucepan: For reducing apple cider.
- Donut cutter (or two round cookie cutters): Essential for shaping. A 3-inch cutter for the donut and a 1-inch cutter for the hole.
- Rolling pin: For flattening the dough.
- Deep-fry thermometer: Crucial for maintaining optimal oil temperature.
- Large heavy-bottomed pot or Dutch oven: For safe and even frying.
- Slotted spoon or spider: For safely removing donuts from oil.
- Wire rack set over a baking sheet: For draining excess oil and coating donuts.
- Paper towels: For initial draining.
Prep Time & Cooking Schedule
Capture the essence of fall with these delightful treats!
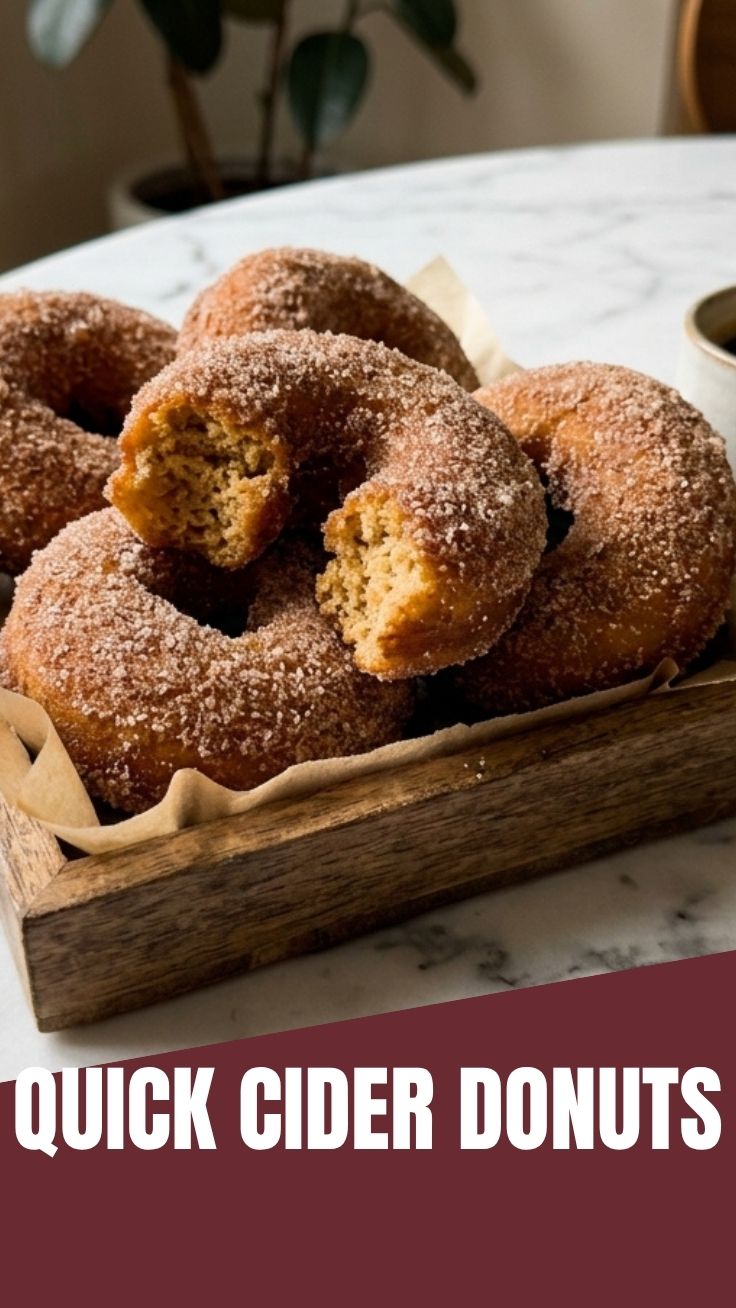
- Prep Time: 30 minutes
- Resting Time: 30-45 minutes (for dough chilling)
- Cook Time: 15-20 minutes (frying time)
- Total Time: Approximately 1 hour 30 minutes
Planning Ahead: Start by reducing your apple cider, as this can be done while you gather other ingredients. The dough benefits from a short chill, making it easier to handle and contributing to a tender texture. Plan to fry the donuts just before serving for the absolute best results.
Step-by-Step Instructions
1. Reduce the Apple Cider: In a small saucepan, bring ¾ cup of unsweetened apple cider to a boil over medium-high heat. Reduce the heat and simmer gently until the cider has reduced to ½ cup. This intensifies the apple flavor significantly. Let it cool completely.
2. Combine Dry Ingredients: In a large bowl, whisk together the flour, baking powder, baking soda, ground cinnamon, ground nutmeg, and salt. Set aside.
3. Combine Wet Ingredients: In another large bowl, whisk together the granulated sugar, melted butter, eggs, the cooled reduced apple cider, and vanilla extract until well combined and smooth.
4. Combine Wet and Dry: Gradually add the dry ingredients to the wet ingredients, mixing with a spatula or wooden spoon until just combined. Be careful not to overmix; a few lumps are okay. The dough will be somewhat sticky.
5. Chill the Dough: Cover the bowl with plastic wrap and refrigerate for 30-45 minutes. This chilling time makes the dough much easier to handle and prevents the donuts from becoming dense.
6. Prepare Frying Station: While the dough chills, prepare your frying station. In a large heavy-bottomed pot or Dutch oven, pour 6-8 cups of vegetable oil (or chosen frying oil) to a depth of about 3 inches. Attach a deep-fry thermometer to the side of the pot. Heat the oil over medium heat to 350°F (175°C).
7. Prepare Coating: In a shallow dish or pie plate, combine the ½ cup granulated sugar and 1 tablespoon ground cinnamon (and optional pinch of nutmeg) for the coating.
8. Shape the Donuts: Lightly flour a clean work surface. Turn out the chilled dough and gently roll it to about ½-inch thickness. Use a donut cutter to cut out donut shapes. Gather the scraps, gently re-roll them, and cut out more donuts until all dough is used.
9. Fry the Donuts: Carefully lower 2-3 donuts into the hot oil using a slotted spoon or spider (do not crowd the pot). Fry for 2-3 minutes per side, or until golden brown. Maintain the oil temperature at 350°F (175°C) throughout frying. Adjust heat as needed.
10. Drain and Coat: Once golden, remove the donuts with a slotted spoon and place them on a wire rack set over paper towels to drain excess oil for about 30 seconds. While still warm (this is crucial for the coating to stick!), immediately transfer the Apple Cider Donuts to the cinnamon sugar coating mixture. Gently toss to thoroughly coat all sides. Repeat with remaining donuts and donut holes. Preparing these Homemade Apple Cider Donuts is truly a labor of love that pays off in every bite.
11. Serve: Serve hot and enjoy immediately!
Nutritional Benefits & Advantages
While donuts are certainly a treat, these particular ones bring a few notable advantages. The presence of actual apple cider provides a subtle dose of antioxidants. Furthermore, baking at home allows for control over the quality of ingredients, such as using real butter and fresh spices, avoiding artificial flavors and excessive preservatives found in commercial versions. Making them yourself also allows you to manage portion sizes and adjust sugar levels, if desired.
Tips, Variations & Cooking Advice
- Don’t Overmix: Overmixing develops gluten, leading to tough donuts. Mix until just combined.
- Oil Temperature is Key: Too cold, and the donuts absorb too much oil, becoming greasy. Too hot, and they burn on the outside before cooking through. A thermometer is your best friend.
- Fresh Spices: Use freshly ground cinnamon and nutmeg for the most vibrant flavor.
- Baked Version: For a healthier alternative, bake the donuts in a donut pan at 375°F (190°C) for 10-12 minutes, or until golden brown. Brush with melted butter before tossing in the cinnamon sugar.
- Gluten-Free: Substitute the all-purpose flour with a 1:1 gluten-free baking flour blend.
- Spice Variations: Add a pinch of ground ginger or allspice to the spice mixture for a more complex flavor profile.
- Glaze Option: Instead of cinnamon sugar, make a simple glaze with powdered sugar, a splash of apple cider, and a touch of vanilla extract.
Common Mistakes to Avoid
- Over-rolling the Dough: Rolling the dough too thin will result in tough, small donuts. Aim for ½-inch thickness.
- Crowding the Frying Pot: This lowers the oil temperature drastically, leading to greasy donuts. Fry in small batches.
- Skipping the Chilling Time: The dough is much stickier and harder to work with when warm, and the chilling helps prevent spread during frying.
- Not Draining Properly: Ensure donuts briefly drain on paper towels before coating to remove excess oil, but don’t let them cool completely before coating, or the sugar won’t stick.
Storage & Meal Prep Tips
These donuts are best enjoyed fresh, ideally on the day they are made. The coating can absorb moisture over time, making them slightly less crisp.
- Storage: If you have leftovers, store them in an airtight container at room temperature for up to 2 days.
- Reheating: To revive slightly stale donuts, warm them in a microwave for 10-15 seconds or in a toaster oven at 300°F (150°C) for 3-5 minutes. This will restore some of their warmth and tenderness.
- Meal Prep (Partial): You can reduce the apple cider and mix the dry ingredients ahead of time. Keep them separate until you’re ready to make the dough.
Conclusion
There’s truly nothing quite like the comforting embrace of a warm, perfectly spiced donut to usher in the cooler months. By following this guide, you’ve not only created a delicious treat but also an experience, filling your home with the irresistible aroma of fall. These Apple Cider Donuts are more than just a dessert; they’re a symbol of coziness and homemade goodness. We hope you savor every bite of your Homemade Apple Cider Donuts and share the joy with those around you. Don’t forget to share your creations with us in the comments below! What’s your favorite fall treat to make from scratch?
FAQs
Q1: Can I use store-bought apple cider instead of reducing it myself?
A1: While you can, reducing the cider concentrates the apple flavor significantly, making a noticeable difference in the final product. It’s highly recommended for the best taste.
Q2: My donuts are coming out greasy. What went wrong?
A2: This usually means your oil temperature was too low. Ensure your oil consistently stays at 350°F (175°C) using a deep-fry thermometer. Frying in small batches also helps maintain the temperature.
Q3: How can I make these dairy-free?
A3: Substitute the unsalted butter with a plant-based butter alternative, or an equal amount of vegetable oil. Ensure your apple cider is also dairy-free (most are).
Q4: Can I bake these instead of frying?
A4: Yes! For a healthier option, bake in a greased donut pan at 375°F (190°C) for 10-12 minutes, or until lightly golden. Brush with melted butter before coating in cinnamon-sugar.
Q5: My donuts are tough, not soft. What’s the problem?
A5: Overmixing the dough is the likely culprit. Mix until just combined; a few lumps are fine. Also, ensure you don’t over-roll the dough, keeping it at least ½-inch thick.