The Ultimate New York Cheesecake: Your Guide to a Creamy Masterpiece
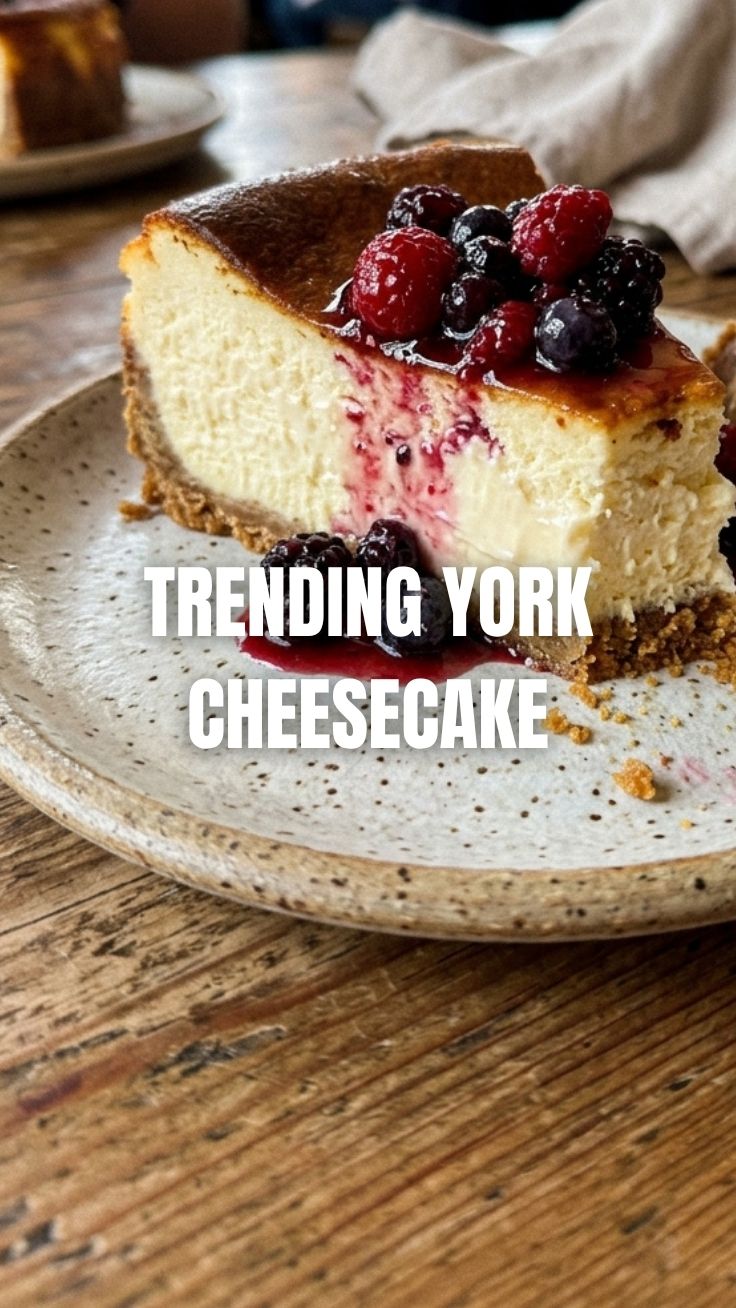
Ever wondered what makes a cheesecake truly extraordinary? Is it the silky-smooth texture, the rich, tangy flavor, or that perfectly crumbly crust? Today, we’re diving deep into the world of homemade dessert perfection, specifically focusing on how to craft the iconic New York Cheesecake. While many store-bought options claim to deliver, nothing compares to the satisfaction and superior taste of a cheesecake made in your own kitchen. This comprehensive guide will not only walk you through each step but also equip you with the knowledge to create a dessert that rivals any professional bakery. Forget the notion that baking a cheesecake is daunting; with our detailed instructions and expert tips, you’ll be well on your way to mastering this culinary classic, ensuring your homemade version stands out from any ordinary Philadelphia Cheesecake you’ve ever tasted.
Ingredients & Kitchen Tools
Crafting the perfect cheesecake requires a few key ingredients and essential kitchen tools. Here’s what you’ll need:
For the Crust:
- 1 ½ cups graham cracker crumbs: Finely crushed; about 10-12 full graham crackers.
- ¼ cup granulated sugar: Adds a touch of sweetness to the crust.
- 6 tablespoons unsalted butter, melted: Binds the crumbs together for a firm crust.
For the Filling:
- 32 ounces (four 8-ounce blocks) full-fat cream cheese, softened: Essential for that signature creamy texture. Ensure it’s at room temperature to prevent lumps.
- 1 ½ cups granulated sugar: Sweetens the rich cream cheese filling.
- 2 tablespoons all-purpose flour: Helps prevent cracking by stabilizing the batter.
- 1 teaspoon vanilla extract: Enhances the overall flavor.
- 1 cup sour cream, at room temperature: Adds a delightful tang and extra creaminess.
- 4 large eggs, at room temperature: Binders that provide structure and richness.
Optional Toppings:
- Fresh berries
- Fruit compote
- Chocolate ganache
Kitchen Tools:
- 9-inch springform pan: Crucial for easy release of the cheesecake.
- Aluminum foil (heavy-duty): For wrapping the springform pan to prevent water from entering during the water bath.
- Large roasting pan: To create a water bath (bain-marie).
- Electric mixer (stand or handheld): For smoothly combining ingredients.
- Rubber spatula: For scraping bowls and folding.
- Measuring cups and spoons: For precise ingredient measurements.
- Parchment paper: Optional, for lining the bottom of the springform pan to prevent sticking.
Prep Time & Cooking Schedule
- Prep Time: 30 minutes
- Baking Time: 1 hour 15 minutes to 1 hour 30 minutes
- Cooling Time (in oven): 1 hour
- Chilling Time (in refrigerator): 6-8 hours (preferably overnight)
This cheesecake truly benefits from proper chilling, so plan to make it a day ahead for the best results. The long chilling time allows the flavors to meld and the texture to fully set, creating that perfect dense and creamy mouthfeel.
Step-by-Step Instructions
1. Prepare the Crust: Preheat your oven to 350°F (175°C). In a medium bowl, combine graham cracker crumbs, granulated sugar, and melted butter. Press the mixture firmly and evenly into the bottom of a 9-inch springform pan. Bake for 10 minutes, then remove and let cool. This initial bake helps a perfect New York Cheesecake crust hold its superb shape.
2. Prepare the Water Bath: Wrap the bottom and sides of the springform pan tightly with several layers of heavy-duty aluminum foil to prevent water from seeping in. Place the wrapped pan inside a larger roasting pan.
3. Make the Filling: In a large bowl, using an electric mixer, beat the softened cream cheese on medium speed until smooth and creamy. Gradually add the sugar, beating until well combined. Scrape down the sides of the bowl.
4. Incorporate Dry Ingredients: Add the flour and vanilla extract to the cream cheese mixture, beating on low speed until just combined.
5. Add Sour Cream and Eggs: Stir in the sour cream until smooth. Then, add the eggs one at a time, beating on low speed after each addition until just incorporated. Avoid overmixing, as this can introduce too much air and cause cracks. This gentle approach is key for that signature dense texture, distinguishing it from a lighter Philadelphia Cheesecake.
6. Bake the Cheesecake: Pour the filling over the cooled crust in the springform pan. Carefully place the roasting pan with the cheesecake into the preheated oven. Pour hot water into the roasting pan, around the springform pan, until it reaches about halfway up the sides of the springform.
7. Bake: Bake for 1 hour 15 minutes to 1 hour 30 minutes, or until the edges are set but the center still jiggles slightly when gently shaken.
8. Cool Gradually: Turn off the oven, crack the door open, and leave the cheesecake inside for 1 hour. This slow cooling prevents sudden temperature changes from causing cracks.
9. Chill: Remove the cheesecake from the oven and water bath. Carefully unwrap the foil. Let it cool completely on a wire rack at room temperature. Once cooled, cover and refrigerate for at least 6-8 hours, or preferably overnight, before serving.
Nutritional Benefits & Advantages
While a treat, homemade cheesecake offers some advantages. Using full-fat cream cheese provides healthy fats and protein, contributing to a feeling of satiety. The eggs are a good source of protein and essential vitamins. By making it at home, you control the quality of ingredients, opting for natural vanilla extract and organic dairy if desired. While not a health food per se, enjoying a homemade dessert in moderation allows for portion control and ingredient transparency, making it a more mindful indulgence.
Tips, Variations & Cooking Advice
- Room Temperature Ingredients: This is paramount! Cold ingredients lead to a lumpy batter and can cause cracking.
- Don’t Overmix: Overmixing incorporates too much air, which can cause the cheesecake to rise rapidly and then fall and crack.
- Water Bath is Key: A water bath provides a moist, even cooking environment, preventing cracks and ensuring a creamy texture.
- Flavor Variations:
* Lemon Cheesecake: Add 1-2 tablespoons of lemon zest and 2 tablespoons of fresh lemon juice to the filling.
* Chocolate Swirl: Melt 4 ounces of bittersweet chocolate, let it cool slightly, and swirl it into the batter before baking.
* Pumpkin Spice: Replace 1 cup of cream cheese with 1 cup of pumpkin puree and add 1 teaspoon of pumpkin pie spice for a seasonal twist.
- Crust Alternatives: Use chocolate or vanilla wafer crumbs instead of graham crackers for a different base.
Common Mistakes to Avoid
1. Cold Ingredients: As mentioned, this causes lumps. Plan ahead!
2. No Water Bath: Leads to dry, cracked cheesecake. Don’t skip this step.
3. Over-baking: Results in a dry, dense, and firm texture. The center should still have a slight jiggle.
4. Opening Oven Door Repeatedly: Causes temperature fluctuations that encourage cracking.
5. Not Chilling Long Enough: The cheesecake won’t be fully set, resulting in a soft, gooey texture. Patience is a virtue here!
Storage & Meal Prep Tips
Store leftover cheesecake tightly covered in the refrigerator for up to 5-7 days. For longer storage, you can freeze individual slices. Place slices on a baking sheet and freeze until firm, then wrap each slice tightly in plastic wrap and then foil. Frozen cheesecake can last for 1-2 months. Thaw frozen slices in the refrigerator overnight before serving.
Conclusion
Creating a homemade New York Cheesecake is a rewarding culinary journey that results in a truly luxurious dessert. By following these detailed steps and paying attention to crucial details like ingredient temperatures and the use of a water bath, you’ll achieve that iconic, dense, and creamy texture that sets it apart. While simpler versions might exist, mastering this classic ensures a rich, tangy flavor profile that’s undeniably superior to a standard Philadelphia Cheesecake. Don’t be afraid to try this recipe; the results are well worth the effort! Share your delightful creations with us, and let us know your favorite ways to customize this magnificent dessert.
FAQs
Q1: My cheesecake cracked! What went wrong?
A1: Cracking is usually due to sudden temperature changes (e.g., pulling it out of the oven too quickly, over-baking, or over-mixing the batter). Ensure ingredients are at room temperature, use a water bath, and cool the cheesecake gradually in the oven.
Q2: Can I make this cheesecake gluten-free?
A2: Absolutely! Use gluten-free graham crackers for the crust, or an alternative gluten-free cookie crumb base. The filling itself is naturally gluten-free.
Q3: How do I know when the cheesecake is perfectly baked?
A3: The edges should be set, and the center (about 2-3 inches wide) should still have a slight jiggle when you gently shake the pan. It will continue to set as it cools.
Q4: Can I use low-fat cream cheese or sour cream?
A4: While technically possible, we highly recommend using full-fat versions. They are crucial for achieving the signature rich, dense, and creamy texture of a classic New York Cheesecake. Low-fat alternatives will result in a less satisfying, drier texture.
Q5: What’s the best way to slice a cheesecake cleanly?
A5: For clean slices, use a long, sharp knife. Dip the knife in hot water and wipe it clean between each slice. This keeps the knife warm and prevents sticking, ensuring a beautiful presentation.