Mastering the Art of Smoked BBQ Ribs: A Journey to Culinary Perfection
Ever wondered how to achieve those fall-off-the-bone, smoky BBQ Ribs that tantalize your taste buds and impress every guest? Mastering the art of grilling succulent ribs at home is not just about cooking; it’s about crafting an experience. Moving beyond store-bought options and into your backyard, you unlock a world of flavor control, quality ingredients, and the immense satisfaction of creating a truly exceptional dish. This comprehensive guide will equip you with the knowledge and techniques to transform humble racks of ribs into a culinary masterpiece, ensuring every bite is a testament to your newfound grilling prowess.
Ingredients & Kitchen Tools
- 2 racks (about 5-6 lbs total) Pork Spare Ribs or Baby Back Ribs: Choose meaty ribs with good marbling for optimal flavor and tenderness.
- For the Dry Rub:
* 2 tablespoons smoked paprika: Adds a deep, smoky undertone and vibrant color.
* 2 tablespoons brown sugar: Balances the savory flavors and promotes a beautiful crust.
* 1 tablespoon garlic powder: Essential for aromatic depth.
* 1 tablespoon onion powder: Enhances the savory profile.
* 1 tablespoon coarse salt (kosher or sea salt): For seasoning and drawing out moisture.
* 1 teaspoon black pepper: A classic spice for a hint of heat.
* 1 teaspoon cayenne pepper (optional): For those who enjoy a little kick.
- For the Spritz (optional, but recommended):
* 1/2 cup apple cider vinegar: Adds tanginess and keeps the ribs moist.
* 1/2 cup apple juice: Contributes sweetness and moisture.
- For the BBQ Sauce (your favorite store-bought or homemade): Apply towards the end for a flavorful glaze.
- Kitchen Tools:
* Sharp knife: For trimming fat and silverskin.
* Paper towels: For patting ribs dry.
* Small bowl: For mixing the dry rub.
* Sheet pan or cutting board: For seasoning the ribs.
* Foil pan or drip pan: To catch drippings and maintain moisture.
* Basting brush or spray bottle: For applying spritz and sauce.
* Meat thermometer: Crucial for monitoring internal temperature.
* Heavy-duty aluminum foil: For wrapping the ribs during the “Texas Crutch.”
* Heat-resistant gloves (optional): For handling hot ribs.
Prep Time & Cooking Schedule
Prep Time: 20-30 minutes (includes membrane removal and seasoning).
Marinating Time: 2-4 hours, or preferably overnight, for the rub to fully penetrate the meat and enhance flavor.
Cook Time: 5-6 hours total, depending on the type of ribs and your desired tenderness. This recipe utilizes the “3-2-1” method (3 hours smoking, 2 hours wrapped, 1 hour unwrapped and sauced) which provides consistently tender results.
Resting Time: 15-20 minutes after cooking allows the juices to redistribute, ensuring a more tender and flavorful outcome. Plan accordingly, as the longer cooking time for ribs requires patience and foresight.
Step-by-Step Instructions
1. Prepare the Ribs: Pat the ribs dry with paper towels. On the bone-side of each rack, locate and remove the papery membrane (silverskin). This step is crucial for tender ribs; if left on, it becomes tough and chewy. Use a butter knife to pry up a corner of the membrane, then grab it with a paper towel and pull it off. Trim any excess fat.
2. Apply the Dry Rub: In a small bowl, combine all dry rub ingredients. Generously apply the rub to both sides of the ribs, ensuring full coverage. Massage it into the meat. For best results, allow the ribs to marinate in the refrigerator for at least 2 hours, or ideally overnight.
3. Preheat Your Smoker/Grill: Prepare your smoker or grill for indirect heat, aiming for a consistent temperature of 225-250°F (107-121°C). If using a charcoal grill, arrange coals to one side and place a drip pan on the other. For gas grills, turn off the burner directly under the ribs. Add wood chips (hickory, apple, or cherry work well) for smoke flavor.
4. Smoke the Ribs (3 hours): Place the ribs directly on the grates, bone-side down, over indirect heat. Close the lid and smoke for 3 hours, maintaining your target temperature. During this time, you can spritz the ribs every hour or so with the apple cider vinegar and apple juice mixture to keep them moist. This initial grilling phase builds that foundational smoky flavor for your BBQ Ribs.
5. Wrap the Ribs (2 hours): After 3 hours, the ribs should have developed a nice bark. Remove them from the grill and place each rack on a large piece of heavy-duty aluminum foil. Add a splash of apple juice or cider vinegar to each packet (about 1/4 cup) and wrap tightly. Return the wrapped ribs to the grill for another 2 hours at the same temperature. This steaming process further tenderizes the meat.
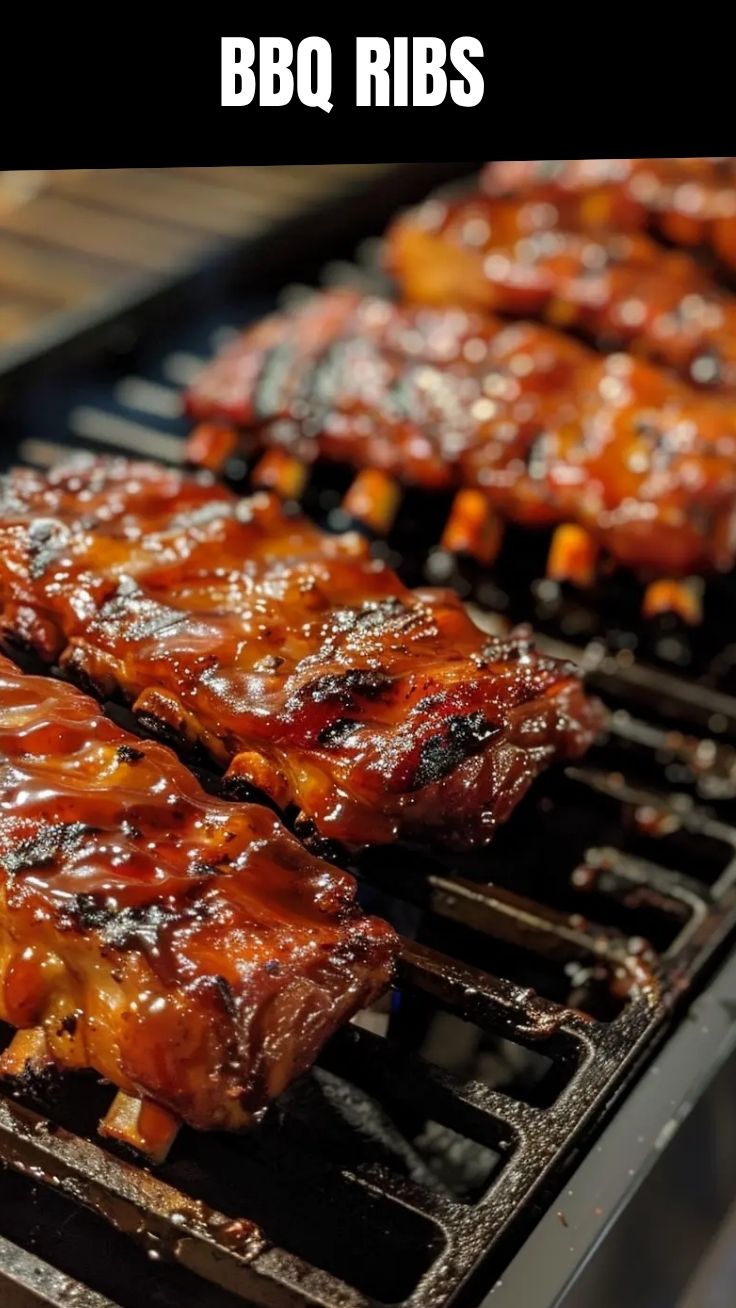
6. Unwrap and Sauce (1 hour): Carefully unwrap the ribs, discarding the liquid. Place them back on the grill, bone-side down. Brush generously with your chosen BBQ sauce. Cook for the final hour, periodically basting with more sauce until the sauce is caramelized and glossy. The internal temperature should be around 195-203°F (90-95°C) for perfect tenderness.
7. Rest and Serve: Transfer the ribs to a cutting board, tent loosely with foil, and let them rest for 15-20 minutes. This allows the juices to redistribute, resulting in a more succulent final product. Slice between the bones and serve immediately.
Nutritional Benefits & Advantages
Pork ribs, while a decadent treat, offer valuable nutrients. They are an excellent source of protein, essential for muscle repair and growth. They also provide significant amounts of B vitamins (especially B12, niacin, and B6), which are vital for energy production and nerve function, as well as minerals like zinc and phosphorus. By preparing your BBQ Ribs at home, you have complete control over the ingredients, often reducing excess sodium and sugar found in many store-bought sauces and rubs. The slow-cooking method also helps render out some of the fat, leaving behind tender, flavorful meat.
Tips Variations & Cooking Advice
- Spice it Up: For a spicier kick, increase the cayenne pepper in the rub or add a dash of hot sauce to your BBQ sauce.
- Herbaceous Ribs: Introduce dried thyme, rosemary, or oregano to your rub for an earthy aroma.
- Different Wood Smokes: Experiment with various wood chips like pecan for a nutty flavor, cherry for a milder fruitiness, or mesquite for an intense smokiness.
- Oven Method: If you don’t have a smoker or grill, you can achieve delicious ribs in the oven. Follow steps 1-2, then bake at 250°F (121°C) for 3-4 hours, wrapped, and then unwrapped for the last hour to sauce.
- Dietary Adaptations: For a gluten-free option, ensure your BBQ sauce is certified gluten-free. Most dry rub ingredients are naturally gluten-free.
- Portion Control: Cut individual ribs after resting for easier portioning.
Common Mistakes to Avoid
- Not Removing the Membrane: This is the most common mistake and results in tough, chewy ribs. Always remove it!
- Cooking at Too High a Temperature: Ribs love low and slow. High heat will dry them out and make them tough.
- Over-Saucing Too Early: Applying sugary BBQ sauce too early in the cook will cause it to burn and become bitter. Wait until the last hour.
- Not Resting the Ribs: Skipping the rest allows juices to escape, leading to drier, less flavorful meat.
- Under-Seasoning: Don’t be shy with the dry rub! Ribs can handle a generous amount of seasoning.
Storage & Meal Prep Tips
Leftover BBQ Ribs can be stored in an airtight container in the refrigerator for up to 3-4 days. For longer storage, freeze ribs (whole or individual portions) in a freezer-safe bag or container for up to 3 months. When reheating, it’s best to do so gently to maintain tenderness. You can warm them in the oven at 275-300°F (135-150°C) until heated through, or reheat them on the grill over indirect low heat, wrapped in foil. Adding a splash of apple juice or broth during reheating helps keep them moist.
Conclusion
Creating perfectly smoked BBQ Ribs at home is a rewarding culinary adventure that combines patience with precision. By following this detailed guide, you’ve gained the knowledge to produce tender, smoky, and incredibly flavorful ribs that will be the highlight of any gathering. Remember to embrace the “low and slow” philosophy for your grilling endeavors, and don’t be afraid to experiment with flavors. Now, go forth, fire up your grill, and savor the unparalleled satisfaction of homemade BBQ Ribs. We encourage you to try this recipe and share your delectable results with us! Happy grilling!
FAQs
Q1: What’s the difference between pork spare ribs and baby back ribs?
A1: Baby back ribs are cut from the loin area, are shorter, leaner, and more tender. Spare ribs come from the belly section, are longer, fattier, and more flavorful, requiring longer cooking times.
Q2: How do I know when the ribs are done?
A2: The best indication is tenderness. When gently lifted with tongs, the ribs should bend significantly, and the meat should start to pull away from the bone. The internal temperature should be between 195-203°F (90-95°C).
Q3: Can I skip the marinating time for the rub?
A3: While marinating enhances flavor, you can apply the rub just before cooking if short on time. However, allowing it to sit for at least an hour yields better results.
Q4: My ribs came out tough. What went wrong?
A4: This often happens if the membrane wasn’t removed, the cooking temperature was too high, or the ribs weren’t cooked long enough to break down the connective tissue. Ensure low and slow temperatures and sufficient cooking time.
Q5: What’s the best wood for smoking ribs?
A5: Hickory offers a robust, classic smoke flavor. Apple and cherry woods provide a milder, fruitier smoke. Experiment to find your personal preference!