Indulge Your Senses: The Ultimate Homemade Decadent Chocolate Cake with Velvety Frosting
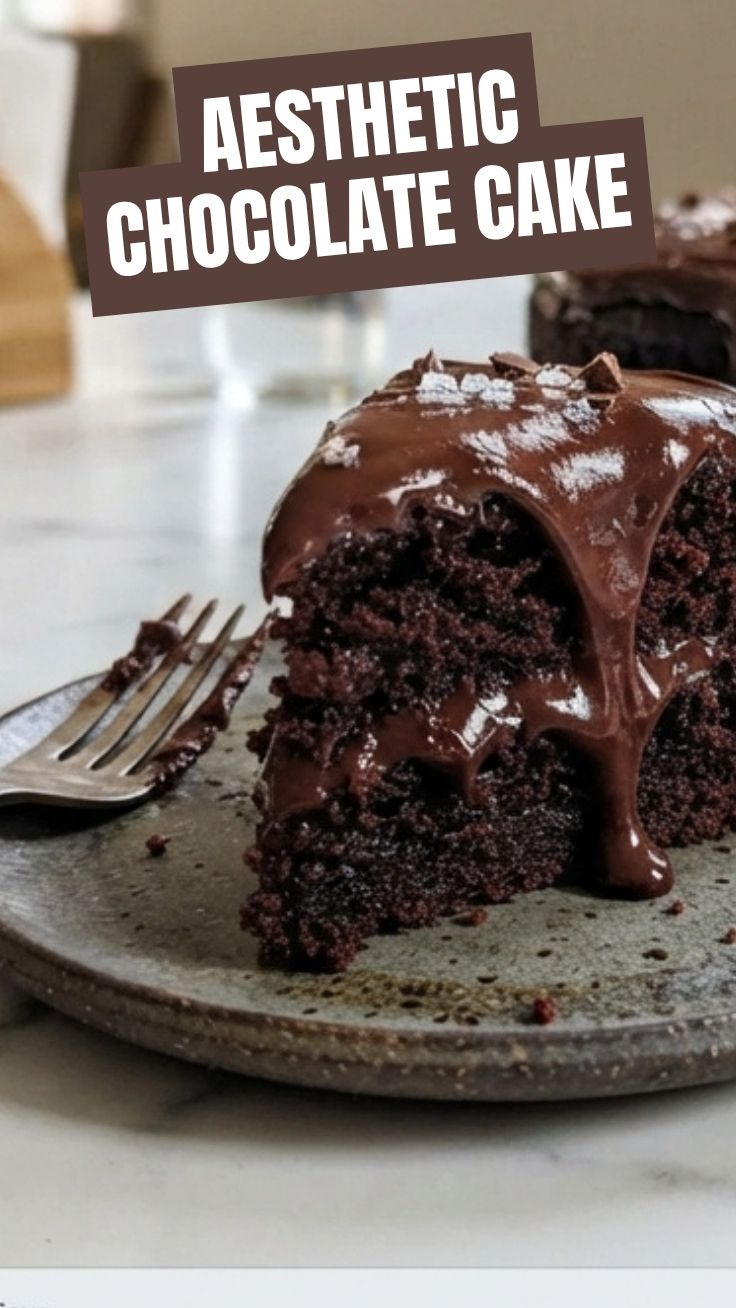
Ever wondered how to create a truly show-stopping dessert that tastes as incredible as it looks, right in your own kitchen? Preparing a homemade Chocolate Cake from scratch isn’t just about baking; it’s about crafting an experience. Forget those dry, store-bought imposters. We’re talking about a rich, moist crumb that practically melts in your mouth, enveloped in a smooth, luxurious Frosting. This guide will walk you through every step to achieve dessert perfection, proving that the most memorable treats are often the ones made with a little love and a lot of chocolate. Get ready to impress your taste buds and everyone around you!
Ingredients & Kitchen Tools
Crafting this divine dessert requires a balance of quality ingredients and the right tools.
Ingredients:
- All-Purpose Flour (2 cups): Provides the main structure for the cake.
- Granulated Sugar (2 cups): Sweetens and tenderizes the cake.
- Unsweetened Cocoa Powder (¾ cup): The star of our show, giving the cake its deep chocolate flavor. Opt for high-quality Dutch-processed cocoa for a richer taste.
- Baking Soda (2 tsp): A leavening agent that helps the cake rise.
- Baking Powder (1 tsp): Another leavening agent, working with baking soda for optimal lift and tenderness.
- Salt (1 tsp): Enhances all the other flavors.
- Large Eggs (2): Act as a binder and add richness.
- Whole Milk (1 cup): Adds moisture and helps activate the leavening agents.
- Vegetable Oil (½ cup): Contributes to the cake’s moist texture.
- Vanilla Extract (2 tsp): Essential for sweet baked goods, it rounds out the chocolate flavor.
- Boiling Water (1 cup): Activates the cocoa, deepening the chocolate flavor and contributing to a moist crumb.
For the Frosting:
- Unsalted Butter, softened (1 cup / 2 sticks): The creamy base of our frosting.
- Powdered Sugar (4 cups): Sweetens and thickens the frosting.
- Unsweetened Cocoa Powder (¾ cup): For that irresistible chocolate frosting flavor.
- Milk (¼ cup, plus more if needed): Adjusts frosting consistency.
- Vanilla Extract (1 tsp): Enhances the overall flavor.
Kitchen Tools:
- Two 9-inch round cake pans: For baking even cake layers.
- Large mixing bowls (2): For wet and dry ingredients.
- Electric mixer (stand or hand-held): Essential for creaming butter and sugar, and mixing batter and frosting.
- Whisk: For combining dry ingredients.
- Rubber spatula: For scraping bowls and folding ingredients.
- Measuring cups and spoons: For precise ingredient measurements.
- Sifter: For cocoa powder and powdered sugar, to prevent lumps.
- Parchment paper: For lining cake pans to prevent sticking.
- Cooling racks: For allowing cakes to cool completely.
Prep Time & Cooking Schedule
Planning makes perfect when it comes to baking.
- Prep Time: 25 minutes
- Bake Time: 30-35 minutes
- Cooling Time: 1 hour
- Frosting Time: 15 minutes
- Total Time: Approximately 2 hours 10 minutes
This schedule allows for complete cooling of the cake layers, which is crucial for a smooth frosting application. Starting approximately 2.5 hours before serving ensures ample time for every step.
Step-by-Step Instructions
Follow these clear steps to achieve a magnificently moist and flavorful Chocolate Cake, expertly adorned with a creamy Frosting.
1. Preheat & Prep: Preheat your oven to 350°F (175°C). Grease and flour two 9-inch round cake pans. Line the bottoms with parchment paper for easy release.
2. Combine Dry Ingredients: In a large bowl, whisk together the all-purpose flour, granulated sugar, unsweetened cocoa powder, baking soda, baking powder, and salt. Ensure there are no lumps; sifting the cocoa can help.
3. Combine Wet Ingredients: In a separate medium bowl, whisk the eggs, milk, vegetable oil, and vanilla extract until well combined and smooth.
4. Combine Wet and Dry: Gradually add the wet ingredients to the dry ingredients, mixing on low speed with an electric mixer until just combined. Do not overmix.
5. Add Boiling Water: Carefully pour in the boiling water. Stir on low speed until the batter is smooth and resembles a thin, liquid consistency – don’t be alarmed by how thin it is, this is key for moisture. This step is crucial for enhancing the chocolate flavor and ensuring a supremely moist crumb.
6. Bake: Divide the batter evenly between the prepared cake pans. Bake for 30-35 minutes, or until a wooden skewer inserted into the center comes out clean.
7. Cool: Let the cakes cool in the pans for 10 minutes before inverting them onto cooling racks to cool completely. This prevents breakage and allows residual heat to dissipate.
8. Prepare the Frosting: While the cakes cool, beat the softened butter in a large bowl with an electric mixer until light and fluffy (about 2-3 minutes). Gradually add the powdered sugar, cocoa powder, milk, and vanilla extract. Beat until smooth and creamy. If the frosting is too thick, add more milk, one teaspoon at a time, until the desired consistency is reached. If too thin, add more powdered sugar.
9. Assemble & Decorate: Once the cake layers are completely cool, place one layer on a serving plate or cake stand. Spread a generous amount of frosting evenly over the top. Place the second cake layer on top and cover the entire cake with the remaining frosting. Smooth the frosting with an offset spatula.
Nutritional Benefits & Advantages
This homemade Chocolate Cake, while an indulgence, offers a few advantages over highly processed store-bought options. By making it yourself, you control the quality of ingredients, opting for pure cocoa and fresh dairy, which can be richer in antioxidants (from the cocoa) and free from hydrogenated oils or excessive preservatives found in commercial cakes. Dark cocoa, in particular, is known for its flavanols, compounds that may support heart health. Furthermore, the satisfaction of creating something delicious from scratch can be a wonderful mood booster!
Tips, Variations & Cooking Advice
- Flavor Boost: Add a teaspoon of instant espresso powder to the boiling water to intensify the chocolate flavor without making it taste like coffee.
- Gluten-Free Version: Substitute the all-purpose flour with a gluten-free all-purpose baking blend (ensure it contains xanthan gum). You might need to add an extra tablespoon of milk as gluten-free flours can absorb more liquid.
- Dairy-Free Option: Use plant-based milk (almond, soy, or oat) and dairy-free buttersticks (like Earth Balance) for both the cake and the frosting.
- Smaller Cake: Halve the recipe and bake in two 6-inch pans for a smaller, more intimate dessert.
- Cupcakes: Line cupcake tins with paper liners and fill ¾ full. Bake for 18-22 minutes. This recipe yields about 24 cupcakes.
- Don’t Overmix: Overmixing develops the gluten in the flour, leading to a tough, dry cake. Mix until just combined.
- Room Temperature Ingredients: Ensure eggs, milk, and butter for frosting are at room temperature. This helps emulsify ingredients and creates a smoother batter and fluffier frosting.
Common Mistakes to Avoid
1. Overmixing the Batter: Leads to a dense, tough cake. Mix until just combined.
2. Not Cooling Cakes Completely: Frosting a warm cake will cause the frosting to melt and slide off, creating a messy result. Patience is key!
3. Incorrect Pan Preparation: If not properly greased and floured (and lined with parchment), cakes will stick, making removal difficult and potentially ruining your layers.
4. Skipping the Sifter for Cocoa/Powdered Sugar: Leads to lumps in your batter or frosting, affecting texture and appearance.
5. Opening Oven Door Too Soon: Can cause cakes to collapse in the center, especially in the first 20 minutes of baking.
Storage & Meal Prep Tips
Store leftover Chocolate Cake in an airtight container at room temperature for up to 3 days, or in the refrigerator for up to 5 days. If refrigerated, allow it to come to room temperature for about 30 minutes before serving for the best texture and flavor. This cake also freezes beautifully! Wrap individual slices or whole unfrosted layers tightly in plastic wrap, then aluminum foil. Freeze for up to 2 months. Thaw frozen cake in the refrigerator overnight before bringing it to room temperature and frosting (if unfrosted).
Conclusion
Mastering the art of baking a truly exceptional Chocolate Cake at home is a rewarding experience. From the rich, moist crumb to the silky, decadent Frosting, every bite is a celebration of flavor and texture. By following this detailed guide, you’ve unlocked the secrets to crafting a dessert that will undoubtedly become a treasured recipe in your home. We encourage you to try this recipe, share your magnificent creations with us, and explore the endless possibilities of homemade baking – your taste buds will thank you!
FAQs
- Q: Can I use different types of cocoa powder?
A: Yes, but Dutch-processed cocoa gives a darker color and milder flavor. Natural cocoa powder can be used, but you might need to slightly adjust the baking soda.
- Q: My cake turned out dry. What went wrong?
A: Overbaking is the most common culprit for dry cakes. Ensure you’re pulling it from the oven as soon as a skewer comes out clean, and make sure your oven temperature is accurate (consider an oven thermometer).
- Q: Can I make the cake layers ahead of time?
A: Absolutely! Baked and cooled cake layers can be wrapped tightly in plastic wrap and stored at room temperature for up to 2 days, or frozen for up to 2 months. Defrost fully before frosting.
- Q: How do I get a perfectly smooth frosting?
A: Ensure your butter is truly softened (but not melted) and your powdered sugar is sifted to prevent lumps. Beat the frosting for several minutes until light and airy.
- Q: What if my frosting is too stiff or too runny?
A: If too stiff, add milk (or water) one teaspoon at a time until desired consistency. If too runny, add more sifted powdered sugar, one tablespoon at a time, until perfect.