Unlock the Secret to the Perfect Homemade Cheesecake: A Culinary Journey
Ever wondered what transforms a simple afternoon treat into an unforgettable dessert experience? Is it the velvety texture, the rich aroma, or the sheer artistry involved? Preparing a homemade Cheesecake from scratch isn’t just about baking; it’s about creating a moment, a memory, and a delightful indulgence that store-bought versions simply can’t replicate. The secret often lies in the quality of your ingredients, especially the creamy, tangy Cream Cheese, which forms the heart and soul of this beloved dessert. This comprehensive guide will walk you through every step, ensuring your homemade creation is a triumph of flavor and texture, proving that the best cheesecake always comes from your kitchen.
Ingredients & Kitchen Tools
Crafting the perfect cheesecake requires a modest but essential lineup of ingredients and tools. Here’s what you’ll need:
- For the Crust:
* 1 ½ cups Graham Cracker Crumbs: Provides a classic, slightly sweet and crumbly base. You can make these by crushing whole graham crackers.
* ¼ cup Granulated Sugar: Adds a touch of sweetness to the crust.
* ½ cup Unsalted Butter, melted: Binds the crumbs together, ensuring a firm crust.
- For the Filling:
* 32 oz (4 blocks) Full-Fat Cream Cheese, softened: The star of the show. Ensure it’s softened to room temperature for a smooth, lump-free filling.
* 1 ½ cups Granulated Sugar: Sweetens the filling, balancing the tang of the cream cheese.
* 4 large Eggs: Act as a binder and add richness to the cheesecake. Ensure they are at room temperature.
* 1 cup Sour Cream: Adds a tangy depth and contributes to the creamy texture.
* 2 teaspoons Vanilla Extract: Enhances the overall flavor profile.
* 1 tablespoon All-Purpose Flour: A secret ingredient that helps prevent cracking.
* Pinch of Salt: Balances the sweetness and enhances other flavors.
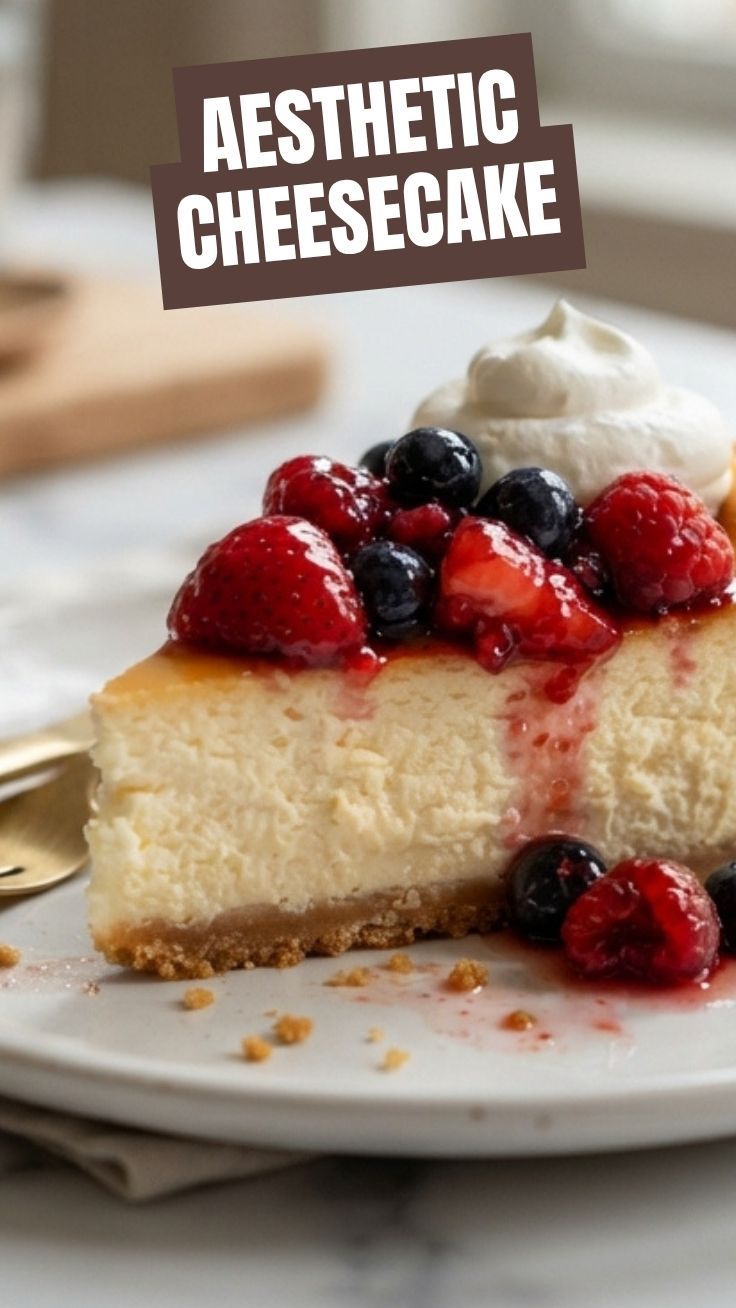
- Optional Toppings: Fresh berries, chocolate sauce, caramel, fruit compote.
- Kitchen Tools:
* 9-inch Springform Pan: Essential for easy removal of the cheesecake without damage.
* Food Processor (optional) or Ziploc Bag & Rolling Pin: For crushing graham crackers.
* Large Mixing Bowls: For combining ingredients.
* Electric Mixer (Stand or Handheld): For achieving a smooth, aerated filling.
* Rubber Spatula: For scraping down bowls and folding ingredients.
* Measuring Cups & Spoons: For accurate ingredient quantities.
* Aluminum Foil: For water bath; prevents seepage into the crust.
* Roasting Pan or Larger Baking Dish: For the water bath.
Prep Time & Cooking Schedule
Planning is key to cheesecake success!
- Prep Time: 25 minutes (includes making the crust and preparing the filling).
- Bake Time: 60-75 minutes (until edges are set and center is slightly jiggly).
- Cooling Time (Room Temperature): 1-2 hours (allow to cool gradually to prevent cracking).
- Chilling Time (Refrigerator): Minimum 4-6 hours, ideally overnight (crucial for setting the cheesecake and enhancing flavor).
Remember, a well-chilled Cheesecake is a happy cheesecake! Don’t rush the chilling process; it’s vital for achieving the perfect consistency and allowing the flavors to meld.
Step-by-Step Instructions
1. Prepare the Crust: Preheat your oven to 350°F (175°C). In a medium bowl, combine graham cracker crumbs, granulated sugar, and melted butter. Press the mixture firmly into the bottom of a 9-inch springform pan. Bake for 8-10 minutes until lightly golden. Remove from oven and let cool completely. This pre-baking helps achieve a crisp crust. Wrap the outside of the springform pan tightly with heavy-duty aluminum foil to prevent water seeping in if using a water bath.
2. Make the Filling: In a large mixing bowl, using an electric mixer, beat the softened Cream Cheese on medium speed until completely smooth and free of lumps. This is crucial for a silky smooth cheesecake. Gradually add the granulated sugar, beating until well combined and fluffy.
3. Incorporate Eggs and Flavorings: Add the eggs one at a time, beating on low speed just until each egg is incorporated. Overmixing eggs can introduce too much air, leading to cracks. Stir in the sour cream, vanilla extract, all-purpose flour, and a pinch of salt until just combined. Be careful not to overmix the batter at this stage to maintain the creamy texture of your Cheesecake.
4. Bake the Cheesecake (Water Bath Method): Pour the filling over the cooled crust in the springform pan. Place the springform pan (wrapped in foil) into a larger roasting pan. Fill the roasting pan with hot water, reaching about halfway up the sides of the springform pan. This water bath creates a moist, even baking environment, preventing cracks and ensuring a creamy texture. Bake for 60-75 minutes, or until the edges are set and the center still has a slight jiggle.
5. Cool and Chill: Carefully remove the cheesecake from the water bath and the roasting pan. Run a thin knife around the edge of the cheesecake before it cools completely to prevent sticking. Let it cool on a wire rack at room temperature for 1-2 hours. Once cooled, cover loosely with plastic wrap and refrigerate for at least 4-6 hours, or preferably overnight. The longer it chills, the better the flavor and texture.
Nutritional Benefits & Advantages
While often seen as an indulgence, cheesecake, particularly when made with good quality ingredients, offers some surprising benefits. The primary ingredient, Cream Cheese, is a good source of calcium and vitamin A. Eggs contribute essential proteins and vitamins. Making it at home allows you to control sugar levels and choose high-quality, potentially organic, dairy products, avoiding artificial flavors and preservatives often found in commercial versions.
Tips Variations & Cooking Advice
- Flavor Boosts: Add lemon zest to the filling for a brighter, more zesty flavor. Swirl in fruit purees, chocolate ganache, or even a spiced pumpkin puree for seasonal variations.
- Crust Alternatives: Experiment with different cookie crumbs (e.g., Oreo, shortbread), or even crushed pretzels for a salty-sweet twist.
- Dairy-Free Option: Use plant-based cream cheese alternatives and sour cream (often made from cashews or soy) for a delicious dairy-free version. Ensure these are full-fat for best results.
- Mini Cheesecakes: Bake in cupcake liners in a muffin tin for individual servings, adjusting baking time accordingly.
Common Mistakes to Avoid
- Overmixing the Batter: This incorporates too much air, which expands during baking and contracts during cooling, leading to cracks. Beat only until just combined.
- Opening the Oven Door Too Often: Fluctuations in oven temperature can also cause cracking. Resist the urge to peek!
- Not Using Room Temperature Ingredients: Cold ingredients don’t blend smoothly, resulting in a lumpy batter.
- Skipping the Water Bath: This is the most common reason for cracked cheesecakes. The water bath provides consistent, gentle heat.
- Cutting Too Soon: An unchilled cheesecake will be gooey and fall apart. Patience is a virtue here.
Storage & Meal Prep Tips
Your homemade Cheesecake is a fantastic make-ahead dessert. Store leftover cheesecake in an airtight container in the refrigerator for up to 5-7 days. For longer storage, cheesecake freezes exceptionally well. Wrap individual slices or the entire cake tightly in plastic wrap, then an additional layer of aluminum foil. It can be frozen for up to 1-2 months. Thaw frozen cheesecake overnight in the refrigerator before serving.
Conclusion
There you have it – the ultimate guide to creating a luscious, homemade Cheesecake that will impress even the most discerning palates. By focusing on quality ingredients, particularly the creamy, rich Cream Cheese, and mastering the techniques outlined here, you’re well on your way to baking perfection. Don’t be intimidated; the reward of that first velvety bite will make every effort worthwhile. So, roll up your sleeves, gather your ingredients, and embark on this delicious baking adventure. We encourage you to try this recipe, share your delicious results with us, and explore other delightful dessert recipes on our blog!
FAQs
Q1: Why did my cheesecake crack?
A1: Cracking is usually due to sudden drastic temperature changes during baking or cooling, or overmixing the batter. Ensure you use a water bath, don’t open the oven door too often, and cool it gradually.
Q2: Can I use low-fat cream cheese?
A2: While you can, it’s not recommended for the best results. Full-fat Cream Cheese provides the necessary richness and creamy texture that defines a classic cheesecake. Low-fat versions often have a higher water content and can lead to a less stable and less flavorful dessert.
Q3: How do I know when my cheesecake is done?
A3: The edges should be set, but the center (about a 2-3 inch circle) should still have a slight jiggle when you gently shake the pan. It will continue to cook and set as it cools.
Q4: Can I make the crust gluten-free?
A4: Absolutely! Simply swap regular graham cracker crumbs for gluten-free graham cracker crumbs or use a gluten-free cookie alternative like almond flour shortbread cookies.
Q5: What’s the best way to slice a cheesecake cleanly?
A5: For clean slices, run a thin, sharp knife under hot water, wipe it dry, and then make your cut. Repeat this process for each slice. This will prevent the cheesecake from sticking to the knife.