Unlocking Culinary Magic: Crafting the Perfect Homemade Beef Enchiladas
Ever dreamt of a dish that’s both comforting and bursting with vibrant flavors, a true showstopper for your weeknight dinner or a special gathering? Look no further than the art of crafting homemade enchiladas. This blog post isn’t just about a recipe; it’s a journey into making truly exceptional Beef Enchiladas right in your own kitchen. Forget bland, pre-made versions; we’re diving into the rich, savory world of authentic flavors, showing you how to build layers of deliciousness that will have everyone asking for more. Mastering a classic like this not only elevates your cooking skills but also provides a healthier, more personalized alternative to takeaway. Plus, when you delve into the heart of Mexican recipes, you open up a world of culinary inspiration.
Ingredients & Kitchen Tools
- Ground Beef (1.5 lbs, 80/20 lean): The core of our delicious filling. The fat content ensures juicy results.
- Corn Tortillas (12-18, 6-inch): Essential for the enchilada rolls. Opt for fresh, pliable tortillas.
- Enchilada Sauce (28 oz can, red): The flavorful foundation. You can also make your own for an extra layer of authenticity.
- Cheddar Cheese (2 cups, shredded): Melty goodness. Monterey Jack or a Mexican blend are excellent substitutions.
- Onion (1 large, chopped): Adds aromatic depth to the beef. Yellow or white onions work well.
- Garlic (3 cloves, minced): Pungent and essential for flavor.
- Green Chilies (1 can, 4 oz, diced): Mild heat and a tangy kick. Optional for those who prefer less spice.
- Cumin (1 tsp): Earthy and characteristic of Mexican cuisine.
- Chili Powder (2 tsp): Adds depth and a touch of heat.
- Salt & Pepper (to taste): Seasoning essentials.
- Olive Oil (2 tbsp): For sautéing.
- Cilantro (fresh, for garnish): Brightens the dish. Optional.
- Sour Cream or Mexican Crema (for serving): Cool and creamy contrast. Optional.
Kitchen Tools:
- Large Skillet or Dutch Oven: For browning the beef.
- 9×13 inch Baking Dish: For assembling and baking the enchiladas.
- Measuring Cups and Spoons: For accurate ingredient portions.
- Cutting Board and Knife: For chopping vegetables.
- Spatula or Wooden Spoon: For stirring.
- Oven Mitts: For handling hot dishes.
Prep Time & Cooking Schedule
- Prep Time: 25 minutes
- Cook Time: 30 minutes
- Resting Time: 5 minutes (after baking, before serving)
Our Beef Enchiladas recipe is designed for maximum flavor with reasonable timelines. Most of the prep involves chopping vegetables and browning the beef, leaving a straightforward assembly process. The baking time allows the flavors to meld beautifully and the cheese to get perfectly bubbly. A short resting period after baking is crucial; it allows the enchiladas to set and makes them easier to serve without falling apart. This schedule makes it a perfect dish for a weekend project or even an ambitious weeknight dinner if you do some mise en place beforehand.
Step-by-Step Instructions
1. Preheat & Sauté: Preheat your oven to 375°F (190°C). In a large skillet, heat olive oil over medium heat. Add the chopped onion and cook until softened, about 5-7 minutes. Stir in the minced garlic and cook for another minute until fragrant.
2. Brown the Beef: Add the ground beef to the skillet, breaking it up with a spoon. Cook until thoroughly browned, draining any excess grease. This ensures a rich, savory base for your Beef Enchiladas.
3. Season the Filling: Stir in the diced green chilies, cumin, chili powder, salt, and pepper. Cook for an additional 2-3 minutes, allowing the spices to toast and permeate the beef. This step is crucial for developing the complex flavors characteristic of great Mexican recipes.
4. Prepare the Tortillas: Briefly warm the corn tortillas in a microwave or a dry skillet to make them pliable. This prevents them from tearing when rolled.
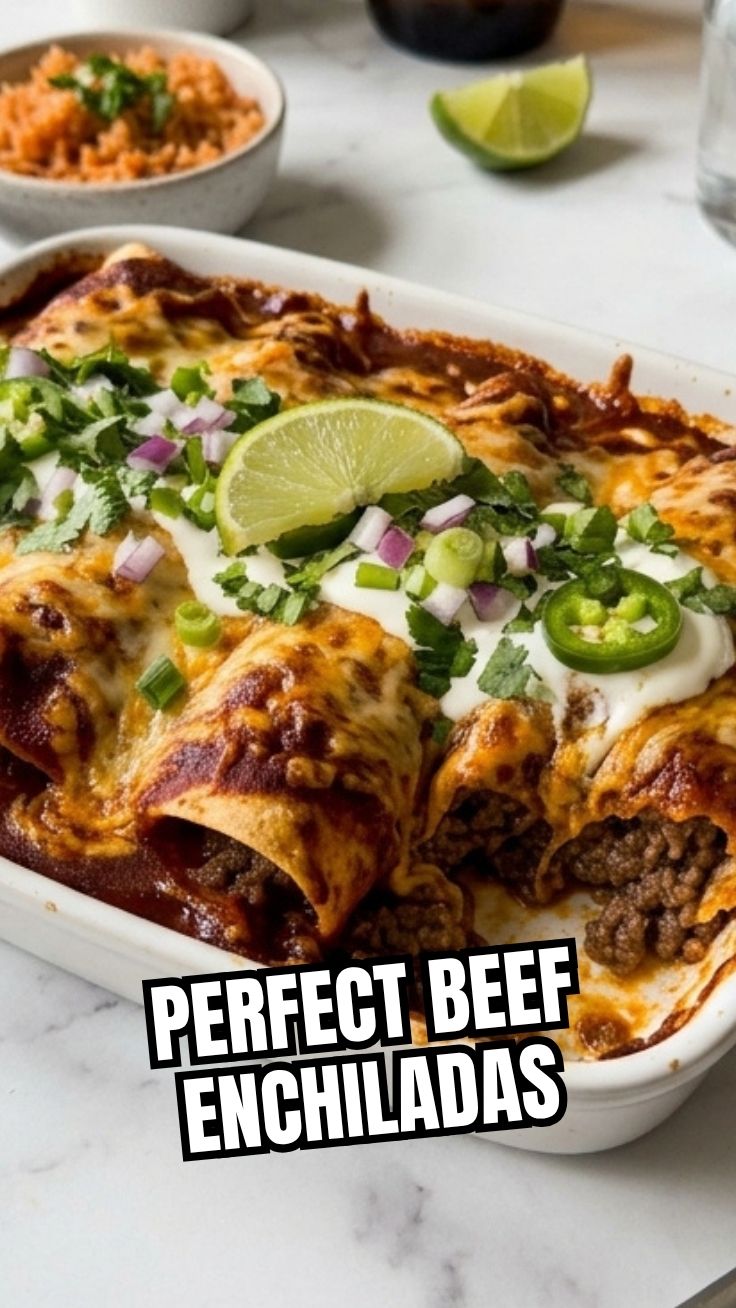
5. Assemble the Enchiladas: Spread a thin layer of enchilada sauce on the bottom of your 9×13 inch baking dish. Dip each warmed tortilla into the enchilada sauce. Place about 2-3 tablespoons of the beef filling down the center of each tortilla, sprinkle with a little shredded cheese, and roll it up tightly. Place seam-side down in the prepared baking dish.
6. Sauce & Cheese: Once all enchiladas are assembled, pour the remaining enchilada sauce generously over the top. Sprinkle with the remaining shredded cheese.
7. Bake: Bake for 25-30 minutes, or until the cheese is melted and bubbly and the sauce is simmering.
8. Garnish & Serve: Let the enchiladas rest for 5 minutes before serving. Garnish with fresh cilantro, and serve with a dollop of sour cream or crema if desired.
Nutritional Benefits & Advantages
These Beef Enchiladas offer more than just incredible taste. Ground beef provides a substantial source of protein, essential for muscle repair and growth, along with iron and B vitamins. The corn tortillas contribute complex carbohydrates for sustained energy and are naturally gluten-free. When made at home, you have complete control over the ingredients, allowing you to opt for leaner meat, reduce sodium in the sauce, and increase fiber by adding vegetables like bell peppers or black beans to the filling. This dish is a hearty, satisfying meal that can be easily adapted to meet various dietary needs while still delivering exceptional flavor.
Tips, Variations & Cooking Advice
- Spice Level: For more heat, add diced jalapeños or a pinch of cayenne pepper to the beef filling.
- Vegetarian Version: Substitute ground beef with a mixture of black beans, corn, bell peppers, and mushrooms for a delicious vegetarian option.
- Cheese Blends: Experiment with other cheeses like Colby Jack, Pepper Jack, or even a sprinkle of crumbled cotija for different flavor profiles.
- Homemade Sauce: For an even richer experience, try making your own red enchilada sauce from dried chilies.
- Crispier Tortillas: For slightly crisper enchiladas, lightly fry the corn tortillas in a small amount of oil before dipping in sauce and filling.
- Make Ahead: Assemble the enchiladas up to 24 hours in advance, cover, and refrigerate. Add a little extra sauce if they look dry before baking, and add about 10-15 minutes to the cooking time.
Common Mistakes to Avoid
- Dry Tortillas: Not warming the tortillas before rolling is a common mistake. Cold, stiff tortillas will crack and break. Always warm them briefly in the microwave or a skillet.
- Too Much Filling: Overfilling can make the enchiladas difficult to roll and messy to eat. Aim for a manageable 2-3 tablespoons per tortilla.
- Undercooked Meat: Ensure the ground beef is fully browned and drain excess fat to prevent a greasy dish.
- Skimping on Sauce: The sauce is crucial for moisture and flavor. Don’t be shy; ensure the enchiladas are well-coated before baking.
- Skipping the Rest: Resting after baking allows the enchiladas to firm up and prevents them from falling apart when served.
Storage & Meal Prep Tips
Leftover Beef Enchiladas are fantastic for meal prep! Store them in an airtight container in the refrigerator for up to 3-4 days. To freeze, wrap individual portions in plastic wrap and then aluminum foil, or place the entire cooled baking dish (covered tightly) in the freezer. They can be frozen for up to 2-3 months. To reheat from the refrigerator, simply pop them in the microwave or bake at 350°F (175°C) until heated through. From frozen, thaw overnight in the refrigerator or bake directly from frozen, covered with foil, for a longer period until heated through. A little extra sauce can be added when reheating to maintain moisture.
Conclusion
There you have it – a comprehensive guide to crafting incredibly flavorful homemade Beef Enchiladas. This recipe is a testament to the comforting power of classic Mexican recipes, offering a rich, savory experience that’s worth every minute of effort. By following these steps, understanding the nuances of each ingredient, and embracing a few smart tips, you’re not just making a meal; you’re creating a memorable culinary moment. We strongly encourage you to give this recipe a try and experience the joy of authentic, homemade enchiladas. Don’t forget to share your creations and tell us your favorite variations in the comments below!
FAQs
Q1: Can I use flour tortillas instead of corn?
A1: While corn tortillas are traditional for enchiladas, you can use flour tortillas if you prefer. They won’t absorb the sauce in the same way and will result in a softer texture.
Q2: How can I make my enchilada sauce thicker?
A2: If using store-bought sauce, you can simmer it gently for a few minutes to reduce it slightly. If making from scratch, a roux (flour and fat) can be used to thicken the sauce.
Q3: What are good side dishes for enchiladas?
A3: Enchiladas pair wonderfully with Mexican rice, refried beans, a simple green salad, or a refreshing dollop of guacamole.
Q4: Can I prepare the filling in advance?
A4: Absolutely! The beef filling can be cooked up to 2-3 days in advance and stored in an airtight container in the refrigerator. This saves a lot of time on busier days.
Q5: My enchiladas came out soggy. What did I do wrong?
A5: Soggy enchiladas can happen if the tortillas weren’t warmed enough (making them prone to over-absorbing sauce) or if too much sauce was used without enough cheese to create a protective barrier. Ensure tortillas are just pliable and don’t drown them in sauce initially.