Master the Art of Crispy, Tangy Perfection: Your Guide to Homemade Orange Chicken Glory!
Ever wondered how to capture that irresistible sweet, sour, and savory magic of your favorite Chinese takeout in your own kitchen? Preparing homemade Orange Chicken at home is not just about saving money; it’s about controlling ingredients, customizing flavors, and enjoying a truly fresh, satisfying meal. Forget soggy, overly sweet imposters. This guide will empower you to create a dish that rivals, if not surpasses, your beloved restaurant versions. And for those who also adore its spicy cousin, we’ll even touch upon the distinct delights of General Tso Chicken, ensuring your Asian-inspired culinary repertoire is as broad as your cravings.
Ingredients & Kitchen Tools
Crafting the perfect Orange Chicken requires a thoughtful selection of ingredients and the right tools at hand.
- For the Chicken:
* 2 lbs Boneless, Skinless Chicken Thighs or Breasts: Thighs offer more flavor and moisture, while breasts are leaner. Cut into 1-inch pieces.
* 1/2 cup Cornstarch: Essential for that signature crispy coating.
* 1/4 cup All-Purpose Flour: Adds to the crispiness and helps bind the coating.
* 1 Egg: Acts as a binder for the coating.
* Salt & Black Pepper: To season the chicken.
* Vegetable Oil (4-6 cups): For deep frying. Can be substituted with canola or peanut oil.
- For the Orange Sauce:
* 1 cup Fresh Orange Juice (about 2-3 oranges): The star of the show. Use fresh for best flavor.
* 2 tbsp Orange Zest: Adds intense orange aroma and flavor.
* 1/4 cup Rice Vinegar: Balances the sweetness with a touch of tang.
* 1/4 cup Soy Sauce (low sodium preferred): Provides umami depth.
* 1/2 cup Granulated Sugar: For sweetness. Adjust to taste.
* 2 tbsp Honey (optional): Adds extra sweetness and a glossy sheen.
* 1 tbsp Fresh Ginger, minced: Adds a fragrant, spicy kick.
* 2 cloves Garlic, minced: Essential aromatic.
* 1 tsp Red Pepper Flakes (optional): For a subtle heat. Increase for more spice.
* 2 tbsp Cornstarch (mixed with 2 tbsp cold water): To thicken the sauce.
- For Garnish:
* Sesame Seeds: For visual appeal and a nutty crunch.
* Green Onions, sliced: Adds freshness and a mild oniony bite.
- Kitchen Tools:
* Large Mixing Bowls (2): For dredging chicken and mixing sauce.
* Whisk: To combine sauce ingredients.
* Heavy-Bottomed Pot or Dutch Oven: For deep frying.
* Spider Sieve or Slotted Spoon: For safely removing fried chicken.
* Wire Rack with Baking Sheet: To drain excess oil and keep chicken crispy.
* Citrus Zester/Grater: For orange zest.
* Cutting Board & Sharp Knife: For prepping chicken and aromatics.
* Measuring Cups & Spoons: For accurate ingredient quantities.
Prep Time & Cooking Schedule
- Prep Time: 20 minutes (chicken cutting, sauce prep)
- Marinade Time (optional): 30 minutes to 1 hour (for extra tender chicken, marinate in a bit of soy sauce and ginger)
- Cook Time: 20-25 minutes (frying chicken in batches, cooking sauce)
- Total Time: Approximately 40-60 minutes
This recipe is perfect for a weeknight dinner, especially if you prep your ingredients ahead of time. You can even mix the sauce ingredients together a day in advance and store it in the refrigerator.
Step-by-Step Instructions
1. Prepare the Chicken: Cut chicken into uniform 1-inch pieces. In a large bowl, whisk together cornstarch, flour, salt, and pepper. In another bowl, beat the egg. Dip each chicken piece into the egg, then dredge thoroughly in the flour-cornstarch mixture, ensuring it’s fully coated. Set aside on a plate. This step is crucial for achieving that characteristic crispy texture in your homemade Orange Chicken.
2. Make the Orange Sauce: In a medium saucepan, combine orange juice, orange zest, rice vinegar, soy sauce, sugar, honey (if using), minced ginger, minced garlic, and red pepper flakes (if using). Bring to a simmer over medium heat, stirring until sugar dissolves.
3. Thicken the Sauce: In a small bowl, whisk together 2 tablespoons of cornstarch with 2 tablespoons of cold water until smooth. Slowly pour the cornstarch slurry into the simmering sauce, whisking constantly until the sauce thickens to your desired consistency (it should coat the back of a spoon). Remove from heat and set aside. The balance of sweet and tangy here is key for a truly satisfying sauce, much like the perfect balance sought in its spicier counterpart, General Tso Chicken.
4. Fry the Chicken: Heat 2-3 inches of vegetable oil in a heavy-bottomed pot or Dutch oven to 350-375°F (175-190°C). Fry chicken in batches, ensuring not to overcrowd the pot, for 4-6 minutes per batch, or until golden brown and cooked through. Use a spider sieve or slotted spoon to transfer fried chicken to a wire rack placed over a baking sheet to drain excess oil.
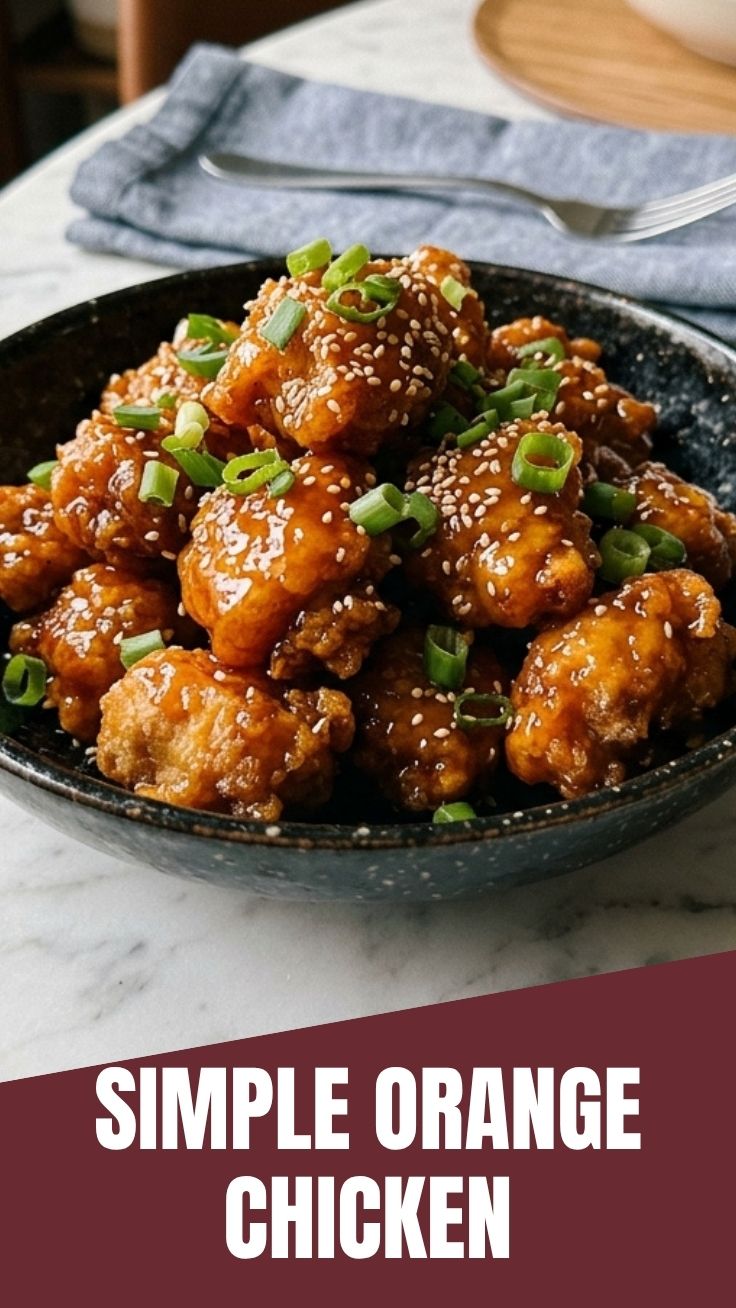
5. Coat the Chicken: In a large bowl, or for small batches, directly in the saucepan, add the fried chicken. Pour the warm orange sauce over the chicken and toss gently until each piece is thoroughly coated.
6. Serve: Garnish with sesame seeds and sliced green onions. Serve immediately with steamed white rice, brown rice, or noodles.
Nutritional Benefits & Advantages
Homemade Orange Chicken offers several nutritional advantages over its takeout counterpart. By preparing it yourself, you control the amount of oil, sugar, and sodium, making it a healthier choice. Chicken is an excellent source of lean protein, essential for muscle repair and growth. Oranges provide a significant boost of Vitamin C, an antioxidant that supports immune health. Garlic and ginger offer anti-inflammatory properties. Opting for whole wheat flour or gluten-free alternatives can further enhance its dietary profile.
Tips, Variations & Cooking Advice
- Extra Crispy Chicken: For an even crispier crust, consider a double-fry method. Fry the chicken once until lightly golden, remove, let it cool for 5 minutes, then fry again until deep golden brown.
- Spicier Kick: Add a finely diced serrano pepper or increase red pepper flakes to the sauce.
- Vegetarian Option: Substitute chicken with extra-firm tofu (pressed and cubed) or cauliflower florets. Adjust frying time accordingly.
- Gluten-Free: Use tamari instead of soy sauce and a gluten-free all-purpose flour blend for the coating. Ensure cornstarch is gluten-free.
- Less Sweet Sauce: Reduce the sugar and honey by half and taste test, adding more if desired.
- Air Fryer Method: For a healthier option, coat chicken as directed, spray with oil, and air fry at 400°F (200°C) for 15-20 minutes, flipping halfway, until golden and cooked through.
Common Mistakes to Avoid
- Overcrowding the Fryer: This lowers the oil temperature, leading to greasy, soggy chicken. Fry in small batches.
- Not Enough Oil: Ensure chicken pieces are submerged for even cooking and browning.
- Overcooking the Sauce: If the sauce becomes too thick, add a tablespoon of water or orange juice until the desired consistency is reached.
- Using Bottled Orange Juice: While convenient, fresh orange juice makes a significant difference in flavor.
- Adding Cold Slurry to Hot Sauce: Always mix cornstarch with cold water before adding to hot liquid to prevent lumps.
Storage & Meal Prep Tips
Leftover Orange Chicken can be stored in an airtight container in the refrigerator for up to 3-4 days. To reheat and maintain some crispness, spread it on a baking sheet and heat in an oven or toaster oven at 350°F (175°C) for 10-15 minutes, or until warmed through. Microwaving is an option but may result in softer chicken. For meal prep, you can fry the chicken ahead of time and store it separately from the sauce. Reheat the chicken, then toss with warmed sauce just before serving. The sauce can be made days in advance and stored in the fridge.
Conclusion
Mastering homemade Orange Chicken is a culinary triumph that brings delicious, restaurant-quality flavor directly to your table. By following these detailed steps and tips, you can achieve that perfect balance of crispy chicken and zesty, sweet-and-sour sauce. It’s a dish that consistently delights, offering a fresh and customizable alternative to takeout. And while we’ve focused on this vibrant dish, remember that understanding the foundational techniques here will also empower you to tackle other beloved Asian classics, including the rich and savory General Tso Chicken. We encourage you to try this recipe and share your delectable creations with us! What’s your secret to the perfect crispy coating?
FAQs
Q1: Can I make the orange sauce less sweet?
A1: Absolutely! Start by reducing the sugar and honey by half. Taste the sauce as it simmers and slowly add more sweetener only if desired, a little at a time.
Q2: What’s the best way to get crispy chicken without deep frying?
A2: For a healthier and less messy option, air frying is excellent. Coat the chicken as directed, spray generously with cooking oil, and air fry at 400°F (200°C) for 15-20 minutes, flipping halfway, until golden and cooked through. Baking in a hot oven (425°F/220°C) for around 20-25 minutes can also work, but results in a slightly less crispy exterior.
Q3: Can I substitute chicken thighs for breasts, or vice versa?
A3: Yes, you can. Chicken thighs tend to be more forgiving and stay juicier, while chicken breasts are leaner but can dry out if overcooked. Adjust frying times slightly based on the thickness of the pieces.
Q4: My sauce is too thin/thick. How can I fix it?
A4: If the sauce is too thin, mix a small amount of cornstarch with cold water (a slurry) and whisk it into the simmering sauce gradually until it thickens. If it’s too thick, simply add a tablespoon or two of water or orange juice until it reaches your desired consistency.