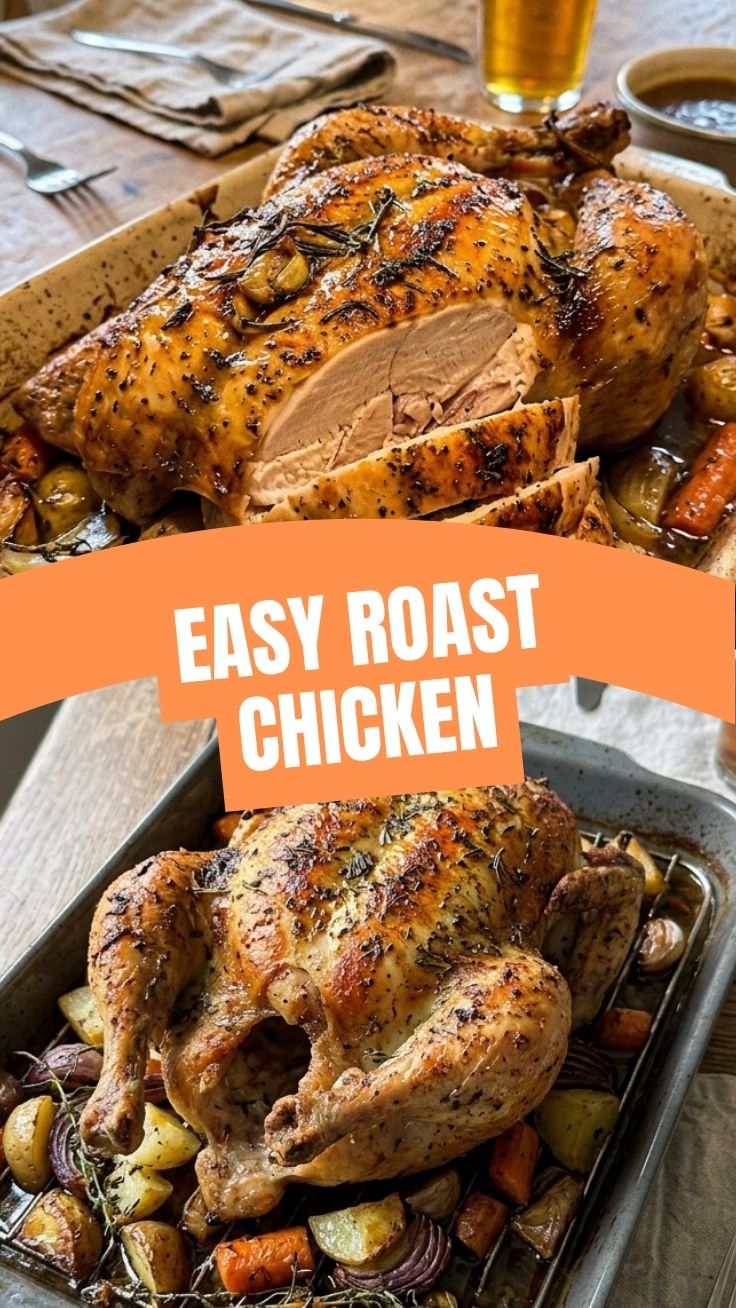
Master the Art of the Perfect Roast Chicken: Your Ultimate Guide
Ever wondered if you could truly master the art of a succulent, golden-brown Roast Chicken right in your own kitchen? The answer is a resounding yes! Forget dry, flavorless birds or complicated techniques. Preparing a delicious Roast Chicken at home offers unparalleled satisfaction – from the tantalizing aroma filling your home to the incredible flavor produced by fresh, quality ingredients. This comprehensive guide will equip you with everything you need to create a show-stopping centerpiece that’s both effortless and unforgettable. We’ll delve into the secrets of creating incredibly tender Chicken Recipes that will impress without the fuss, transforming your home cooking experience.
Ingredients & Kitchen Tools
Crafting the perfect roasted bird begins with the right components. Here’s what you’ll need:
- Whole Chicken (3-4 lbs): Opt for a high-quality, preferably organic or free-range bird for superior flavor and texture.
- Lemons (2-3): Essential for bright, acidic notes and tenderizing the meat. Organic is a plus.
- Fresh Herbs (Rosemary, Thyme, Sage): A fragrant trio that infuses deep, aromatic flavors. Fresh is paramount for impact.
- Garlic (1 head): Adds a pungent, savory depth when roasted. No need to peel every clove, just smash them.
- Onion (1 large): Caramels beneath the chicken, creating a flavorful base and preventing sticking.
- Olive Oil (2-3 tbsp): For crisping the skin and carrying herb flavors. Extra virgin is ideal.
- Butter (2 tbsp, unsalted): Rubbed under the skin for extra moisture and browning.
- Salt (Kosher or Sea Salt): Essential for seasoning both inside and out. Don’t skimp!
- Black Pepper (Freshly Ground): Adds a subtle, spicy kick.
- Vegetable Broth or Water (1/2 cup, optional): For an even juicier bird and to create a pan sauce.
- Roasting Pan with Rack: Crucial for even air circulation around the chicken, ensuring crispy skin.
- Meat Thermometer: The key to perfectly cooked chicken, preventing dryness.
- Basting Brush (optional): For applying pan juices during roasting.
- Kitchen Twine: To truss the bird, promoting even cooking.
Prep Time & Cooking Schedule

Planning is everything when it comes to a perfectly cooked bird. This schedule ensures a stress-free outcome.
- Prep Time: 20 minutes (includes unwrapping, patting dry, seasoning, and trussing).
- Marinating Time (Optional): 2-4 hours or overnight in the refrigerator. This step significantly enhances flavor and moisture, especially if you have the time.
- Cook Time: 60-90 minutes (depending on chicken size and oven calibration).
- Resting Time: 15-20 minutes. Absolutely critical for juicy results, allowing juices to redistribute.
Total active time is minimal, but the overall process benefits from thoughtful timing. For a 4 PM dinner, for instance, begin prep around 2 PM to allow sufficient cooking and resting.
Step-by-Step Instructions
Follow these clear steps to achieve a truly magnificent Roast Chicken, ensuring tender meat and crispy skin every time. Mastering these techniques will elevate all your future Chicken Recipes.
1. Preheat Oven & Prep Chicken: Preheat your oven to 425°F (220°C). Remove the chicken from its packaging, remove giblets, and thoroughly pat it dry with paper towels – this is crucial for crispy skin!
2. Seasoning & Aromatics: In a small bowl, combine softened butter, chopped fresh herbs (rosemary, thyme, sage), minced garlic, salt, and pepper. Gently separate the skin from the breast meat using your fingers, then rub half of the herb butter mixture underneath the skin. Rub the remaining butter over the entire exterior of the chicken. Season generously with more salt and pepper.
3. Stuffing the Cavity: Halve one lemon and quarter the onion. Stuff the chicken cavity with lemon halves, onion quarters, and a few sprigs of the remaining fresh herbs and smashed garlic cloves.
4. Trussing (Optional but Recommended): Using kitchen twine, tie the legs together. Tuck the wing tips under the chicken’s body to prevent them from burning.
5. Roasting: Place the chicken breast-side up on a rack in your roasting pan. You can add the remaining lemon and onion pieces around the chicken in the pan if desired, along with a splash of vegetable broth if you want a pan sauce.
6. Initial High Heat Roasting: Roast at 425°F (220°C) for 15-20 minutes to crisp the skin.
7. Lower Heat & Continue Roasting: Reduce the oven temperature to 375°F (190°C). Continue roasting for another 45-70 minutes, or until an instant-read meat thermometer inserted into the thickest part of the thigh (without touching bone) registers 165°F (74°C). Baste with pan juices every 20-30 minutes if desired.
8. Resting: Once cooked, remove the chicken from the oven, tent loosely with foil, and let it rest for 15-20 minutes. This allows the juices to redistribute, resulting in incredibly succulent meat.
9. Carve & Serve: Carve the chicken and serve immediately with the roasted lemon and onion from the pan, and any pan juices.
Nutritional Benefits & Advantages
Beyond its incredible flavor, our Roast Chicken offers a wealth of nutritional advantages. Chicken is an excellent source of lean protein, essential for muscle repair and growth, and provides important vitamins and minerals such as B vitamins (Niacin, B6, B12), phosphorus, and selenium. These nutrients support energy metabolism, nerve function, and antioxidant defense. Roasting, particularly with fresh herbs and lemon, adds flavor without excessive fats, making it a wholesome meal. Opting for a whole chicken allows for using the carcass to make nutrient-rich bone broth, reducing waste and providing further health benefits.
Tips Variations & Cooking Advice
- Spice Rub: For a different flavor profile, experiment with a dry spice rub that includes paprika, cumin, coriander, and chili powder.
- Vegetable Medley: Roast hearty vegetables like potatoes, carrots, or parsnips alongside the chicken in the same pan for a complete meal.
- Citrus & Herb Swap: Replace lemon with oranges or limes, and vary the herbs with marjoram or basil for seasonal flavors.
- Brining: For an exceptionally juicy and flavorful chicken, consider brining it overnight in a simple salt solution.
- Butter Alternatives: For a dairy-free option, use olive oil or a plant-based butter substitute.
Common Mistakes to Avoid
- Not Patting Dry: This is the most common mistake leading to soggy skin. Always, always pat the chicken thoroughly dry.
- Overcrowding the Pan: If adding vegetables, ensure they have space to roast, not steam. Use a larger pan if necessary.
- Not Resting the Chicken: Skipping this step results in dry meat as all the juices run out when carved.
- Under-Seasoning: Don’t be shy with salt and pepper both inside and out. It makes a significant difference.
- Ignoring the Meat Thermometer: Visual cues can be misleading. A thermometer is your best friend for perfectly cooked poultry.
Storage & Meal Prep Tips
Leftover Roast Chicken is incredibly versatile for meal prep. Store carved chicken meat in an airtight container in the refrigerator for up to 3-4 days. You can also freeze cooked chicken for up to 2-3 months; ensure it’s fully cooled before freezing in a freezer-safe bag or container. To reheat, gently warm in the oven at a low temperature (around 300°F/150°C) with a splash of broth to prevent drying, or slice and add to stir-fries, sandwiches, salads, or soups. The carcass can be used to make a flavorful stock!
Conclusion
Mastering the art of Roast Chicken is a culinary milestone that brings immense satisfaction to any home cook. With this guide, you now possess the knowledge and confidence to create a magnificent, tender, and incredibly flavorful meal that will undoubtedly become a family favorite. From the savory herbs to the zesty lemon, every element harmonizes to produce a dish that’s both comforting and impressive. Don’t shy away from experimenting with these fantastic Chicken Recipes; your kitchen awaits! Go ahead, give this recipe a try, and share your delicious results with us!
FAQs
Q1: How do I get truly crispy skin?
A1: The key is to pat the chicken extremely dry, use high initial oven heat, and ensure good air circulation around the bird by using a roasting rack. Rubbing butter or olive oil on the skin also helps.
Q2: Can I use different herbs?
A2: Absolutely! Feel free to experiment with your favorite fresh herbs like marjoram, oregano, or even a hint of tarragon. Dried herbs can be used in a pinch, but fresh provides superior flavor.
Q3: My chicken is cooking unevenly, what can I do?
A3: Ensure your chicken is trussed properly, which promotes more even cooking. Also, make sure it’s centered in the oven and rotate the pan halfway through cooking if you notice one side browning faster. A meat thermometer is essential for checking doneness in different parts.
Q4: How can I make a pan gravy from the drippings?
A4: After removing the chicken and letting it rest, place the roasting pan on the stovetop over medium heat. Deglaze with a splash of wine, chicken broth, or water, scraping up any browned bits. Simmer for a few minutes, then whisk in a tablespoon of flour or cornstarch dissolved in water to thicken. Strain if you prefer a smoother gravy.
Q5: What’s the best way to reheat leftover roast chicken?
A5: To maintain moisture, slice the chicken and place it in an oven-safe dish with a splash of chicken broth or water. Cover loosely with foil and reheat in a preheated oven at 300°F (150°C) until warmed through. This prevents it from drying out compared to microwave reheating.