Unlock Summer Flavor: The Secret to Perfectly Grilled Corn on the Cob
Ever wondered how to achieve that smoky, sweet, and perfectly charred corn you crave all summer long? Forget bland boiled corn; we’re diving into the art of making the best Grilled Corn on the Cob right in your own backyard! Not only is it a quintessential summer side dish, but mastering this simple technique opens up a world of delicious possibilities for your outdoor cooking adventures, including a myriad of exciting grilled corn recipes. Preparing this at home not only guarantees freshness but also allows you to customize the flavors to your exact preference, turning a humble vegetable into a star.
Ingredients & Kitchen Tools
Here’s what you’ll need to create culinary magic:
- Fresh Corn on the Cob (4-6 ears): Look for firm, bright green husks and plump kernels. Organic is preferred for best flavor.
- Olive Oil (2 tablespoons): Or melted unsalted butter, for coating the corn and enhancing char.
- Salt (to taste): Kosher or sea salt works best.
- Black Pepper (to taste): Freshly ground is always superior.
- Optional Toppings:
* Lime Wedges: For a zesty finish.
* Chili Powder or Paprika: For a subtle kick and vibrant color.
* Cotija Cheese or Feta Cheese: Crumbled for a salty, creamy touch (essential for an Elote-style experience).
* Fresh Cilantro: Chopped, for freshness and aroma.
* Mayonnaise or Crema: For a classic elote base.
- Grill (Gas or Charcoal): The essential tool for achieving smoky flavor and perfect char.
- Tongs: For safely turning the corn on the grill.
- Basting Brush (optional): For applying oil or butter evenly.
- Large Platter: For serving your masterpiece.
- Aluminum Foil (optional): For wrapping cooked corn to keep it warm.
Prep Time & Cooking Schedule
- Prep Time: 10 minutes (mostly husking and cleaning)
- Cook Time: 10-15 minutes
- Resting Time: 2-3 minutes (optional, allows internal heat to distribute)
This recipe is incredibly quick and perfect for a weeknight side or a weekend BBQ. The beauty of grilled corn is in its simplicity, requiring minimal fuss for maximum flavor.
Step-by-Step Instructions
1. Prepare the Corn: Carefully remove the husks and silk from each ear of corn. You can also pull back the husks, remove the silk, then pull the husks back over the corn – this protects the kernels and adds a subtle steamed element while grilling. For direct grilling, ensure all silk is removed. Rinse the corn under cold water and pat dry with a paper towel.
2. Preheat Your Grill: Heat your grill to medium-high heat (around 400°F / 200°C). A good hot grill is key for achieving those desirable grill marks and a tender-crisp texture.
3. Season the Corn: Lightly brush each ear of corn with olive oil or melted butter. Season generously with salt and black pepper.
4. Grill the Corn: Place the seasoned corn directly on the hot grill grates. Close the lid if using a gas grill, or cover if using a charcoal grill to help steam the kernels while charring.
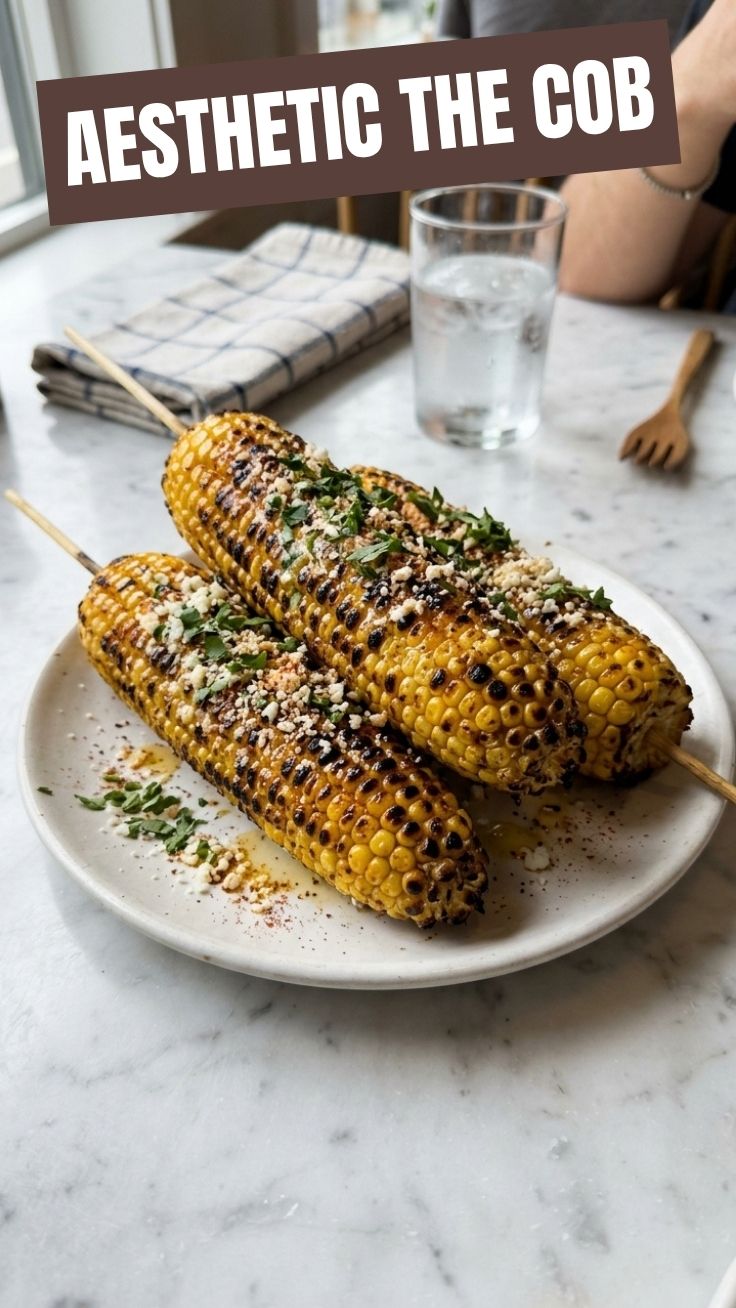
5. Turn and Char: Cook for 10-15 minutes, turning every 2-3 minutes, until the kernels are tender and slightly charred on all sides. You’re looking for a beautiful golden-brown color with some darker, smoky spots. This charring is what gives Grilled Corn on the Cob its distinctive flavor.
6. Serve Immediately: Once cooked to your liking, remove the corn from the grill. For truly exceptional outdoor meals, don’t stop at just one creation; explore various grilled corn recipes to broaden your culinary horizons.
7. Add Optional Toppings (Elote Style): For a classic Mexican street corn experience, spread mayonnaise or crema over the hot corn, sprinkle with crumbled Cotija cheese, a dash of chili powder, and a squeeze of lime juice. Garnish with fresh cilantro.
Nutritional Benefits & Advantages
Corn is a surprisingly good source of fiber, antioxidants (like ferulic acid), and B vitamins (especially folate and vitamin B6). Grilling avoids the need for excessive fats, and when paired with healthy toppings, it can be a wholesome addition to any meal. It’s naturally gluten-free and can be made vegan by using oil instead of butter and omitting cheese.
Tips, Variations & Cooking Advice
- Flavor Boost: Before grilling, try soaking the corn (with husks on) in cold water for 15-20 minutes. This helps prevent the husks from burning and steams the corn lightly for extra tenderness.
- Herb Butter: Mix softened butter with minced garlic, fresh herbs (like chives, parsley, or thyme), salt, and pepper. Spread this over the hot grilled corn for incredible flavor.
- Spice It Up: Add a pinch of cayenne pepper or a dash of hot sauce to your oil before grilling for a spicier kick.
- Foil Packet Grilling: If you prefer less char, wrap individual ears of seasoned corn tightly in aluminum foil and grill for 15-20 minutes, turning occasionally. This method steams the corn perfectly.
Common Mistakes to Avoid
- Overcooking: Don’t grill the corn for too long, or it will become dry and tough. Watch for tenderness and a subtle char.
- Cold Grill: Placing corn on a grill that isn’t hot enough will result in bland, steamed corn without the desired smoky flavor and char marks.
- Forgetting to Season: Unseasoned corn tastes, well, unseasoned! Salt and pepper (at minimum) are crucial. For best results, season it before it hits the grill.
Storage & Meal Prep Tips
Leftover grilled corn can be stored in an airtight container in the refrigerator for up to 3-4 days. To reheat, you can microwave it briefly, grill it again for a few minutes, or even cut the kernels off the cob and add them to salads, salsas, or stir-fries. For longer storage, remove the kernels from the cob, flash freeze them on a baking sheet, then transfer to a freezer-safe bag for up to 3 months.
Conclusion
There you have it – the ultimate guide to creating the most delectable Grilled Corn on the Cob! This simple yet profoundly satisfying dish embodies the spirit of summer cooking. Don’t be afraid to experiment with toppings and make it your own. And remember, the culinary possibilities extend far beyond this single preparation; there are countless grilled corn recipes to explore. Try this recipe for your next outdoor gathering and watch it disappear! We’d love to hear about your experience and any creative variations you come up with in the comments below.
FAQs
Q1: Can I grill corn without husking it first?
A1: Yes, you can! Pull back the husks, remove the silk, then pull the husks back over the corn. Soak for 15-20 minutes before grilling directly over medium-high heat for about 20-25 minutes, turning frequently. This steams the corn inside its own wrapper.
Q2: What’s the best way to get good grill marks?
A2: Ensure your grill grates are clean and well-oiled before placing the corn. High heat (medium-high) and leaving the corn undisturbed for 2-3 minutes per side will help achieve those coveted char marks.
Q3: Can I use frozen corn for this recipe?
A3: While fresh corn on the cob is highly recommended for grilling, you can grill frozen corn kernels if thawed and patted dry. Spread them in a grill basket or on foil, tossed with oil and seasonings.
Q4: How do I know when the corn is done?
A4: The corn is done when the kernels are tender and slightly plump, with visible charring on various sides. You can test for tenderness by gently pressing a kernel with your finger.