Unlocking the Sweet Secrets: Your Guide to Crafting Divine Homemade Blackberry Jam
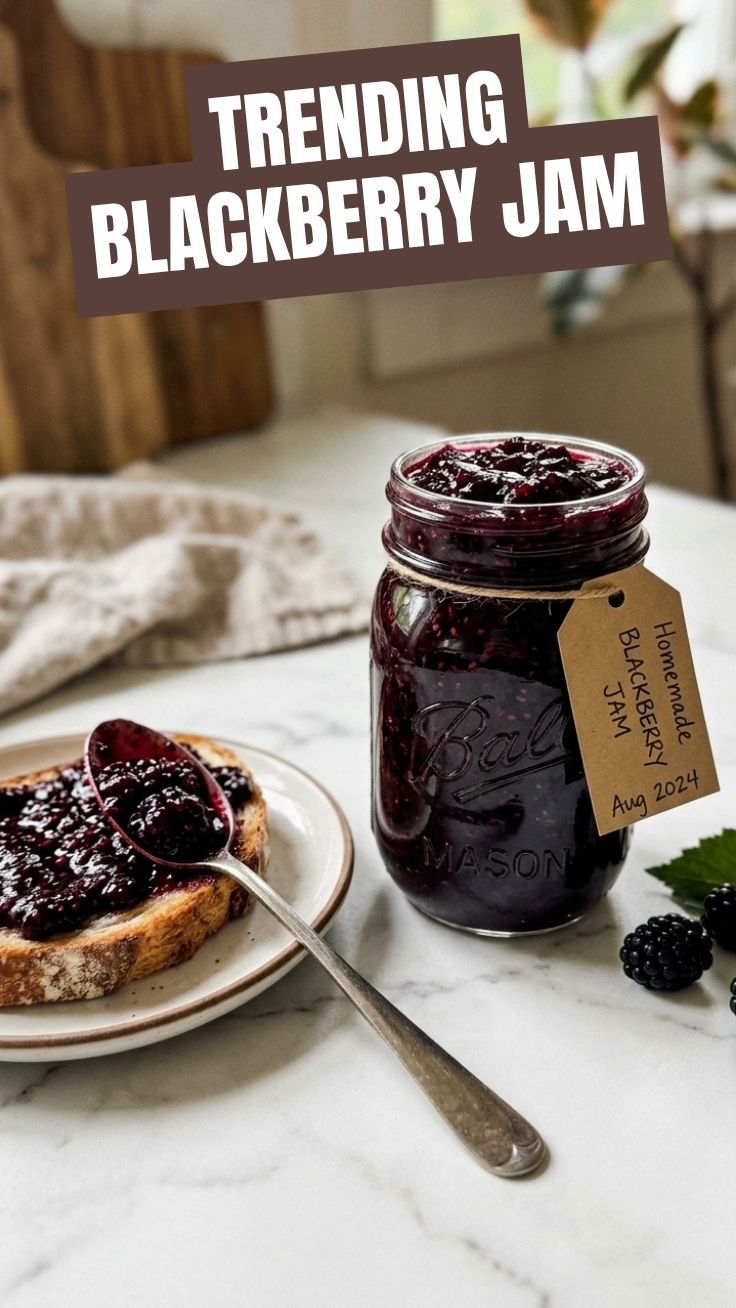
Have you ever savored a spoonful of truly homemade jam and wondered if you could capture that same vibrant flavor and comforting warmth in your own kitchen? Preparing homemade Blackberry Jam (Homemade) isn’t just about making a preserve; it’s about connecting with a culinary tradition, infusing your pantry with seasonal goodness, and experiencing a taste far superior to anything store-bought. This comprehensive guide will walk you through every step, ensuring your first foray into making a delicious Blackberry preserves recipe is a resounding success, filling your home with an irresistible aroma and your toast with pure delight.
Ingredients & Kitchen Tools
Crafting the perfect batch requires a few essential items. Here’s what you’ll need:
- Fresh Blackberries (4 cups): Choose ripe, plump berries for the best flavor. Frozen berries can also be used, but fresh yields a brighter taste.
- Granulated Sugar (4 cups): Acts as a preservative and sweetens the jam. Canning sugar is also an option.
- Lemon Juice (¼ cup): Freshly squeezed is best. It provides acidity, which is crucial for proper gelling and brightens the berry flavor.
- Pectin (Optional, 1 packet or 1.75 oz.): While blackberries have natural pectin, adding a commercial pectin can ensure a firmer set, especially if you prefer a less runny jam. Look for fruit pectin designed for low-sugar or no-sugar jams if adjusting sweetness.
- Large Non-Reactive Pot or Dutch Oven: Stainless steel or enamel-coated cast iron is ideal to prevent metallic flavors.
- Potato Masher or Immersion Blender: For breaking down the berries.
- Sterilized Jars with Lids and Bands (4-5 half-pint jars): Essential for safe storage and preservation.
- Canning Funnel: Makes filling jars less messy.
- Ladle: For transferring hot jam.
- Jar Lifter: Safely removes hot jars from a water bath.
- Candy Thermometer (Optional): Helps determine when the jam has reached its setting point.
- Clean Kitchen Towels: For wiping jar rims and drying jars.
Prep Time & Cooking Schedule
- Prep Time: 20 minutes (Washing berries, sterilizing jars)
- Cook Time: 30-45 minutes (Simmering and thickening)
- Resting Time: 24 hours (For jam to fully set after processing)
Plan to dedicate a focused block of time for this project. The active cooking period can be intense, so having all your ingredients and tools ready beforehand is crucial. Additionally, allow ample time for the jam to cool and set properly after canning – patience is key for the best texture!
Step-by-Step Instructions
1. Prepare Jars: Begin by sterilizing your jars. Wash them thoroughly in hot, soapy water, rinse well, and then either boil them in a large pot for 10 minutes, run them through a dishwasher on a hot sanitize cycle, or heat them in an oven at 225°F (107°C) for 10-15 minutes. Keep them warm until ready to fill. Set new lids and bands aside.
2. Berry Preparation: Gently wash the fresh blackberries under cool running water. Remove any stems or leaves. If using frozen, thaw them partially.
3. Combine Ingredients: In your large non-reactive pot, combine the blackberries and lemon juice. If using commercial pectin, follow the package directions – some require adding it with the fruit, others later. Generally, if using powdered pectin, sprinkle it over the fruit and stir well.
4. Initial Simmer: Bring the mixture to a boil over medium-high heat, stirring constantly to prevent scorching. Reduce heat and simmer for 5-10 minutes, mashing the berries with a potato masher to your desired consistency. For a smoother jam, use an immersion blender sparingly.
5. Add Sugar: Gradually stir in the granulated sugar. Continue stirring until the sugar is completely dissolved. The mixture will look clearer.
6. Boil to Set Point: Increase the heat to medium-high and bring the jam to a rapid, rolling boil that cannot be stirred down. Stir frequently. This is where the magic happens for making your Blackberry Jam (Homemade). Cook, stirring often, until the jam reaches its setting point. You can test this using a candy thermometer (220°F/104°C at sea level), the cold plate test (a dollop on a chilled plate wrinkles when pushed), or the spoon test (drops form sheets when falling off a spoon). This critical step ensures your Blackberry preserves recipe achieves the perfect texture.
7. Fill Jars: Carefully remove the pot from the heat. Using a canning funnel and ladle, fill the hot, sterilized jars, leaving ¼ inch headspace from the rim.
8. Seal Jars: Wipe the rims clean with a damp cloth to ensure a good seal. Center new lids on the jars and screw on the bands until finger-tight.
9. Water Bath Canning (Optional but Recommended for Shelf Stability): Place filled jars in a boiling water canner, ensuring they are covered by at least 1-2 inches of water. Bring to a rolling boil and process for 10 minutes (adjust for altitude). Turn off heat, remove lid, and let jars sit for 5 minutes before carefully removing them with a jar lifter onto a towel-lined surface.
10. Cool and Store: Let the jars cool undisturbed for 12-24 hours. You’ll hear the satisfying “pop” as they seal. Check seals by pressing the center of the lid – it should not flex. Store properly sealed jars in a cool, dark place for up to one year. Unsealed jars should be refrigerated and consumed within 3 weeks.
Nutritional Benefits & Advantages
Blackberries are powerhouses of nutrition, packed with antioxidants, particularly anthocyanins, which give them their deep purple hue and may combat free radicals. They are also an excellent source of Vitamin C, K, and manganese, and are rich in dietary fiber, aiding digestion. While jam adds sugar, moderate consumption provides a delightful way to enjoy these benefits. Making jam at home allows you to control the sugar content and avoid artificial additives often found in commercial varieties.
Tips, Variations & Cooking Advice
- Seedless Jam: For a smoother, seedless jam, press the cooked berry mixture through a fine-mesh sieve or a food mill before adding sugar.
- Flavor Boosts: A touch of vanilla extract, a pinch of cinnamon, or a splash of balsamic vinegar (surprisingly good!) can elevate the blackberry flavor.
- Low-Sugar Option: Use low-sugar pectin and reduce the amount of granulated sugar. Be aware the texture might be softer.
- Spice It Up: Add a star anise pod or a few cloves during the cooking process, removing them before jarring.
- Mixed Berry: Combine blackberries with raspberries or blueberries for a delightful blend.
Common Mistakes to Avoid
- Not Sterilizing Jars: This is critical for preventing spoilage and ensuring shelf stability.
- Under-Boiling: Not reaching a rolling boil for the set time can result in a runny jam that won’t set properly.
- Overcooking: Boiling too long can result in a jam that’s too stiff or has a caramelized, overcooked flavor. Keep an eye on the consistency and temperature.
- Ignoring Headspace: Too much or too little headspace can affect the seal. ¼ inch is ideal.
- Not Wiping Jar Rims: Food residue on the rim can prevent the lid from sealing correctly.
Storage & Meal Prep Tips
Properly sealed Blackberry Jam (Homemade) can be stored in a cool, dark pantry for up to one year. Once opened, refrigerate the jam and consume within 3-4 weeks. This recipe yields several jars, making it perfect for meal prep, gifting, or simply ensuring you have a steady supply of this delightful preserve. It’s a wonderful addition to toast, scones, yogurt, oatmeal, or even as a glaze for savory dishes.
Conclusion
Crafting your own Blackberry Jam (Homemade) is a rewarding culinary journey, yielding a product that far surpasses anything you can buy. From the vibrant color to the intense, fresh berry flavor, this homemade delight captures the essence of summer in a jar. We hope this guide empowers you to confidently create your own batch of this exquisite Blackberry preserves recipe. Don’t be shy – dive in, experiment with flavors, and share your delicious results with us!
FAQs
Q1: My jam isn’t setting. What did I do wrong?
A1: Common reasons include not enough pectin (natural or added), not enough acid (lemon juice), or not boiling it long enough to reach the setting point. Reheat the jam, add a bit more pectin dissolved in water (if using powdered), and boil vigorously, testing for the set point.
Q2: Can I use less sugar?
A2: Yes, but you’ll need to use a low-sugar or no-sugar pectin designed for this purpose, as sugar plays a crucial role in gelling and preservation. The texture might also be softer.
Q3: How do I know if my jars have sealed properly?
A3: After cooling for 12-24 hours, the center of the lid should be concave and should not flex when pressed. If it pops up and down, the jar is not sealed and should be refrigerated and consumed within a few weeks.
Q4: Can I use other fruits with this recipe?
A4: Absolutely! The general principles apply to many fruits. However, fruits vary in their natural pectin and acidity levels, so you may need to adjust lemon juice and pectin amounts accordingly.
Q5: What if I don’t have a canning funnel or jar lifter?
A5: While not strictly essential, they make the process much safer and cleaner. Use a regular funnel carefully for filling and tongs (with caution) for lifting hot jars, but investing in proper canning tools is highly recommended for safety and ease.